• Skip to primary navigation
  • Skip to main content
  • Skip to primary sidebar

Panlasang Pinoy

Your Top Source of Filipino Recipes

  • Start Here
  • All Recipes
    • Course
      • Breakfast
      • Lunch
      • Appetizers
      • Dessert
      • Dinner
    • Ingredient
      • Chicken
      • Pork
      • Beef
      • Turkey
      • Vegetable
      • Fish
      • Rice
      • Egg
      • Tofu
      • Noodles
    • Type
      • Adobo
      • Bread
      • Fried Chicken
      • Sinigang
      • Kilawin
      • Ginataan
      • Kaldereta
  • Cooking Schools
  • About Panlasang Pinoy
Facebook
Instagram
Pinterest
YouTube
Home Cooking Tips

Does oatmeal have gluten?

Gluten intolerance is a serious condition that can cause symptoms ranging from fatigue to damaged intestines. Unfortunately, there are many foods on the market today that contain gluten. Although some foods are clearly labeled “non-gluten”, others can be hard to detect. One such food is oatmeal. This article aims to answer the question millions are asking every day: “Does oatmeal have gluten?”

What is Gluten?

Gluten is a large protein found in the seeds of wheat. It has also been associated with rye and barley. It is common, therefore, for cereals and breads to contain gluten. Contrary to popular belief, gluten is not an unhealthy substance. It is harmful only to those who are intolerant.

How to Tell If You Are Gluten-Intolerant

If you haven’t been diagnosed as intolerant, there are several telltale signs that gluten might be bad for your health. Symptoms include feeling tired after eating foods with gluten; bloating, constipation, diarrhea; fatigue, confusion, dizziness; swollen and painful joints, as well as headaches. These symptoms usually appear as a result of eating gluten foods. Try removing them from your diet for 2-6 weeks to see if your condition improves.

Does Oatmeal Have Gluten?

The answer is yes and no. When oatmeal is made from pure oats, it does not contain gluten at all. However, if oats have been mixed with other grains, it will contain trace amounts of the substance. The bad news is that even small amounts of gluten can affect intolerant people significantly, especially those suffering from Celiac disease.

Oatmeal has gluten only when wheat, rye or barley has been added to it. Adding these grains to oats is common practice in the food industry. Therefore, to find oatmeal without gluten, you have to read the package labels very closely. Generally, if the package does not say “gluten-free”, you should automatically assume it contains gluten and avoid it.

Oatmeal and Celiac Disease

Celiac disease is an extreme form of intolerance. When people suffering from this disease eat gluten, it damages their small intestine. As a result, they cannot absorb the nutrients needed by the body. Without proper absorption, patients end up malnourished and extremely ill. For Celiac patients, the question “does oatmeal have gluten” has far-reaching consequences than those with mild intolerance.

If you have Celiac disease, oatmeal is safe to eat provided you are 100% sure it is gluten-free. If you are not certain, it is advisable to stick other gluten-free breakfast foods like eggs, fish, plain yoghurt, fruit and low-fat meat.

There are also people who suffer from non-Celiac sensitivity. This is when your intolerance to gluten produces symptoms very similar to Celiac disease. In this case, you should also opt of pure oats or gluten-free foods instead. Gluten can be dangerous for intolerant people. Speak to your physician about dietary recommendations.

The next time you go shopping for oats and you’re wondering if your favorite brand of oatmeal has gluten or not, remember this: If it doesn’t say gluten-free, it probably isn’t.

What is the difference between feta cheese and goat cheese?

There is a common misconception that feta cheese is a type of goat cheese. This is not true. However, a closer look at the sources of the milk used to produce these cheeses shows why many can assume that. Feta cheese and goat cheese differ from composition right down to taste. Both are delicious and provide certain nutrients that are good for you.
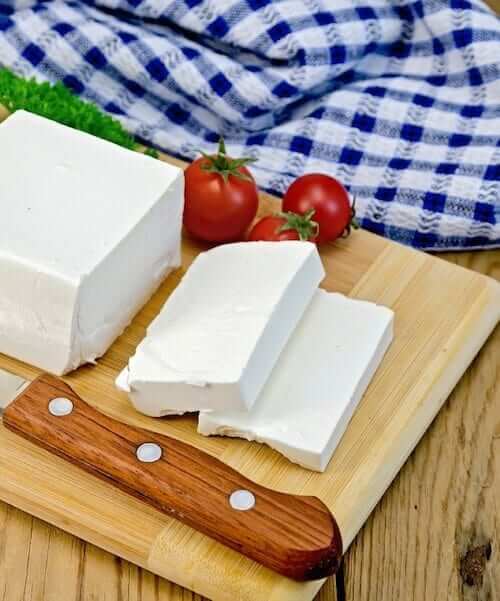
difference-between-feta-cheese-and-goat-cheese

Difference between feta cheese and goat cheese:

 Types of Milk Used

The biggest difference between feta cheese and goat cheese lies in the type of milk. Feta cheese can be made entirely from sheep milk. In some instances, it can contain a small percentage of goat milk. If goat milk is used, it should not exceed 30% of the product. If more is used, the cheese cannot be categorized as feta anymore. Goat cheese, on the other hand, is made from 100% goat milk with no sheep milk whatsoever.

Types of Nutrients

Feta cheese is known to contain certain kinds of healthy bacteria that are capable of killing harmful bacteria called Listeria. Goat cheese is infamous for its high protein content. Goat cheese is higher in calories than feta, and contains more saturated fat. Feta ranks higher in cholesterol, sodium and carbohydrates. The differences in nutrients are not large but significant nonetheless.

Taste and Texture

Not all experts agree on the taste of cheeses. However, feta cheese is widely known for its tangy, salty and oftentimes bitter taste. The taste of goat cheese has been likened to cream cheese and is considered to be saltier than feta. It is also worth noting that goat cheese does develop a deeper flavor when it ages. In terms of texture, feta cheese tends to be chunky, while goat cheese takes on a crumbly or chalky feel.

Price Range

In past years, feta cheese was more readily available than goat cheese. This made it more affordable than its counterpart. Over the years, goat cheese became more accessible and its price has significantly decreased since. With prices of cheeses almost neck and neck, goat cheese is still more expensive than feta in many parts of the world.

The Healthier Choice

Choosing the healthier option between the two depends on the state of your health. If you are on a weight loss diet, you should consider eating feta over goat cheese. This is because 100 grams of goat cheese has around 100 calories more than feta cheese. It also has higher saturated fat content.

On the other hand, if you have heart conditions, it is advisable to opt for goat instead of feta cheese.

The cholesterol and sodium in feta can be problematic to your cardiovascular health when consumed in excess. Too much sodium can also have a negative imprint on blood pressure.

It is hard to say which cheese tastes better. The cheese you prefer depends entirely on your taste. Feta cheese is mostly used in Greek salads and French dishes because it complements dressings, sauces and greens. Goat cheese is most commonly used in heavier, savory meals because of its likeness to cream cheese.

There is a thin line between feta cheese and goat cheese. It is not uncommon to confuse them. This is because there are often traces of goat milk in feta. While both are equally flavorful, they differ in the types of nutrients and calories. When preparing meals with these cheeses, keep your health and fitness goals in mind.
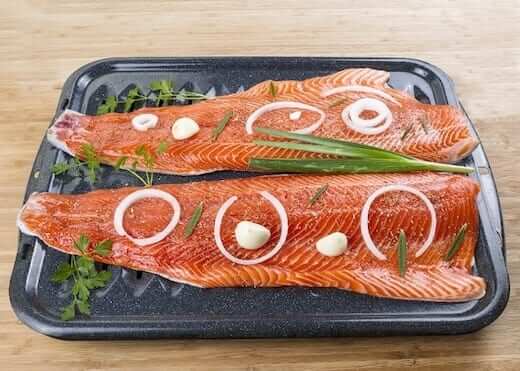

How long do you bake salmon?

When cooked properly, salmon can be richly nutritious and delicious. It is available in different types, cuts and sizes. It can be cooked in several ways, but baking tends to be simpler and quicker. Because it is such a delicate fish, it’s easy to overcook it. So, how long do you bake salmon?

How-long-do-you-bake-salmon

Identify the Type of Salmon

Salmon is bred and stored in different ways. It can either be wild or farmed, fresh or frozen. The size and thickness of the fish also matters. Smaller salmon pieces cook much faster than larger ones. Thick fillets also tend to cook longer than thinner pieces.

If you want to know how long to bake salmon, consider the size and thickness. Generally, salmon an inch thick can take about 10 minutes to bake. If it is two inches thick, leave it in the oven for 20 minutes. In other words, add 10 minutes to each inch. Monitor salmon frequently. When its color changes to an opaque pink, it is ready.

How Long Do You Bake Salmon In Paper?

You have the option of wrapping salmon in parchment paper before cooking it. Covering fish is advantageous because it prevents it from drying out. Baking salmon with paper allows you to slip in herbs, lemons and other kinds of seasoning. It also keeps the fish intact and is easy to clean. You can follow the 1-inch-10-minutes rule until the flesh is pink and a little flaky.

How Long Do You Bake Salmon In A Dish?

If you prefer to bake salmon in an oven-proof dish, keep in mind that it might take longer. How long to bake salmon depends on what you add to the dish and the heat settings you choose. While some cooks prefer covering salmon with fluids like orange and lemon juice, others bake it bare. If you are adding juices, give the salmon 20 to 30 minutes to cook. Because thinner, smaller pieces cook quickly, check it in 10-minute intervals to be safe.

How Long Do You Bake Salmon With Vegetables?

Baking salmon fillets with vegetables is a popular method. It can, however, be a little tricky because you are cooking both fish and veggies. The best way is to precook your vegetables and place them together with the salmon in foil. Moisturize them with olive oil, wine or lemon juice, and close the packet to trap steam inside. It should be ready when fish flakes at the touch of a fork, which normally takes 30 minutes.

Tips and Precautions

When you consider how long to bake salmon, keep in mind the container you use and the moisture you want to add. Dashing the fish with olive oil, juice or wine gives salmon a great flavor. However, if you overdo it, it will increase your chances of overcooking it. Although salmon usually cooks well in temperatures between 350 and 450 degrees, follow instructions given in the recipe.

How long you bake salmon depends on several factors. Firstly, the smaller the fish, the faster it will cook. Secondly, uncovered fish tends to bake slower than salmon wrapped in paper or foil. Thirdly, the moisture you add to fish not only adds flavor, but it can also accelerate the cooking process. Monitor your salmon regularly so you can enjoy perfectly baked salmon every time.

More buttermilk substitute suggestions

Finding a great buttermilk substitute has been the headache of casual and professional cooks alike. Because buttermilk can sometimes be challenging to find and store, it is wise to learn how to create a replacement that can match its texture and flavor. With just two or three ingredients, you can make a worthy buttermilk substitute to help you prepare your dishes.

more-buttermilk-substitute

What is Buttermilk?

Buttermilk is flavorful, rich by-product of churned butter. Sweet buttermilk is the most frequently found product in stores. However, it can also be sour in taste. The flavor depends on the butter that was churned. While people living in the countryside usually have easy access to it, city residents are not so lucky. Fortunately, there are a few simple but effective buttermilk substitute recipes to try.

Why is Buttermilk Preferred?

This sweet or sour product is included in many recipes for several reasons. It is processed to the point where it produces lactic acid. Lactic acid allows buttermilk to soften meat and therefore tenderize it. Cooks like its effect particularly on tougher meats like beef, mutton and goat. Bakers also prefer buttermilk because it reacts well with baking ingredients. The result is lighter and crispier cookies, breads and treats. It also gives cakes and cornbread a moist, rich texture.

How to Make a Buttermilk Substitute

It is true that buttermilk can be made from all types of milk. However, it is important to choose the right kind of milk and curdling agent to create a replacement that is just as rich and tasty. The factors you should always keep in mind when making a buttermilk substitute are texture, acidity and fat content.

The rich texture of buttermilk can be replicated by using whole milk. However, if you are watching your calorie intake, it is better to use whey or skim milk instead. In fact, skim milk is preferred by many because it is low in fat, and can produce the consistency similar to buttermilk. Curdling the milk only requires an acidic agent, which is not hard to find.

Recipes for Buttermilk Substitute

buttermilk-substitute

Making a suitable replacement for buttermilk is simple and quick. It can be produced using products you already have in your kitchen.

Milk and Lemon Juice:

With this method, all you have to do is add a tablespoon of lemon juice to every cup of milk. Sit the mixture aside for 5 to 10 minutes to allow it to curdle.

Milk and Sour Cream:

Sour cream makes a great acidifying agent. Blend it together with your choice of milk until you achieve the same consistency as buttermilk. To lower fat content, opt for low-fat sour cream.

Milk and White Vinegar:

White vinegar has the same effect on milk as lemon juice does. You can use it to create a rich buttermilk substitute by letting it settle for 5 to 10 minutes as well.

Milk and Yoghurt:

The yoghurt used here should be plain and not sweetened in any way. The good bacteria in plain yoghurt are essential to achieve buttermilk taste and texture. Mix two tablespoons with your whole, skim or whey milk.

Although buttermilk has a unique taste, consistency and texture, its properties can be recreated with a buttermilk substitute. Whether you prefer whole or whey milk, lemon juice or yoghurt, a replacement can be made in your kitchen in less than 10 minutes. Once it’s curdled, you can enjoy tender meats and crispy treats in no time.

What are the different steak cuts?

From barbeques to gourmet meals, beef is served daily on millions of dinner tables worldwide. Although it is widely consumed, only a few know the different steak cuts that affect its tenderness, flavor and price. Steak cuts refer to the part of the cow where meat comes from. While some are extremely tender, others can be tougher but more flavorful. Knowing the cuts and grades of meat can help you prepare delicious meals.

steak-cuts

Terms You Should Know

The first step to understanding steak cuts is to be familiar with common terms used. The grade of beef, for instance, is a term used to describe the quality of meat. Beef can be premier, choice or select. Premier steak refers to the highest quality of steak, while select is the lowest. Most stores sell only premier and choice. Select meat is often used to make beef products.

Another important term to know is marbling. Marbling is basically white fat that lies within the various sections of meat. The more marbling a piece of beef has, the more flavorful it is. The age of beef is also noteworthy. Aged meat is considered to be of better quality. When meat is aged, it turns to a deep, rich red color with a slightly stronger scent.

Steak Cuts and Cow Parts

A cow is generally divided into the fore and hind quarters. The parts closest to the shoulders bear meat that is relatively tougher. Steak cuts made from the front part include chuck, brisket, rib and flank cuts. In the hind quarters, you can find sirloin, tenderloin, loin, topside and of course oxtail cuts. While the former requires more tenderizing through slow cooking or boiling, the latter is very tender and easy to grill and fry. Shanks or shins are cut from the legs.

Steak Cuts by Tenderness

Steak cuts from the front or fore-quarters should ideally be slow cooked or be used in a stew. Their tougher texture needs to be softened before being eaten. If grilled or roasted, they can be hard and stiff. Meat from the hind part of the cow, however, is much tender.

The least tender cut of meat, but tender nonetheless, is considered to be the sirloin. A popular cut from the sirloin is the T-bone, which is part sirloin and part tenderloin. Topside/silverside steak cuts can also be juicy, and are often leaner as well. The two most tender steak cuts are from the loin and tenderloin. Out of the two, the tenderloin is considered to produce premier meat.

The tenderloin is also known as fillet. It is the most expensive because the part it is cut from is smaller than the rest. Popular steak cuts made from tenderloin are rib eye, strips, filet mignon and T-bone. Recommended ways to cook it include grilling, pan-frying, broiling and roasting.

Here is a link to an article that comprehensively talks about steak cuts.

Steak cuts are important if you want to know which meat you should use for your meals. An easy way to differentiate cuts by tenderness is to remember that meat gets tender the further you move away from the cow’s shoulders. If you’re watching your weight, beef with less marbling is probably best. If you need more flavor, look for white, waxy fat on meat. Whichever you choose, customize your shopping experience by classifying beef into steak cuts, marbling, grade and price.

What is a good substitute for baking soda?

Baking soda is on almost every list of baking ingredients. It is a mysterious and volatile white powder. Many people have no clue how it is made and only a few know it can be mined directly from the earth. You probably still have the packet you bought from a decade ago because recipes only need a tiny amount of it. Given the interesting nature of this product, you won’t be blamed for thinking that finding a baking soda substitute is impossible. In fact, making a replacement for baking soda is easy and you can prepare it with products that are already in your kitchen.

substitute for baking soda

What is the difference between baking soda and baking powder?

These two have a lot in common. They contain more or less the same ingredients. They are both used to make baked goods rise and can substitute each other whenever necessary. Baking soda is preferred when it comes to baking because it contains substances that the powder does not. When it is combined with other ingredients and heated, it allows carbon dioxide in the batter to escape through very small bubbles. When carbon dioxide leaves your batter, it rises and makes whatever you are baking much lighter in texture and more delicious. Baked goods with lighter texture also look great, which is why baking soda is the baker’s best friend.

Baking soda’s pH level is alkaline. In order to release carbon dioxide, it needs to be mixed with an acidic ingredient like buttermilk. Whatever you substitute for baking soda should have a similar alkaline content, but you should also make sure your buttermilk substitute is acidic to achieve maximum results. The carbon dioxide is released but never makes it out of batter. It is trapped inside it and because of this the batter is forced to rise.

The good news is that if you ever find yourself out of soda, baking powder makes a great baking soda substitute. You need to double and in other cases triple the amount of baking powder in recipes for it to have the same effects of baking soda.

When do you need baking soda?

This might sound like a silly question with an obvious answer but baking soda is not always used in baking cakes, muffins, cupcakes and other treats. Many people use it as a meat tenderizer while others find it to be an effective cleaning agent for dirty surfaces.

How to make your own baking soda substitute?

You cannot just replace baking soda with a double portion of baking powder and end it there. A good baking soda substitute should be alkaline but contain a little bit of acid as well. The simplest recipe for a substitute involves combining baking powder with cream of tartar. No matter how much of it you need, you should always mix one part of baking powder with two parts of cream of tartar. You’re free to add a teaspoon of corn starch which can prevent baking powder from reacting prematurely.

How to Brew Tea

Learning how to brew tea was once an ancient, important practice. There was special brewing equipment you have to use and tea leaves had to be picked carefully. These days, hot water dispensers and tea bags make tea something you can put together in seconds. Because it’s rushed, your cup of tea might not be strong enough, essential nutrients might remain in the bag and its soothing scent might be lost. Knowing how to make tea the right way can bring back those heart-warming mornings and long, relaxing afternoon teas.

how to brew tea

Types of tea

There are over 100 kinds of tea but they are usually grouped into four categories. The main types of tea are black, green, white, oolong, Rooibos and mate tea. Some may contain infusions of peppermint, flowers, ginger and many herbs. Some people prefer combining different teas together to create their own blends.

Tea can, of course, also be hot or iced. After brewing, you can make sweet tea out of it.

The brewing process

The brewing process is very simple and standard. Boil water until it’s hot and soak leaves to add flavor. However, if you want that perfect cup, you need to pay more attention to detail. The amount of leaves you use, the infusions you add, the type and the temperature of water make a huge difference.

Water

Some experts say that the water you use is not all that important. Others argue that the best type of water to brew tea is spring water. They also maintain that a cup of tea tastes much better and richer when the water contain less chlorine. Instead of tap water, they recommend you get bottled mineral or spring water.

How hot the water is also plays a part in how your tea will taste and smell. Some teas are ruined by boiling water. Teas like green, oolong and white teas tend to acquire a bitter taste when soaked in water that is too hot. Instead of allowing water to heat up all the way, turn off the teapot, kettle or whichever vessel you are using.

Tea leaves

If you’re used to making tea with bags bought from the grocery store, you’ve been missing out. The best tasting and smelling teas are made with tea leaves. There is no art to tea bags but using tea leaves to brew tea helps you customize your flavors and increase the strength of the taste.

There is much debate about the amount of tea leaves you should pour per cup. The standard is 8 ounces or a teaspoon per cup. Others say that the perfect cup needs 8 ounces per 200 ml of water you use. These standards are not set in stone. If you prefer a stronger blend, simply add another teaspoon.

It is also advisable to brew tea with loose leaves. They are high in quality but can be a little more expensive than tea bags. If you give them a little more room when steeping, you can taste the subtle flavors and infusions you’ve always wanted.

Safe cooking temperature for meat

Everyone has unique preferences when it comes to how well their meat is cooked. Some like it rare and others well-done. Eating meat raw might be fine in a restaurant but if you are grilling your meats at home, you need to learn about the cooking temperature for meat. Undercooked meat can cause all sorts of problems in your digestive system but this can be avoided if you know how to cook your favorite meat the right way.

What is the safe temperature for cooking meat?

Beef

Beef should be cooked at 160 degrees when it is ground and 145 degrees if it is fresh. Uncooked beef can contain E Coli, which is a bacterium that infests the stomach and causes symptoms like diarrhea, stomach cramps, bloody stools and even a little fever.

Ground beef requires a higher temperature than fresh meat because it is made out of meat from a lot of different cows. One cow might be healthy but the next one might be infected. Since they both end up in the same meat packet, you will catch bacteria and fall ill.

It’s hard to think about disease-causing beef without thinking about mad cow disease. Mad cow disease should be controlled at the basic level. It is up to manufacturers and farmers to disinfect cattle. It cannot be killed by simply cooking it.

Pork

Pigs are well-known for their less-than-sanitary ways and the worms they ingest while feeding. One of the most reported diseases from people who have eaten uncooked pork is trichinellosis, also known as trichinosis. This is when the larvae of a worm called trichinella enters your stomach and makes you sick. It is known by the symptoms it produces, which include discomfort in the abdomen, fatigue, fever and diarrhea. This disease can spread to the nervous system and cause itchiness in the face, pain in the joints, headaches and constipation.

Therefore, 160 degrees is the best temperature for cooking meat. Fresh pork and ham can be cooked at 145 degrees but if the pork is mixed or ground, it’s 160 degrees.

Poultry and chicken

Poultry and chicken need a slightly higher temperature than other meats. Both should be cooked at 165 degrees. Eating them undercooked can put you at risk for campylobacter, a disease that can cause serious damage to your health if left untreated. Campylobacter confuses the immune system and causes it to attack your nervous system. Apart from diarrhea, this infection can lead to conditions like arthritis and other neuron-related diseases.

Another disease from undercooked meat worth noting is Listeria. It affects all types of meat and causes muscle pain, nausea, diarrhea and fever. If you experience these symptoms, contact your doctor right away because it has a tendency to spread to the nervous system. When it does, your neck might become stiff and headaches might follow.

Knowing the right cooking temperature for meat is crucial to your health. While diseases might produce symptoms for a few days, some might be life-threatening.

A Chef thinking about recipes to create

Helpful Tips on How to Become a Chef

Becoming a chef is a dream for many people who love food and cooking. Whether your goal is to work in a busy restaurant, explore different cuisines, or someday start a food business, the journey always begins with small steps. This guide shares practical and meaningful tips that you can follow, practice, and apply as you move closer to a professional kitchen.

Knife skills

Start With the Fundamentals

Every chef begins with the basics. Strong foundational skills will help you in every kitchen you enter. Instead of jumping right away into complex recipes, focus on the core techniques that you can use every day.

  • Practice knife skills for a few minutes each day using one vegetable and focus on even cuts.
  • Learn simple cooking methods such as boiling, sautéing, roasting, and steaming.
  • Train yourself to taste food as you cook and adjust seasoning slowly and carefully.
  • Study food safety so you understand cleanliness, storage, and proper handling of ingredients.

23 Easy Filipino Vegetable Dishes

Filipino vegetable dishes are some of the simplest and easiest meals you can prepare at home, yet they still deliver comforting and familiar flavors.

Browse All

Once you feel comfortable with these basics, you will find it easier to follow recipes and create your own dishes with confidence.

Spend Time in a Real Kitchen

You learn the most when you spend time in a real working kitchen. This does not always mean a fine dining restaurant right away. You can start small and still gain valuable experience.

  • Assist in a local eatery, café, or catering business.
  • Volunteer for community events that prepare food for a crowd.
  • Help family and friends who run food stalls or small food businesses.
  • Look for short term roles as a kitchen helper or prep cook.

Real kitchen work teaches discipline, speed, teamwork, and the natural rhythm of service. You learn how to move with purpose and how to support other cooks during busy hours.

Learn From Different Cooks and Kitchens

Every cook and every kitchen has something unique to offer. If you pay attention, you will collect techniques, habits, and ideas that you can apply to your own style.

Team of chefs in a busy kitchen
  • Observe how different cooks organize their station and handle ingredients.
  • Ask respectful questions when time allows and listen to the reasoning behind their methods.
  • Study how dishes are plated and presented before they leave the pass.
  • Taste dishes from many cuisines and try to identify the main flavors and aromatics.

The more you watch and taste, the richer your cooking vocabulary becomes. This helps you grow faster as you move from beginner to more advanced roles.

Build Confidence Through Repetition

Repetition is one of the most powerful training tools in the kitchen. You become more confident when your hands and eyes know what to do without hesitation.

New chef chopping carrots
  • Cook the same basic dish several times in one week and compare the result each time.
  • Time yourself during prep work to see if you can become faster without losing accuracy.
  • Choose one technique for the week such as sautéing or roasting and focus on it.
  • Keep a simple cooking notebook where you write what worked and what you want to improve.

Small improvements add up. Over time you will notice that tasks which once felt difficult now feel natural and easy to repeat.

Develop the Right Mindset for Kitchen Life

Skill is important, but mindset often decides who grows and who gives up. The kitchen can be busy and demanding, and the right attitude helps you stay steady.

A Chef thinking about recipes to create
  • Stay humble and accept correction from more experienced cooks.
  • Arrive early, be prepared, and keep your station clean and organized.
  • Stay calm when orders begin to pile up and focus on one task at a time.
  • Show respect to everyone on the team, from dishwashers to head chefs.

When people see that you work hard, listen well, and support the team, they will be more willing to teach you and trust you with more responsibility.

Train Your Palate

Your sense of taste is one of your most important tools as a chef. You can train it in the same way that you train your knife skills and cooking techniques.

  • Taste individual ingredients before you cook with them so you know their natural flavor.
  • Notice how salt, acid, sweetness, and bitterness affect a simple soup or sauce.
  • Compare the taste of fresh herbs and dried herbs in the same dish.
  • Adjust seasoning little by little instead of adding a large amount at once.

As your palate improves, you will be able to fix dishes, balance flavors, and create sauces and marinades with more confidence.

Take Care of Your Body and Energy

Cooking in a professional kitchen is physically demanding. You may stand for long hours, carry heavy pots, and work in a hot environment. Taking care of your body will help you stay in this field for many years.

  • Stretch your back, shoulders, and wrists before long cooking sessions.
  • Wear proper footwear that supports your feet while you stand.
  • Drink water regularly and eat meals that give you steady energy.
  • Get enough rest between busy days in the kitchen.

Good health allows you to focus on cooking instead of struggling with constant fatigue or discomfort.

Choose the Learning Path That Fits You

There is no single correct path to becoming a chef. Some people start in culinary school, others learn through apprenticeships or direct kitchen work. What matters is that you keep moving forward and keep improving.

  • Culinary schools offer structured classes, kitchen labs, and theory in a classroom setting.
  • Apprenticeships mix work in a real kitchen with guided learning from a supervising chef.
  • On the job training allows you to learn directly in restaurants as a prep cook or line cook.
  • Home practice with serious study can prepare you before you apply to a restaurant or school.

Look at your budget, schedule, and long term goals, then choose the path that feels realistic and sustainable for you.

Avoid Common Beginner Mistakes

New cooks often make the same mistakes. Being aware of them can save you time and frustration.

  • Focusing only on recipes without learning the underlying techniques.
  • Skipping proper preparation and trying to cook while ingredients are still unorganized.
  • Ignoring food safety and cross contamination rules.
  • Giving up quickly when the work becomes tiring or repetitive.

Mistakes are normal, but if you learn from them and adjust your habits, you will continue to grow as a cook and future chef.

Create a Simple Practice Routine

A clear routine helps you stay consistent. You do not need expensive ingredients or equipment to train like a future chef. You just need time, focus, and a plan.

Weekly cooking planner
  1. Day One: focus on knife skills and vegetable preparation.
  2. Day Two: practice one cooking method such as sautéing.
  3. Day Three: work on seasoning and tasting a basic soup or sauce.
  4. Day Four: follow a complete recipe from start to finish.
  5. Day Five: repeat the same recipe and aim for a better result.
  6. Day Six: read or watch lessons about cooking techniques or kitchen organization.
  7. Day Seven: rest and review what you learned during the week.

You can repeat and adjust this routine based on your schedule. The important part is to keep moving and keep practicing.

Becoming a chef is a journey that takes time, patience, and consistent effort. Every dish you cook, every shift you complete, and every lesson you learn in the kitchen brings you one step closer to your goal. Stay curious, stay humble, and keep practicing. With passion and steady work, you can build a future where cooking is not only your skill but also your career and source of joy.

How to Choose a Pastry Chef School

How to Choose a Pastry Chef School? The culinary world is composed of various areas of expertise too and pastry making is one of those aspects. Are you inclined to focus on creating delightful pastries and mouth-watering sweets? Whether you want to open a small shop for pastries, be employed by the most renowned bakeshops or make desserts for the family, you would need to enroll in a pastry school.

How to Choose a Pastry Chef School

Why do you have to enroll in a pastry school if recipes are easily available? It is true that there are so many recipes which you can just follow when making pastries. However, these would not really teach you about expert techniques, important skills and proper procedures. Those are the things which you can acquire when you enroll in classes.

Since there are too many options when it comes to pastry school, how will you be able to trim down your options? Here are some tips which would help you in weeding out other choices so you can find the school that is best for you.

  • Know the Difference Among Schools—Schools are categorized into culinary institutes, universities or cooking classes. If you are aiming to gain credibility which will make you qualified for employment, then you should consider enrolling in a university or culinary institute. These are the ones that are easily recognized by potential employers. On the other hand, if you are looking for a pastry school for recreation, the personal and short-course classes from independent chefs and cooking schools will be perfect. photo credit: flickr.com/Sabrina Eras
  • Ensure Accreditation—Whether you want a school which will gear you up for the professional world or one that will satisfy your interest for recreational baking, it is important to ensure that the pastry school is accredited and licensed. That way, there will be no questions or doubts about your diploma, degree or certification in the future.
  • Compare Student to Faculty Ratio—Some schools give one-on-one pastry-making classes to ensure that the teacher would be able to train the student well. On the other hand, some schools handle classes with up to fifteen students. It is important to decide whether you want a more personalized program or one that allows you to interact with other students.
  • Cross-Check Curriculum—It is alright to request for a copy of the curriculum from several schools. Pastry making is more than just mixing and combining ingredients. There are other important aspects like kitchen sanitation, equipment maintenance, decorating and others. A closer look into the curriculum will reveal which pastry school will fit your interests.
  • Evaluate the Costs—The amount of tuition fee does not determine the quality of education that a pastry school can provide. Doing some simple mathematics before enrolling is important because this will reveal which school is the most cost efficient.

These are the primary aspects hat have to be checked when it comes to choosing the pastry school to enroll into. Enrolling in the programs which are related to pastry making, bread making and dessert creation will enable you to find a stress-busting hobby or a lucrative business.

  • Previous
  • Page 1
  • Page 2
  • Page 3
  • Next

sidebar

Welcome!

As a huge fan of Filipino food, it is my goal to teach people how to cook it using the simplest way possible. Prepare your taste buds for an ultimate showdown of delectable Filipino dishes! Read more…

Facebook
Instagram
Pinterest
YouTube

Reader Favorites

Chicken Adobo in a Bowl

Filipino Chicken Adobo Recipe

Leche Flan Recipe

kare kare beef tripe

Kare-Kare Recipe (Beef Tripe)

Pork Sinigang

Sinigang

Receive new recipes by email!


Seasonal

Beef Morcon Recipe

Arroz Valenciana

lechon belly roll recipe

Lechon Belly Roll

Christmas Macaroni Salad

How to Make Macaroni Salad for the Holidays

As Seen In:

good housekeeping
parents
serious eats
livestrong
kitchn
sheknows
Facebook
Instagram
Pinterest
YouTube
About
Meet Vanjo
New? Start Here
Browse Recipes
Explore
Ingredient 101
Philippines
Cooking Schools
Privacy Policy
Disclaimers
Contact
© 2026 Panlasang Pinoy
Site Credits
Designed by Melissa Rose Design Developed by Once Coupled
Back to Top
Back to Top