• Skip to primary navigation
  • Skip to main content
  • Skip to primary sidebar
Your Top Source of Filipino Recipes
About
Cooking Schools
Contact
Facebook
Instagram
Pinterest
YouTube

Panlasang Pinoy

Your Top Source of Filipino Recipes

  • New? Start Here
  • All Recipes
  • Course
    • Breakfast
    • Lunch
    • Appetizers
    • Dessert
    • Dinner
  • Ingredient
    • Chicken
    • Pork
    • Beef
    • Turkey
    • Vegetable
    • Fish
    • Rice
    • Egg
    • Tofu
    • Noodles
  • Type
    • Adobo
    • Bread
    • Fried Chicken
    • Sinigang
    • Kilawin
    • Ginataan
    • Kaldereta
Home Cooking Tips

Ways to Cook Artichoke

Artichoke is originally from the Mediterranean region. This is a great addition to your diet because it contains impressive amount of anti-oxidants which can fight the free radicals in the body that commonly cause various diseases. Aside from that, it is also rich in vitamins and nutrients — like Vitamin C, calcium, iron, niacin and phosphorus. Aside from combating common illnesses like liver problems, high blood pressure and fluctuating sugar levels, this can also be a good solution for the more common problems like hangovers.

Preparing Artichoke

There are several ways on how to cook artichoke but before proceeding, it is best to prepare it carefully. Since this is actually an unopened flower of a thistle-like plant, it is best to soak it in warm water with salt before adding it to your dish or cooking it. That way, the dirt which could have accumulated in it can be completely removed. Cut to bottom stem too to ensure that the texture is pleasing to the palette.

Once the artichoke has been washed and cut, there is a tendency for it to become brownish in color. To prevent this from happening even before you cook artichoke, it is recommended to rub lemon juice on it.

Boil or Steam

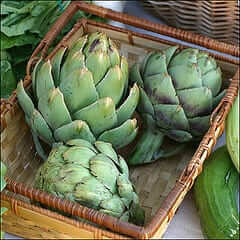
photo credit: flickr.com/La Grande Farmer’s Market

One way to cook artichoke is to boil or steam it. This is ideal for people who are on a strict diet because there is no need to put any oil or butter which could add more fat or carbohydrates. If you are concerned about the amount of nutrients that you can get from the artichoke, it is best to have it steamed than boiled. That is because, boiling can destroy some of the nutrients that it has due to the high heat. On the other hand, steaming makes it possible to retain the vitamins and minerals. Steaming takes about 30 to 40 minutes or until the petal starts to come off easily. This may also vary depending on the size of the artichoke. To make it even more flavorful, it is okay to add some lemon juice and other seasoning on it.

Grilling

Grilling is also a sumptuous and healthy way to cook artichoke. Usually, it has to be pre-prepared by steaming it for about 10 to 20 minutes. This ensures that the inside is also cooked. Then, it should be cut lengthwise into two sections. Lightly brush some olive oil to prevent it from becoming too dry. Grilling should take about 4 to 5 minutes or until the surface has become golden brown in color. Grilling makes it even more aromatic and tasty.

How to Eat Artichoke

Some people prefer to eat it with some dressing or sauce to make it even more flavorful. Others peel off the outermost layer and eat only the tender part inside (which is the most common and correct way of eating it). Aside from eating it on its own, it is also alright to cook artichoke and add it to other recipes like salads and dips.

Artichoke should be part of every personโ€™s diet. This will not only make the taste buds rejoice, it will also give you a whopping amount of nutrients.
5 Benefits of Enrolling in Cooking Classes

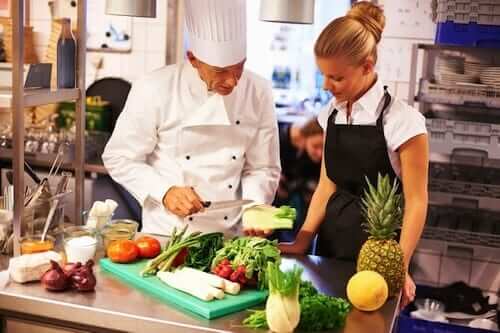
Enrolling in cooking classes is a good idea especially if you want to improve your culinary knowledge and skills. Cooking classes are short courses that aim to provide ideas and hands-on experience in specific areas related to food preparation, food presentation, and food appreciation. Some of the basic classes offered by cooking schools are basic knife skills, wine tasting, butchery, cake decorating, basic cooking techniques, and outdoor grilling. Aside from these, there are also classes catered to international cuisines and other topics.

Benefits of Cooking Classes

Several culinary institutions such as cooking schools, training kitchens, and online cooking classes offer a wide array of trainings intended to a diverse audience in a more informal manner, compared to taking a formal culinary education.

Each of us might have our own reasons to enroll in cooking classes. Some want to learn how to cook for the family, while there are others who want to gain skills for a future business or profitable engagement — there are also people who just wants to have fun. What ever your reason is, it is a certainty that you will benefit something at the end.…Read More

11 Things to Consider in Choosing Culinary Schools

Do you want to be a chef? Have you thought of owning and managing a restaurant?

Becoming a chef or managing hotel kitchens and restaurants is fulfilling. You get to express yourself through food while making money in terms of salaries or profits. However, proper education is necessary to make this dream a reality. This is where Culinary Schools come-in.

Choosing a Culinary School

Culinary education plays an important role in molding our future chefs and restaurateurs. Through proper education in Culinary Schools, students learn almost everything essential in starting a career as a chef or managing a food or restaurant business.

Choosing a Culinary School is one thing that needs to be taken seriously. The Cooking School that you will enroll-in will have a huge impact in your Culinary Career.

Culinary Schools – Things to consider:

1. Accreditation

Meeting the standards and providing good quality Culinary Education makes a Cooking School earn accreditation from different groups. The biggest accrediting body in the field of Culinary Arts is the ACFFAC (American Culinary Federation Foundation Accrediting Commission). Choosing an ACF accredited Culinary School is always the best choice.

2.ย Culinary Arts Programs

Photo Credit: Digital Setant

What Culinary Programs are you interested in? Do you want to be a banquet or restaurant manager? Are you interested in the food catering business? How about being a chef? Choose the Culinary Arts Program of your interest and confirm what youโ€™re prospective Culinary School is offering.

3. Culinary School Reputation

Reputation is defined as an explicit attribute attached to an individual or group. This has something to do with the image that is being portrayed by a Culinary School. Make sure that you choose a school with good reputation.

4. Cost of Tuition

Culinary education has its price. It is important to have an idea on the cost of tuition per course or per Culinary Arts Program before choosing a Culinary School. This will help you manage your education expenses, and choose a Culinary School that fits your budget.

5. Culinary School Facilities

The facilities of Culinary Schools are important for the students. These facilities helps the students learn and develop their culinary skills. These awareness and skills will be the edge of each student in building their culinary career after graduating culinary school.

6. Culinary Scholarships

Applying for Culinary Scholarships will help you save culinary tuition money. Ask if your prospect Culinary School is offering scholarship. Get the details about the Culinary Scholarship that the school is offering and apply immediately. You can also get Culinary Scholarship from private entities.

7. Proficiency Levels of Professors or Teachers

In the beginning, a student is only as good as his mentor. It is a must that teachers and professors of a Culinary School know what they are doing. They should also be proficient in their area of expertise. Check your prospect schoolโ€™s website and get the faculty details. Try to assess if you are comfortable with the overall faculty proficiency based on the information provided.

8. Culinary School Years of Existence

The older an institution gets, the more they become credible and trustworthy. A school or any educational institution grows with time. The best Culinary Schools are usually the oldest (most of the time), but there are also exceptions.

9. Successful Graduates

Good Cooking Schools produces excellent graduates. Try to research on the successful alumni of your desired school and see if you want to be like them in the future.

10. Location

Choosing a Culinary School that is near your place of residence is the ideal thing. It makes your commute easier and saves you transportation and lodging money. As much as possible, choose a school near your home.

11. Diversity of Students

Diversity plays a huge factor in terms of Culinary Arts. Ever heard of the words โ€œWorld Cuisineโ€? Diversity promotes learning about other cultures — including their customs and food. The more diverse the students are, the better a school becomes.

How to Make Toasted Garlic

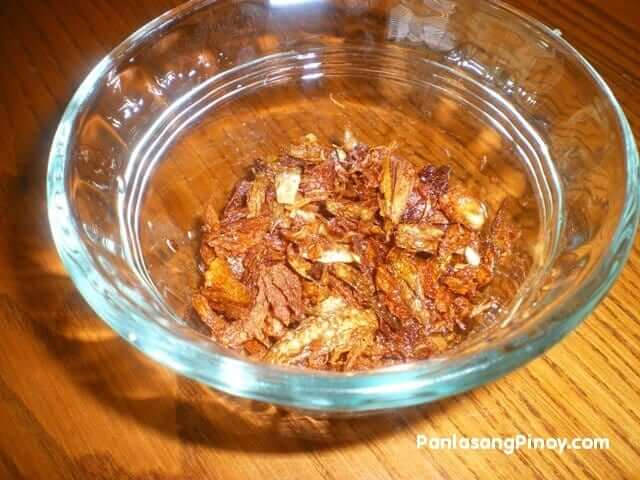
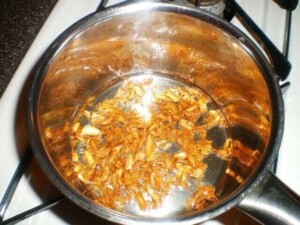
Toasted garlic makes a good condiment. In fact, this is used in many dishes across different cultures. When it comes to Filipino Food, toasted garlic plays a big role in providing flavor and aroma to many of our famous Filipino dishes; it also makes eating more pleasurable.

how to make toasted garlic

It is a fact that not all of us are garlic lovers; to those who appreciate garlic, almost every food wonโ€™t be complete without it. Take goto, Pancit molo, and arroz caldo as examples. I can eat them even if toasted garlic is not around but it will be more enjoyable if I can grab hold of some.

Aside from being an important condiment or even garnishing, toasted garlic or garlic (in general) is a good supplement that can prevent heart disease including high cholesterol and high blood pressure.

Making toasted garlic is simple; all you need to do is follow the steps below.

Print Pin

How to Make Toasted Garlic

Author Vanjo Merano

Ingredients

  • 8 cloves garlic
  • 3 to 4 tablespoons cooking oil

Instructions

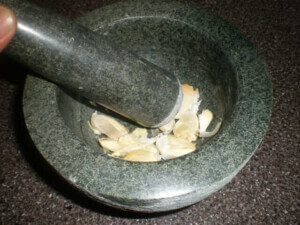
  • Manually pound the garlic using a mortar and pestle. Remove the skin.
  • Place the pounded garlic in a chopping board and mince.
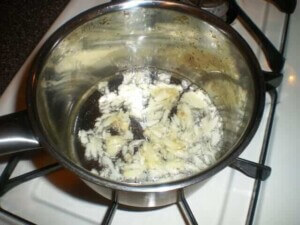
  • Combine cooking oil and minced garlic in a saucepan then apply medium heat.
  • Fry the garlic until the color turns medium brown.
  • Turn off heat and drain the excess oil.
  • Transfer to a small bowl and serve as condiment.

11 Tips to Improve Your Cooking Skills

Are you interested in improving your cooking skills? These cooking tips might come in handy:

1. Start with a positive attitude and set your goal

Being optimistic in the idea of learning and improving yourself is the most important attitude that you need to wear to guarantee success in any endeavor that you wish to pursue. Ask yourself this: Do I really want to improve my cooking skills? If you do, think of the reasons why you want to improve your skills; these reasons will be your goal. Write them down and visualize yourself attaining them. This will help you to focus more on the things that need to be done.

2. Take time to understand cooking terms and learn basic techniques

Learning the basics of cooking is a prerequisite. If you seek for improvement, you must at least understand some terms used in recipes and cookbooks and be able to perform the basic cooking techniques. If you wish to learn how to bake a cake then you should have at least tried making simple pastries. Our previous post on the Definition of cooking verbs can be a good start in understanding common terms used in recipes and cookbooks.

3. Select the freshest ingredients possible

Different ingredients are needed to make a dish. The quality of ingredients that you use can make or break it. This might sound like an idiom but you ought to know that the success of a dish mostly relies on the ingredients used. You cannot make a fresh tasting fish dish with an old fish no matter how fresh your spices are – even the best chef in the world will have a hard time doing that. The best way to ensure that you are using the freshest ingredients is to get them on the day that you need them. If you donโ€™t have the time to visit the market on a daily basis, refrigerating them can work too as long as you will consume them within the next 24 hours. If you are used to freeze meat and seafood, try to use freezer bags to trap the freshness and avoid burns. Of course, fresh foods are still best compared to frozen ones.

4. Invest in cooking tools and kitchen equipments

This is one of the areas that most neglect. Many of us might think that having a pan, a spatula, and a knife is enough to get things going. Some might term this scenario as a frugal way of living but if you are serious about cooking and honing your skills then you should consider getting additional cooking tools and kitchen equipment to assist you further and make your cooking experience as easy as possible. Every cooking tool and equipment serves a specific purpose: cooking pans are used for frying while cooking pots are used to make stews and soups; chef knives are used for slicing while paring knives are used to peel and carve. If budget is an issue, try using a Skillet instead of having pans and pots. Skillets can beautifully sear meat; it can also be used for roasting and making casseroles. When Iโ€™m not shooting cooking videos, I use my favorite cast iron skillet to get things done easily. As for the knives, it is best if you have a set of kitchen knife to make your slicing and cutting chores faster and easier. If a set is too expensive for you, I recommend keeping at least a piece of chef knife, paring knife, and filet knife. Some stores carry limited varieties of kitchen equipment and tools; I usually buy my kitchen tools and equipment online because the inventory is not limited and I can read reviews on the products that I wish to have.

5. Try to know the characteristics of every ingredient that you will use

Knowing the properties or characteristics of your ingredients is important. Having an idea on how your ingredient will behave or react while being cooked can help you plan ahead and decide the sequence or steps in making your dish. Letโ€™s take calamari as an example. We all know that the main ingredient for calamari (calamares) is squid. Squid should not be cooked for a long time because it will have a rubbery texture. If you are aware of this, you will try to limit the frying time to preserve the optimal texture of the squid. This can also be applied to vegetables. Say I need to make a vegetable soup out of potatoes and spinach โ€“ Iโ€™ll put-in the potatoes first before the spinach because it takes a while for the potatoes to cook. Placing the spinach ahead of the potatoes will overcook the spinach producing an unpleasant texture.

6. Donโ€™t be afraid to get messy but make sure to tidy-up

It is normal for beginners to use utensils while working with ingredients and plating. While this is not wrong at all (this is even recommended as far as sanitation is concerned), using your hands is also a fine as long as you wash them first (of course, there are instances when using tools are highly recommended). Donโ€™t be grossed-out when you use your hands when marinating or making your presentation because sometimes you literally need to feel your food. There are also some unavoidable circumstances when you create a mess in the kitchen while you are cooking โ€“ this is normal. Donโ€™t freak out when you see that your kitchen is messy; cleaning is also a part of cooking. Make it a habit to clean the mess that you created once you are done cooking. Always remember that a clean kitchen is a healthy kitchen.

7. Try to master simple dishes before moving-on to the next level

Most of us might be guilty on this. You want to cook your favorite dish so you searched a recipe from the internet or bought a cookbook. As you were skimming on the recipe, you noticed that the procedures are quite complicated and you donโ€™t have a clue on how it should be done โ€“ or you tried doing the procedure but the result is always unsatisfactory. Donโ€™t blame the cookbook or the recipe on this. Try to ask yourself why you were not able to follow the procedure correctly. If all recipes have accompanying videos like what we have here in Panlasang Pinoy then you should have no problem at all โ€“ but that is not the case. Remember that you first learned to walk before you started running. Try to walk slowly by mastering simple dishes. Try to master the art of egg frying first before attempting to cook breaded pork chops. When you feel confident enough and you think that you are ready, that is the time that you take on the next challenge. Cook pork adobo or chicken adobo next then master them. If you follow this advice, youโ€™ll be able to make morcon, chicken pastel, dinuguan and other more advanced level dishes in no time.

8. Timing is everything

Have you tried watching a baseball game? Observe how the batter hits the ball โ€“ there is a proper time when he swings the bat towards the approaching ball to hit it. That is timing my friends. Proper timing is one of the factors for a successful dish. Imagine that you will fry fresh fish on a regular pan (not the Teflon coated or non-stick pan that we use today). You turned the heat on and poured-in the cooking oil in the pan. You then placed the fish immediately even if the oil is not hot enough. When the pan and oil starts to heat-up, the skin of the fish will stick to the bottom of the pan since the fish sits directly on the metal end. When you try to flip the fish to fry the opposite side, youโ€™ll see yourself scraping the spatula just to let the fish loose. You wonโ€™t be in this situation if you only waited for the oil to be hot enough before frying the fish. Develop a sense of timing by knowing when to start and when to stop.

9. Think outside the box

How many times have you heard this phrase? This might sound overused but if youโ€™ll ponder on it and read between the lines youโ€™ll see a whole new meaning that you can apply to almost anything. Sometimes living a square life and following everything by the book is boring. Try to hype things up. Improvise a recipe by adding ingredients or do some cooking experiment and develop a new recipe. Try to combine two dishes and see how it goes.

10. Plan ahead of time

What has this got to do with improving your cooking skills? If you think that cooking starts when the pan is heated, you need to rethink and look at the bigger picture. A good cook should be able to plan a menu. Are you aware on the consequences of poor planning or not planning at all? This is a big waste of time, energy, and money. Planning your menu ahead of time gives you control and allow you to select and purchase only the ingredients that are needed. This also gives you time to double check recipes and ensure that everything is in place. You donโ€™t want to cook a dish if you are missing the major ingredient, do you?

11. Practice,practice,practice

This needs no explanation at all. I believe that you are determined to be a good cook if you were able to read up to this point. Do a lot of practice by cooking for your family everyday. You are hitting 2 birds with1 stone; you develop your cooking skills while making your family happy and satisfied.

ย 

How to Peel Peaches

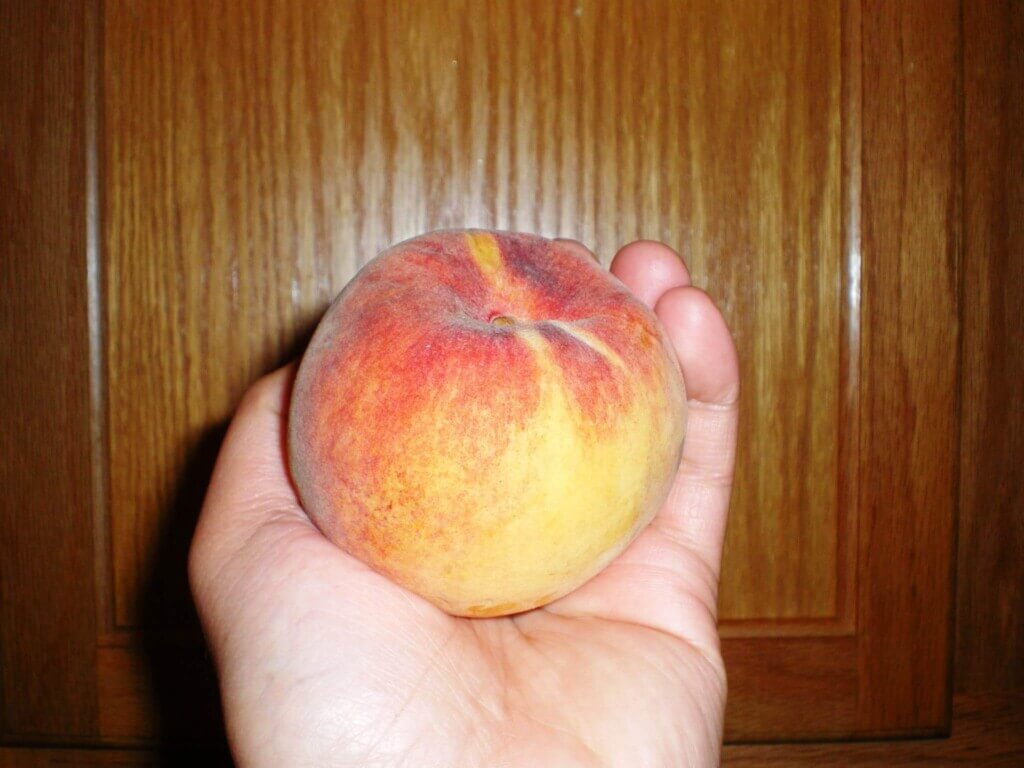
Peeling peaches using a paring knife or peeler can be complicated and could end-up in a mess. Peaches are delicate fruits and peeling ripe ones require a proven technique to maintain the shape and quality of the fruit.

Remember the technique that we apply to cook vegetables while maintaining their crisp and color? It is called blanching. This is done by cooking fruits or vegetables in boiling water for a few seconds to a minute then soaking them right away in ice cold water. Using this technique will enable you to peel peaches easily without creating any mess.

how to peel peaches

Here is how it is done:

Step 1

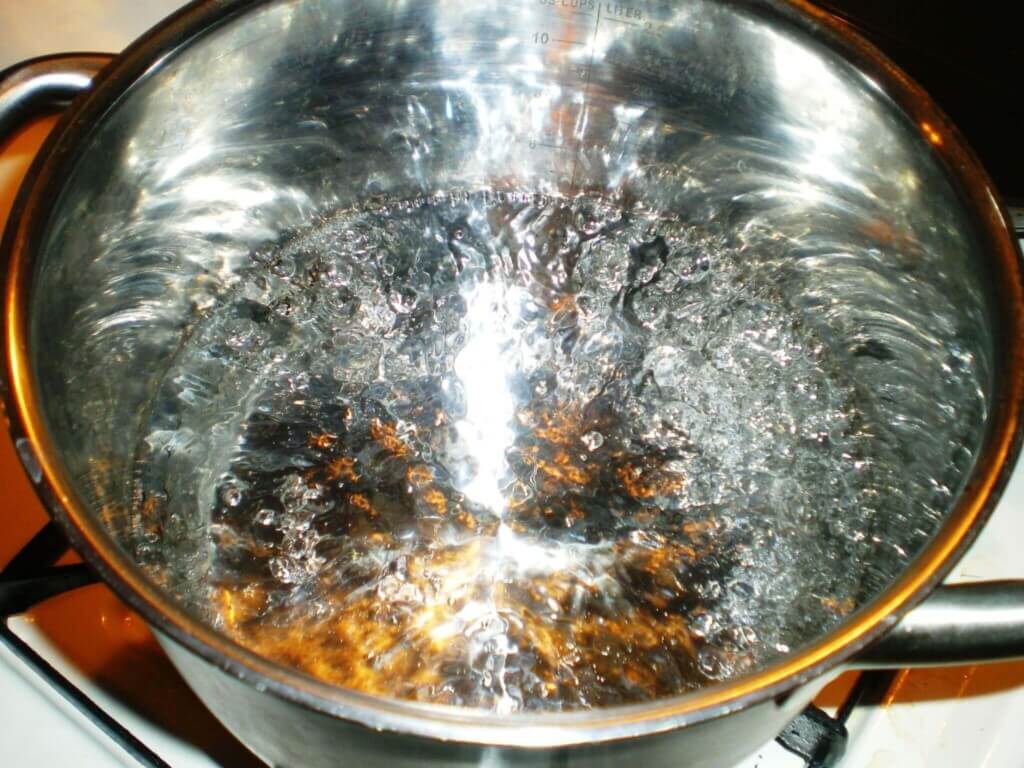
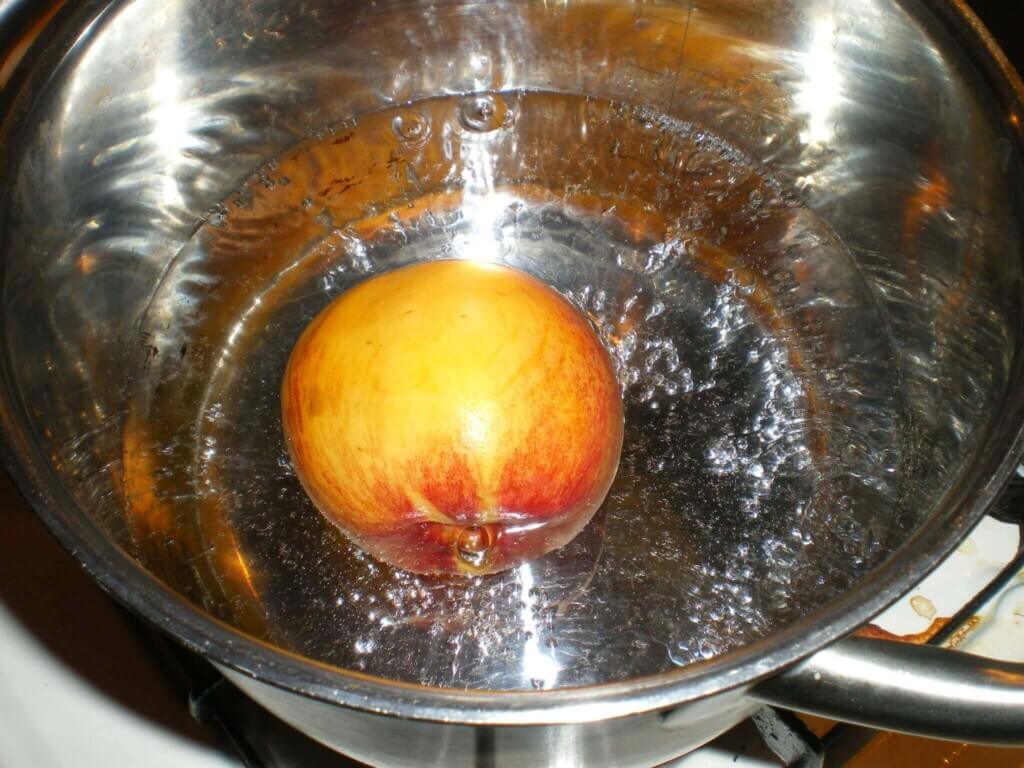
1. Boil water in a saucepan or cooking pot.

Step 2
2. Put-in the peach and turn off the heat right away. Leave the peach for 40 to 50 seconds.

Step 3
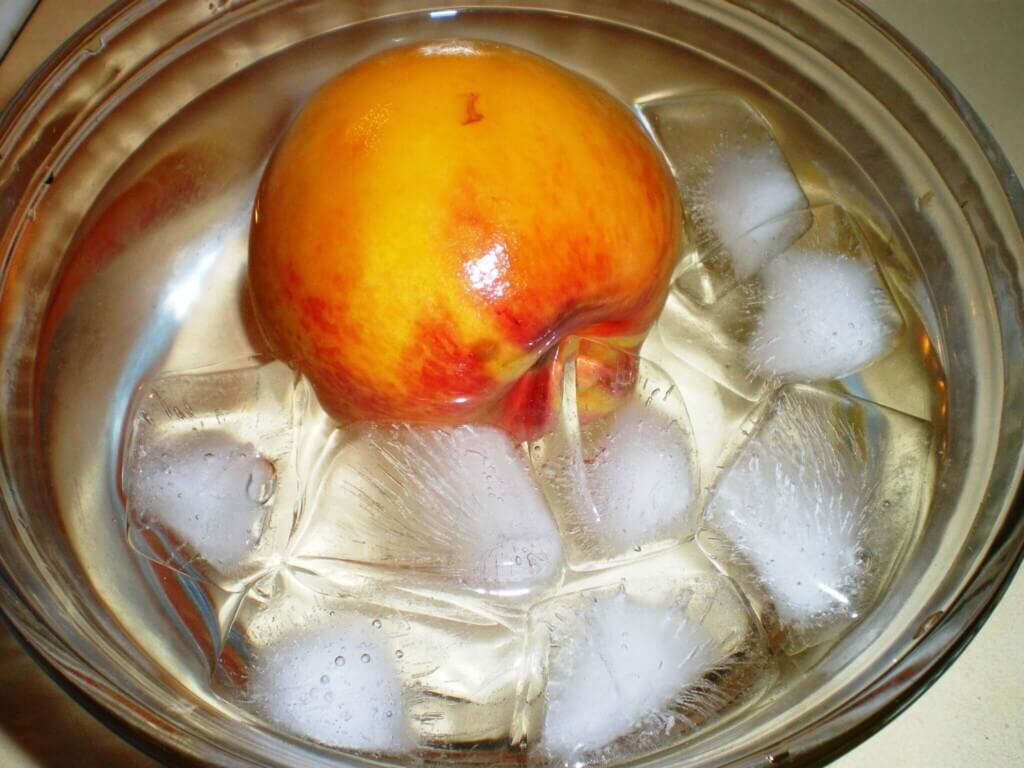
3. While the peach is soaked in hot water, combine cold water and ice in a large bowl. Transfer the peach from the saucepan to the bowl with ice cold water and leave it there for 1 to 2 minutes.

Step 4
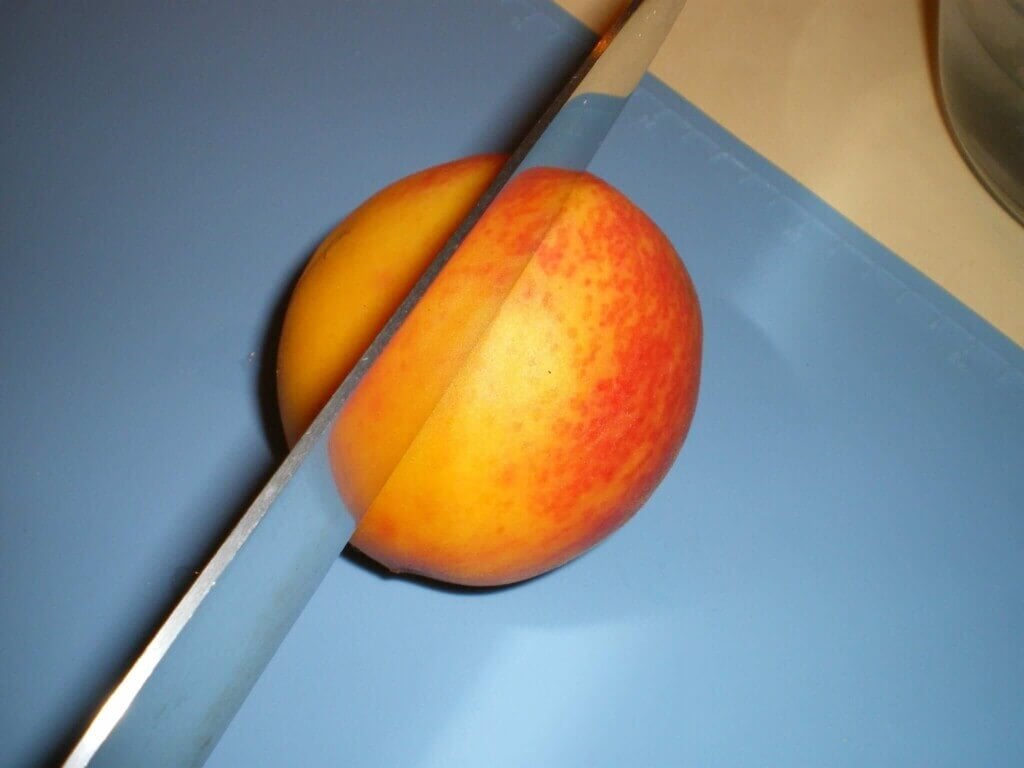
4. Dry the peach and make an incision using a knife.

Step 5
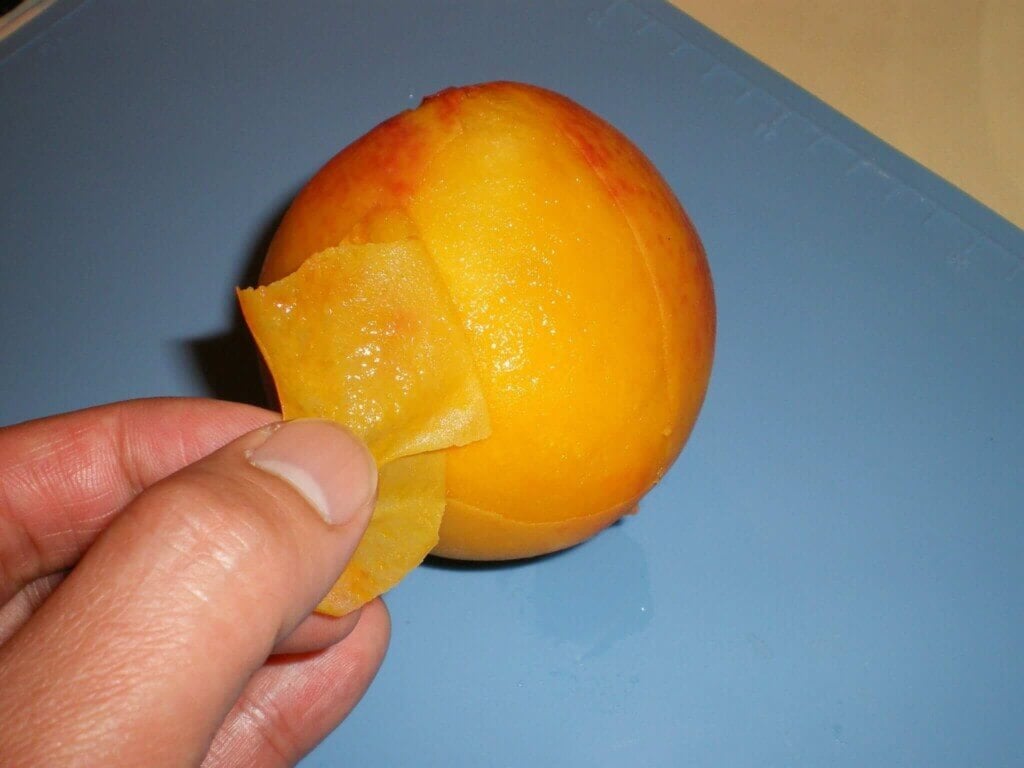
5. Peel of the skin starting at the incision using your fingers.

Pretty simple isnโ€™t it? You should be able to enjoy your peaches without any hassle.

Do you have other food related tips to share? Be heard by commenting below.

How to Butcher a Chicken

Have you ever tried to butcher a whole dressed chicken? I remember the first time to butcher a whole chicken; it was confusing. Back then, I didnโ€™t know where to start and I have no idea as to how many parts should I divide it into. I spent more than 30 minutes to complete the task and I created a mess. The chicken was torn apart; I canโ€™t even recognize one part from the other.

After observing how my mom does it (not to mention several hours of watching several cooking shows on TV), I finally figured the steps and techniques to butcher a chicken appropriately. After that day, I practicedโ€ฆ and practicedโ€ฆ and practiced until I got it right.

This is a basic topic that most of you already know. For the benefit of those who want to learn the proper way, I listed some steps that you may use as a guide. Remember, knowledge is just the first part of learning. Once you know what to do, start to practice until you get it right. Also, take extra caution when handling sharp objects. Good luck!

butcher-a-chicken-1
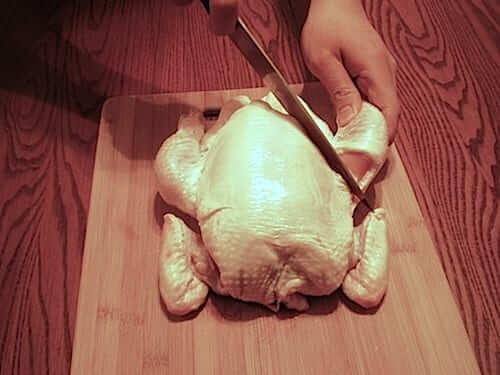
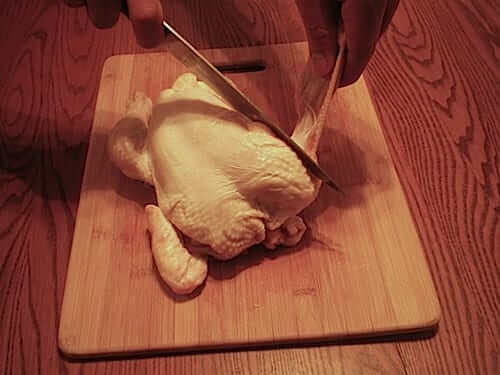
1. Place the chicken on a chopping board (the back should be facing down). Using a sharp knife (preferably chefโ€™s knife), slice between the leg and breast until you reach the bone. Stop right there; donโ€™t attempt to cut the bone.

butcher-a-chicken-2
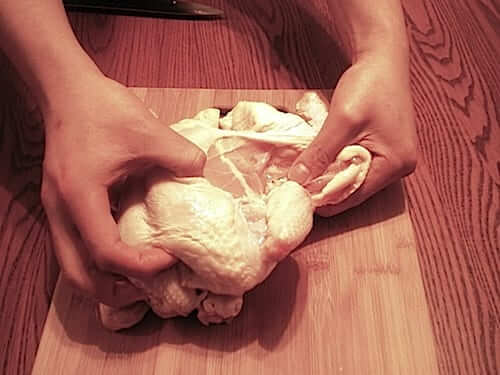
2. Loosen the hip joint by pulling the sliced leg away from the body while pressing the back of the hip joint. Youโ€™ll know that you are done when you see the leg bone pop-out from the joint.

butcher-a-chicken-3
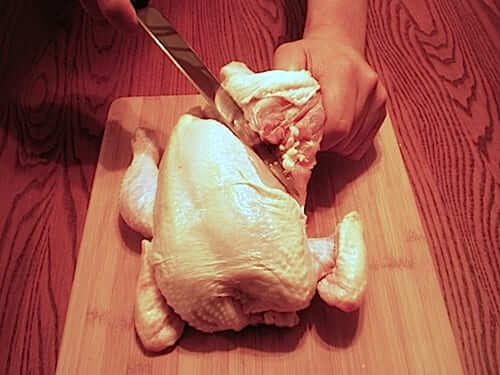
3. Once the leg bone is disconnected, continue slicing through the joint until the leg and thigh are completely detached.

butcher-a-chicken-4
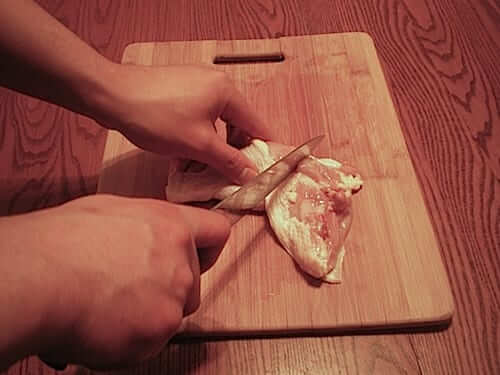
4. Separate the drumstick and thigh by putting the leg on a chopping board and cutting through the joint between the two parts.

butcher-a-chicken-5
5. Pull the wing out and cut it off at the joint then trim the wing tip. Perform step number 2,3, and this step to the other side of the chicken.

butcher-a-chicken-7
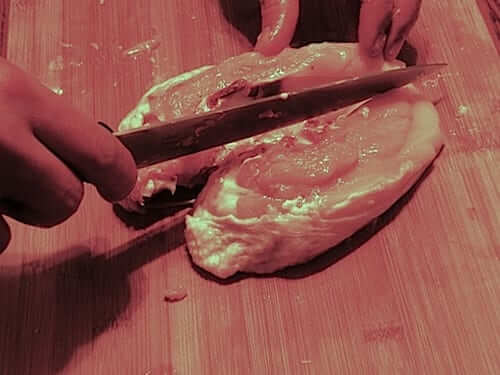
6. Remove the breast by making a slit down the middle of the breastbone then continue slicing alongside the ribcage while pulling the meat.

7. Turn the remaining part around and perform step number 6 to remove the breast on the other side.

As for the trimmings and remaining parts, you can always use them to make chicken stock so nothing goes to waste.

Dice an Onion

How to Dice an Onion

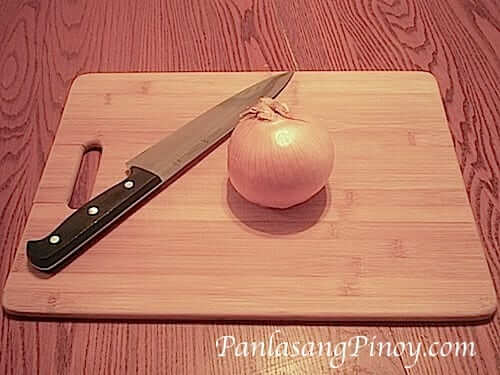
Part of our culinary adventure is learning the proper method of preparing the ingredients. This article is intended to visually demonstrate the proper steps in dicing an onion. There are no incorrect procedure as long as the goal is achieved but following best practices tend to make work simple and easier.

Dice an Onion

Are you also doing the same method?
 

IMGP6988

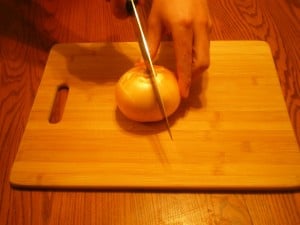
1. Using a knife, cut-off the pointy end of the onion.

IMGP6989

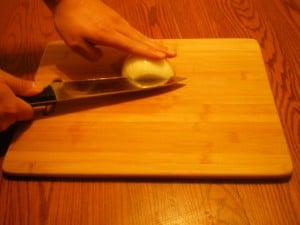
2. Stand the onion up using the cut end as the base and divide it into two equal pieces by slicing in half through the root then peel off the skin.

IMGP6990

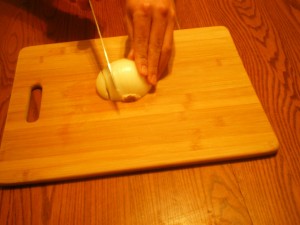
3. Position half of the onion (cut-side facing down) and slice horizontally on the center. Make sure you don’t slice too far so that the root part is still in one piece.

IMGP6991

4. Make a series of vertical slices (about 1/4 to 1/2 inch apart) ; do not slice through the root.

IMGP6992

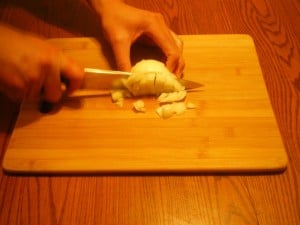
5. Hold the side with the root then perform a series of vertical slices perpendicular to what you did in the fourth step. The diced onion pieces will automatically be detached after every slice.

Cooking Terms

Do you really understand what the cookbook and recipe procedure tells you? Have you messed-up any dish because of not doing the correct steps?

Hey guys, I’m not belittling anyone. It just so happened that I was one of those who answered “yes” to both of the questions in the past. I was thinking that this simple definition that I have here could help you understand more and avoid the mistakes that I did. By the way, I’m trying not to be so serious here so please forgive my additional comments after each definition. Hope this helps.

cooking terms

Bake – Cook and make edible by putting in a hot oven; prepare with dry heat in an oven; “Please bake some pandesal, monay, and pandecoco”

Baste – This term is often used when roastingchicken or cooking meat in a marinade. You will need to regularly “baste” the meat with the juices or sauce to keep it moist. You can use a spoon to spoon the juices or sauce over the meat or you can use a “baster” which is a bit like a syringe or bulb. The mag-iisaw is bastingwhen he dips the brush (usually paint brush) in a bottle with oil mixture and applying it on your isaw or betamax while being grilled.

Beat – A term often used in cookingor baking. You may be instructed to beat and egg – simply crack an egg into a bowl and beat (stir rapidly) with a fork or whisk to combine the yolk and white. In cake recipes you may be instructed to beat the margarine and sugar together – use an electric whisk or beater for ease. Before steaming the lecheflan, the egg yolk should be constantly beaten. You might hear your mom saying โ€œAnak, mag bati ka ng itlog para sa agahanโ€.

Blanch – A recipe may call for blanching vegetable. This simply means to plunge them into boiling water for about a minute.

Chop – self explanatory but use a good sharp knife and try to chop vegetables etc. so that bits are uniform in size and thickness. Onions often have to be chopped finely so chop them as small as you can.

Cream – Cake recipes often instruct you to cream the butter or margarine with the sugar. Beat them together either with a wooden spoon or electric mixer until they are well combined and the mixture has turned a paler color.

Dice – If you are instructed to dice meat or vegetables it means that you should chop into uniform squares.

Drain โ€“ To remove liquid

Fillet– This word can either be used as a noun or a verb. A meat fillet is a good quality piece of meat which has been “filleted” had the bones removed. If a recipe asks you to fillet a piece of meat or fish it means you need to remove the bones. Fish fillet is used in preparing โ€œkilawinโ€.

Fold – Cake recipes often tell you to fold in the flour after creaming the margarine and sugar and adding eggs. Remember that this is different from the term used in playing poker.

Julienne – This term is used with vegetables. Julienne carrots are carrots which have been chopped into matchsticks or strips. So the next time you see this word in a cookbook, always keep in mind that this is a valid verb used in cooking and not a type of carrot :).

Marinate– To coat a piece of meat or fish in a sauce usually overnight or for a few hours in the fridge. The meat will take on the flavors from the sauce. โ€œMarinade the liempo that we will grill in our inuman tomorrow.

Pare – Remove the skin from fruit or vegetables. Remember, this is not your childโ€™s God Father.

Peel – Remove the skin from fruit vegetables or prawns. โ€œI can peel itโ€

Poach – To cook in liquid. Poached eggs are cooked in boiling water and poached fish is often cooked in hot milk. Are you thinking about your small bag? Well, this isnโ€™t it.

Puree – To puree a vegetable or fruit is to blend it until it is as smooth as baby food. Use an electric blender.

Sautรฉ– You can sautรฉ vegetables and this means to fry in hot oil over a high heat for a short amount of time.

Season – To flavor with salt and pepper.

Simmer– It means to bringa sauce to boilingand then turn down to a level where the sauce is bubbling but not boiling.

Stiff peaks – If you are instructed to beat cream or egg whites until stiff peaks are formed then you need to whisk or beat until the mixture forms peaks which do not collapse and you could even turn the bowl upside down without the mixture immediately falling out.

Stir-fry – To stir-fry is to cook meat and/or vegetables in a wok at a high temperature. Stir-fry packs can be found in supermarkets and all you have to do is fry them briefly in hot oil in a wok add sauce or spices and serve with noodles or rice.

Scald – Applying heat that is close to the boiling point. Itโ€™s not the verb describing your actions to your kid when you are mad;).

Sift/sieve – sieve separates wanted/desired elements from unwanted material using a tool such as a mesh, net or other filtration or distillation methods, but it is also used for classification of powders by particle size, or for size measurement as an analytical technique. A strainer is a type of sieve typically associated with separating liquids from solids.

Whisk – Use an electric whisk or a hand whisk to beat something like cream. This is different from Johnnie and Jack.

  • Previous
  • Page 1
  • Page 2
  • Page 3

sidebar

bio

Welcome!

As a huge fan of Filipino food, it is my goal to teach people how to cook it using the simplest way possible. Prepare your taste buds for an ultimate showdown of delectable Filipino dishes! Read more…

Facebook
Instagram
Pinterest
YouTube

Reader Favorites

Chicken Adobo Panlasang Pinoy

Filipino Chicken Adobo Recipe

Leche Flan Recipe

kare kare beef tripe

Kare-Kare Recipe (Beef Tripe)

Pork Sinigang

Sinigang

Receive new recipes by email!

Seasonal

Beef Morcon Recipe

Arroz Valenciana

lechon belly roll recipe

Lechon Belly Roll

Christmas Macaroni Salad

How to Make Macaroni Salad for the Holidays

As Seen In:

good housekeeping
parents
serious eats
livestrong
kitchn
sheknows
Facebook
Instagram
Pinterest
YouTube
About
Meet Vanjo
New? Start Here
Browse Recipes
Explore
Ingredient 101
Philippines
Cooking Schools
Privacy Policy
Disclaimers
Contact
© 2025 Panlasang Pinoy
Site Credits
Designed by Melissa Rose Design Developed by Once Coupled
Back to Top
Back to Top