Simple Kimchi Fried Rice
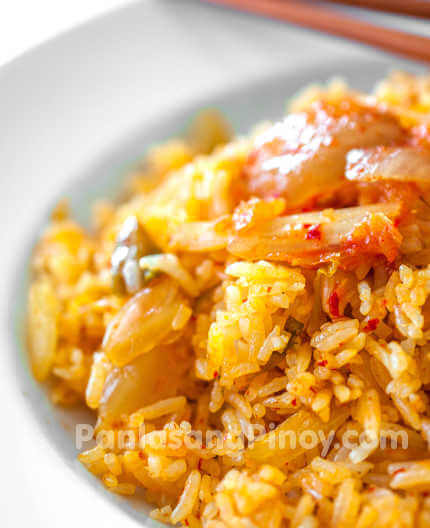
Leftover rice from dinner becomes Kimchi Fried Rice the next morning whenever kimchi is readily available. I keep this version simple with chopped kimchi, some of its juice, sesame oil, and a little cooking oil. Try not to add garlic, soy sauce, or gochujang because the kimchi already gives the rice plenty of flavor.
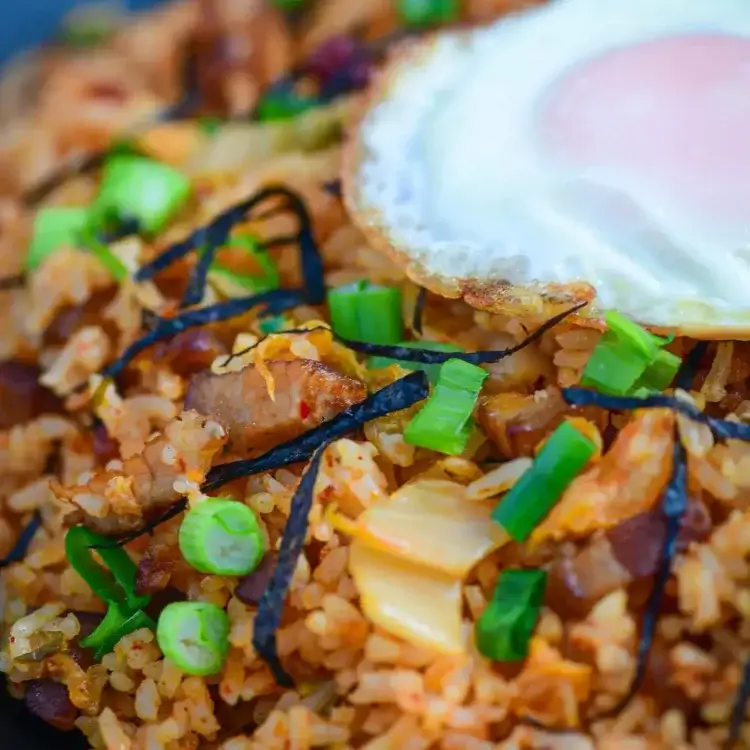
I did not always like kimchi. The smell was too strong for me when I was younger, and I only started enjoying it when I was in my late teens. Maybe that is why I prefer keeping this version mild. If you like something with more going on, try my Kimchi Adobo Fried Rice with pork adobo, bacon bits, chicharon, and gochujang. You can also make the kimchi at home if you want to control how sour it gets.
One thing I do differently is add the kimchi juice near the end. I let the rice fry for a few minutes first so the grains can dry out a bit before the liquid goes in. Adding the juice too early can make the rice soft and sticky.
What is Kimchi Fried Rice?
Kimchi Fried Rice is a Korean rice dish made by stir-frying cooked rice with chopped kimchi and the juice from the kimchi jar. Koreans know it as kimchi bokkeumbap, a simple home-style dish where the kimchi does most of the seasoning.
Kimchi gets more sour as it sits in the refrigerator, and that stronger flavor works especially well in cooked dishes. Older kimchi also goes into stews, pancakes, and fried rice like this. In the Philippines kimchi is easy to find now, and the napa cabbage used for it is the same pechay Baguio sold in the wet market.
Compared with my fried rice recipe, which uses soy sauce, this one tastes sour first, with a little heat from the kimchi. It has more in common with sinangag than with takeout fried rice, since both start with leftover rice and very few other ingredients. I like it with a fried egg on top, and that is enough for a simple meal.
Ingredients
- Cooked white rice – Day-old rice from the refrigerator. This recipe uses two and a half cups, and cold rice fries better than rice cooked the same morning because the grains are drier.
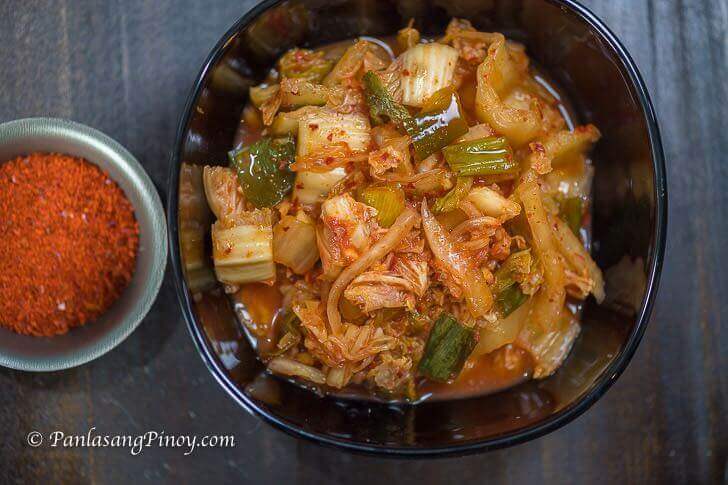
- Kimchi – Napa cabbage kimchi that has been open for two weeks or more. Chop it small, about the size of your thumbnail, so you get kimchi throughout the rice.
- Kimchi juice – Two tablespoons of the red liquid at the bottom of the jar. This is the only seasoning in the recipe, so scoop it before you drain or squeeze the cabbage.
- Sesame oil – The dark toasted kind. Half a teaspoon is enough because toasted sesame oil has a strong flavor. Adding too much can make the rice taste bitter.
- Vegetable oil – A teaspoon is all the recipe needs, since the kimchi has enough moisture of its own.
There are only five ingredients here, so the kimchi you use matters. For this recipe, I use napa cabbage kimchi that has had enough time to ferment and turn sour. A fresh jar is crunchy and only lightly tangy, and it keeps souring in the refrigerator until it develops the deeper sourness that works well here. Korean groceries sell the aged kind by the tub, and most large supermarkets now stock kimchi in the chilled section near the tofu. If yours is new, leave the jar on the counter for a day before putting it back in the refrigerator.
Vanjo’s Advice
- Break the cold rice apart before it goes into the pan. Rice straight from the refrigerator comes out in blocks. Rub the clumps between your fingers over a bowl first, because doing it in a hot pan takes long enough that the kimchi starts to burn.
- Cut the kimchi with kitchen scissors right in the bowl. A cutting board holds the red color and the smell for days. Scissors also make it easier to cut soft kimchi into small pieces.
- Spread the rice flat and leave it alone for a minute at a time. Constant stirring keeps the grains damp. Leave the rice against the hot pan for about a minute, toss it, then let it sit again. That helps dry the grains.
- Taste the rice before you reach for salt. Kimchi brands vary in saltiness, and some are salty enough that you will not need to add anything else. I usually find that the two tablespoons of juice are enough.
- Add a few drops of sesame oil at the end if you want more of the aroma. The half teaspoon in the recipe goes in at the start with the vegetable oil. Some of the sesame aroma fades as it cooks, so taste the rice at the end and add more only if needed.
- Cool the rice properly the night before. Do not leave cooked rice sitting on the counter for hours. Get it into the refrigerator before using it for fried rice. My guide on how to cook rice covers cooling and storing it, and rice chilled that way fries up drier anyway.
- Sauté any meat before the kimchi goes in. Thinly sliced beef or chicken cooked in the oil first will be done by the time the rice is finished. Crispy adobo flakes are the shortcut, and those go in at the end since they are already cooked. Bacon is what most Korean versions use, and my bacon and egg fried rice shows how I cook it down before the rice goes in.
How to Cook Kimchi Fried Rice
Chop the kimchi and measure the juice before heating the pan because the cooking moves quickly once the oil is hot.
Cook the Kimchi
- Heat the vegetable oil and sesame oil in a pan.
- Add the chopped kimchi. Cook for 1 to 2 minutes.
Cook the kimchi for the full 1 to 2 minutes before adding the rice. Raw kimchi is wet and sharp. Those minutes in hot oil cook off some of the liquid and soften the sourness. Add the rice too early and it can steam in the moisture from the kimchi.
Fry the Rice
- Add the cooked white rice. Stir-fry for 3 to 5 minutes.
- Pour in the kimchi juice. Stir and continue cooking for 2 minutes.
The rice should turn an even pale red after you mix in the kimchi juice. If you still see white patches, break up those clumps against the side of the pan as you stir. Those last two minutes are also when the extra liquid cooks off.
Serve
- Transfer to a serving plate.
- Serve while the rice is still hot.
Get the rice out of the pan as soon as it is done. The pan stays hot after the flame is off, and the bottom layer dries out and sticks within a couple of minutes.
What to Serve with Kimchi Fried Rice
- Galbi – Grilled beef short ribs in a sweet soy marinade. This is what I serve the rice with, and the sweetness of the meat goes well with the sour kimchi.
- A fried egg – The usual topping, and the yolk softens the heat. Cook the egg until the yolk is firm, about 160°F, if you are serving young children, older adults, or anyone pregnant.
- Extra kimchi from the jar – A small saucer on the side, for anyone who wants it sourer than the rice.
- Roasted seaweed sheets – Scoop the rice into a sheet and eat it by hand. This is also the easiest way to finish leftovers.
- Something fried – Fried pork chop or fried chicken on the side turns this into a proper lunch.
Storage
Kimchi Fried Rice keeps well for a few days, and the sourness becomes a little stronger by the next day.
- Refrigerator: Let the rice cool, then keep it in an airtight container for up to 3 days. I try to get it in there within 2 hours of cooking. A few minutes in a hot pan is all it needs the next day.
- Freezer: You can freeze this for up to 1 month. I pack it flat in resealable bags, since flat portions thaw faster and reheat more evenly than a solid block. Freeze the rice on its own, though. If we are having it with a fried egg or extra kimchi on the side, those go in fresh when I reheat the rice.
- Reheating: I use a dry pan over medium heat for 3 to 4 minutes instead of the microwave, which leaves the grains soft. Add a teaspoon of water if the rice dried out in the refrigerator. Frozen portions are better thawed overnight, though you can also put them straight into the pan over low heat and cover it for the first few minutes.
More Fried Rice Recipes
- Yang Chow Fried Rice – Shrimp, char siu, and egg in one pan, for when you are cooking for several people.
- Tuyo Fried Rice – Dried salted fish fried into the rice. The tuyo gives it most of its flavor, so it does not need much else.
- Tocino Fried Rice – Sweet cured pork stirred through garlic rice with peas and carrots.
- Adobo Rice – Leftover adobo cooked with garlic and oyster sauce.
- Filipino Pork Fried Rice – Marinated pork tossed with garlic rice, cooked fresh instead of from leftovers.
- Vegetable Fried Rice – No meat at all, for the mornings when the refrigerator is bare.
- Egg Fried Rice – A simple fried rice seasoned with soy sauce instead of kimchi.
Substitutions
- Kimchi juice – A new jar may not give you two tablespoons. Squeeze the cabbage over a bowl to get what you can, then top it up with water and a quarter teaspoon of rice vinegar for the missing sourness.
- Cooked white rice – Brown rice and red rice both work at the same two and a half cups. Both are chewier, so give them an extra minute in the pan.
- Sesame oil – Plain untoasted sesame oil is much lighter in taste. Use a full teaspoon of it if that is what you have.
- Vegetable oil – Canola, corn, or peanut oil are all fine here. Butter works too and makes the rice richer, though it browns faster and needs a lower flame.
- Napa cabbage kimchi – Radish kimchi gives you a crunchier result with less of the red color. Chop it smaller than you would the cabbage.
Frequently Asked Questions
Can I use fresh kimchi instead of sour kimchi?
You can, and the rice will taste milder and less tangy. Fresh kimchi also holds more water, so give it an extra minute in the pan before the rice goes in. A quarter teaspoon of rice vinegar stirred into the juice puts back some of the sourness.
Do I have to use day-old rice?
Not always, though it does make the frying easier. Rice cooked the same day is still soft and it clumps when you stir it. If that is all you have, spread it on a plate and leave it in the refrigerator for thirty minutes first, or cook it with a little less water than usual.
Is this recipe spicy?
It is mild. The only chili in the pan is what is already in the kimchi, and frying softens that further. For more heat, stir in a teaspoon of gochujang with the kimchi, or a spoonful of chili garlic sauce at the end.
Why does my kimchi fried rice turn out wet?
Usually it is the kimchi juice going in too soon. The rice needs three to five minutes of dry frying before any liquid arrives. Warm rice and a crowded pan do the same thing, so cook in two batches if your pan is small.
Kimchi Fried Rice is ready when the grains look dry and separate and the whole pan has turned an even pale red. Serve it hot, straight from the pan, with galbi if you have it. Share and enjoy!
Did you make this? If you snap a photo, please be sure tag us on Instagram at @panlasangpinoy or hashtag #panlasangpinoy so we can see your creations!
Kimchi Fried Rice
Ingredients
- 2 1/2 cups cooked white rice day-old, chilled
- 3/4 cup kimchi chopped
- 2 tablespoons kimchi juice from the jar
- 1/2 teaspoon sesame oil toasted
- 1 teaspoon vegetable oil
Equipment
- 1 Frying pan A wide pan gives the rice more contact with the heat, which dries the grains faster.
Instructions
- Heat the vegetable oil and sesame oil in a pan.1/2 teaspoon sesame oil, 1 teaspoon vegetable oil
- Add the chopped kimchi. Cook for 1 to 2 minutes.3/4 cup kimchi
- Add the cooked white rice. Stir-fry for 3 to 5 minutes.2 1/2 cups cooked white rice
- Pour in the kimchi juice. Stir and continue cooking for 2 minutes.2 tablespoons kimchi juice
- Transfer to a serving plate. Enjoy with galbi.
- Share and enjoy!
Leave a Comment