Chili Oil
Chili oil is a spicy condiment made with fresh Thai chili peppers, garlic, and aromatics simmered low and slow in canola oil. I like this chili oil recipe because the flavor is deep and the heat is steady without being sharp. The peppers, garlic, star anise, and bay leaves cook together in the oil for about an hour until everything softens and the oil turns red. You end up with a thick, slightly chunky condiment that works on almost anything. I use it on congee, fried siomai, fried rice, and noodle soups.

I keep at least two mason jars in the fridge at all times. The whole process takes about an hour, and most of that is just letting the wok do its job on low heat. If you have made chili garlic oil before, this is a similar idea with more aromatics and a longer simmer.
High heat will scorch the chili and garlic and leave a bitter taste in the oil. Keep it low the entire time.
What is Chili Oil?
Chili oil is a condiment made by infusing cooking oil with chili peppers and aromatics. It originally came from China. Chili peppers arrived there from the Americas sometime during the late Ming Dynasty, and cooks in provinces like Sichuan, Hunan, and Guizhou started steeping them in oil. The Mandarin name is “la jiao you,” which just means “chili pepper oil.” It stuck around because it was cheap to make, lasted a long time, and made bland food interesting.
Different countries do it differently. Japan has rayu. Korea uses gochugaru flakes. In Southeast Asia, you sometimes see versions with shrimp paste or lemongrass mixed in. In the Philippines, chili oil shows up at carinderia and street food stalls next to the soy sauce and vinegar. It is not a traditional Filipino condiment in the way that sinamak or sawsawan is, but it has become common enough that most Filipinos will recognize it on the table.
This recipe is not the usual hot oil pour method where you heat oil and dump it over dried flakes in a bowl. Instead, fresh Thai chili peppers and garlic go through a food processor first and then simmer directly in the oil for about an hour. The texture is thicker. More chunky. And the garlic cooks into the oil instead of sitting on top of it.
Why This Chili Oil Recipe Works
A few things make this recipe different from most chili oil recipes you will find online.
- Slow simmering instead of a hot oil pour – Cooking the chili and garlic directly in the oil over low heat for close to an hour draws out more flavor than dumping hot oil over flakes. Nothing gets shocked or scorched, and the oil absorbs heat and garlic flavor gradually.
- Fresh peppers processed with garlic – Running the Thai chili peppers and garlic through a food processor gives the oil a consistent texture. Every scoop has garlic and heat in it, not just clear oil floating on top of solids.
- Star anise and bay leaves for warmth – These go in the oil for about 30 minutes. Long enough to add a subtle sweetness and herbal quality, short enough that they do not take over.
- Rice vinegar for balance – A small amount near the end of cooking keeps the oil from tasting flat. It also helps with shelf life.
- Off-heat seasoning – Brown sugar, oyster sauce, and Maggi Magic Sarap go in after the stove is off. Cooking them at high heat would strip their flavor. This way they stay intact.
Ingredients
- Thai chili peppers – Sharp, focused heat that holds up through a long simmer.
- Canola oil – Neutral flavor, high smoke point. It stays out of the way and lets the chili and garlic come through.
- Garlic – A whole head, peeled and blitzed with the peppers. It softens in the oil over the hour and turns mellow.
- Maggi Magic Sarap – A Filipino seasoning that strengthens the umami. Small amount, noticeable difference.
- Dried bay leaves – Quiet herbal note during the simmer. You will not specifically taste bay leaves, but you would notice if they were gone.
- Rice vinegar – Mild acid that keeps things lively and extends shelf life.
- Star anise – One piece. Faint sweetness, almost licorice, without taking over.
- Brown sugar – Softens the bite of the chili. Not enough to make the oil sweet.
- Oyster sauce – Savory, full of umami. Goes in last, off the heat.
Vanjo’s Advice
Here are some things I have picked up from making this.
- Keep the flame as low as your stove allows. The moment the oil gets too hot, the chili turns dark and bitter. Tiny bubbles, not popping and sizzling.
- Use a wok. The wide surface area spreads heat evenly and gives you room to stir without splashing. I tried a saucepan once. The bottom scorched because all the heat concentrated in one spot. I have not used a saucepan for this since.
- Pull the star anise and bay leaves out after 30 minutes. I have left them in longer than that before and the oil ended up tasting like spiced tea
- Let it cool completely before sealing. Hot oil in a sealed jar creates condensation inside the lid, and that moisture shortens the shelf life.
- Make a double batch. One jar does not last.
How to Cook Chili Oil
This chili oil is not complicated. Low heat, a wok, and about an hour of your time.
Prepare the Chili and Garlic
- Place the Thai chili peppers and peeled garlic in a food processor.
- Blitz for about 1 minute or until finely chopped with an even texture.
If you do not have a food processor, a blender works. Add about a cup of the canola oil to help the blades catch the ingredients.
Simmer in Oil with Aromatics
- Pour the canola oil into a wok and add the chili and garlic mixture. Turn on the stove and set the heat to the lowest setting.
- Cook for 10 minutes, stirring occasionally to prevent sticking.
- Add the star anise and dried bay leaves. Continue simmering for 30 minutes, stirring every 2 minutes.
- Remove the bay leaves and star anise.
You should see tiny, slow bubbles. If the mixture sputters or the chili darkens quickly, the heat is too high. Turn it down.
Season and Cool
- Pour in the rice vinegar. Stir well and continue simmering for 10 minutes.
- Turn off the stove. Add the brown sugar, oyster sauce, and Maggi Magic Sarap.
- Stir until mixed in.
- Let the chili oil cool completely, then transfer to clean mason jars.
Pro Tips
- Stir every 2 minutes during the long simmer – The chili settles at the bottom and will burn if you walk away.
- Do not skip the rice vinegar – It does more than add tang. It helps preserve the oil and keeps the color from going muddy.
- Taste before jarring – If it needs more salt, add a pinch while the oil is still warm so it dissolves.
- Clean, dry utensils only – A wet spoon or one with food residue on it will shorten the shelf life of the whole jar.
What to Serve with Chili Oil
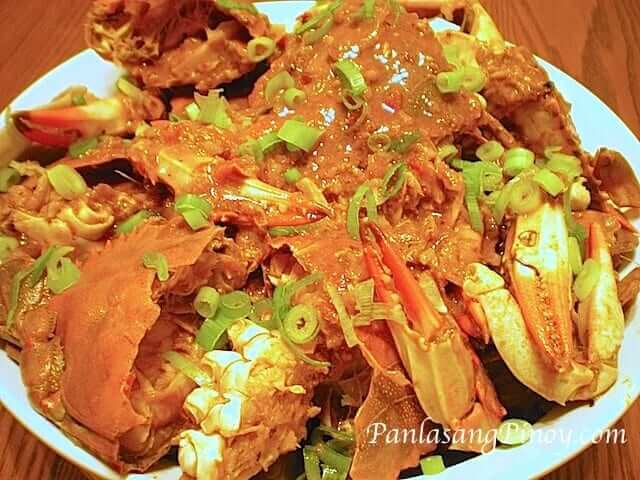
- Pork Siomai – A drizzle over freshly steamed siomai with a squeeze of calamansi
- Goto – Stir a spoonful into hot rice porridge
- Chicken Mami – The heat cuts through the broth and wakes up the whole bowl
- Arroz Caldo – Another rice porridge that takes well to a spoonful of spicy oil
- Sinangag – Drizzle over garlic fried rice for color and kick
- Fried eggs on rice – This is probably how I eat it most often
How to Store Chili Oil
This stores well as long as you keep moisture out of the jar.
- Refrigerator: Airtight mason jar, up to 3 months. The oil thickens when cold. Let it sit out for about 30 minutes before using.
- Freezer: Freeze in small portions using ice cube trays or small containers. Good for up to 6 months. Thaw at room temperature.
- Reheating: Not necessary. Use it straight from the jar. If you want it warm, heat a small amount in a pan on low for about a minute.

More Condiment Recipes
- Sinamak – Ilonggo spiced vinegar with chili, ginger, and garlic soaked in coconut vinegar
- Filipino Vinegar Dipping Sauce – A classic sawsawan for fried or grilled Filipino food
- Asian Dipping Sauce – Soy sauce, vinegar, and sesame oil for dim sum
- Sweet and Sour Sauce – Tangy and glossy, good alongside spicy oil on the table
Substitutions
- Thai chili peppers – Dried red pepper flakes work. The texture will be lighter and less chunky. Start with about 1 cup and adjust.
- Canola oil – Vegetable oil, peanut oil, or avocado oil. Avoid olive oil. The flavor competes with the chili.
- Maggi Magic Sarap – A pinch of MSG and salt. Or skip it entirely and adjust salt to taste.
- Rice vinegar – White vinegar or apple cider vinegar in the same amount. Slightly different flavor but the oil still turns out fine.
- Star anise – Leave it out if you cannot find it. The oil will taste good, just without that faint licorice warmth.
- Oyster sauce – Soy sauce with a small amount of sugar.

Frequently Asked Questions
Does chili oil need to be refrigerated?
It can sit at room temperature in a sealed jar for about two weeks. After that, refrigerate it. The cold thickens the oil a bit, so pull it out 30 minutes before you plan to use it. In the fridge, it lasts several months.
How long does homemade chili oil last?
Around 2 weeks at room temperature and up to 3 months in the fridge. The biggest thing that shortens the shelf life is moisture getting into the jar. Always use a clean, dry spoon. If you see any mold or the smell changes, throw it out.
Can I use dried chili flakes instead of fresh Thai chili peppers?
Yes. Dried red pepper flakes are fine. The texture will be different since you do not get that thick, chunky consistency from fresh peppers. Also watch the color closely because dried flakes tend to darken faster in oil. Keep the heat extra low if you go this route.
What kind of oil is best for making chili oil?
Anything neutral with a high smoke point. Canola, vegetable, peanut, avocado. Olive oil and sesame oil have strong flavors that overpower the chili and garlic, so save those for other things.
How do I make my chili oil less spicy?
Use fewer Thai chili peppers and more oil. Removing some of the seeds before blitzing also helps since most of the heat sits in the seeds and white membrane. Another option is to mix in a milder pepper like red bell pepper. It keeps the red color without the same intensity.
This chili oil recipe is one I come back to often. It works on too many things for me not to have a jar around. If you want to see how I make it, watch the video below.
Watch How to Make It

Did you make this? If you snap a photo, please be sure tag us on Instagram at @panlasangpinoy or hashtag #panlasangpinoy so we can see your creations!

Chili Oil
Ingredients
- 2 lbs. Thai chili pepper see notes below
- 1 head garlic peeled
- 8 grams Maggi Magic Sarap
- 2 dried bay leaves
- 2 tablespoons rice vinegar
- 1 star anise
- 2 tablespoons brown sugar
- 2 ½ tablespoons oyster sauce
- 2 cups canola oil see notes below
Equipment
- 1 Food processor
Instructions
- Combine Thai chili pepper and garlic in a food processor. Blitz for 1 minute or until the ingredients are finely chopped.2 lbs. Thai chili pepper, 1 head garlic
- Pour the canola oil in a wok and then add the chili and garlic mixture. Turn on the stove. Adjust the heat to a simmer. Continue cooking the mixture for 10 minutes while occasionally stirring.2 cups canola oil
- Add star anise and dried bay leaves. Continue cooking the mixture for 30 minutes. Note: Stir the mixture every 2 minutes.1 star anise, 2 dried bay leaves
- Remove the bay leaves and star anise.2 dried bay leaves, 1 star anise
- Pour the rice vinegar. Stir and continue simmering for 10 minutes.2 tablespoons rice vinegar
- Turn off the stove. Add brown sugar, oyster sauce, and Maggi Magic Sarap. Stir and let the chili oil cool down.2 tablespoons brown sugar, 2 ½ tablespoons oyster sauce, 8 grams Maggi Magic Sarap
- Transfer it to individual mason jars. You can let keep it in room temperature for a few weeks or refrigerate to extend the shelf life.
- Serve as a condiment or use as an ingredient to spice-up your dish. Enjoy!


Leave a Comment