• Skip to primary navigation
  • Skip to main content
  • Skip to primary sidebar

Panlasang Pinoy

Your Top Source of Filipino Recipes

  • Start Here
  • All Recipes
    • Course
      • Breakfast
      • Lunch
      • Appetizers
      • Dessert
      • Dinner
    • Ingredient
      • Chicken
      • Pork
      • Beef
      • Turkey
      • Vegetable
      • Fish
      • Rice
      • Egg
      • Tofu
      • Noodles
    • Type
      • Adobo
      • Bread
      • Fried Chicken
      • Sinigang
      • Kilawin
      • Ginataan
      • Kaldereta
  • Filipino Food
  • Cooking Schools
  • About Panlasang Pinoy
Facebook
Instagram
Pinterest
YouTube
Home Culinary Arts

Culinary Arts

Batuan fruit

Batuan (Batwan)

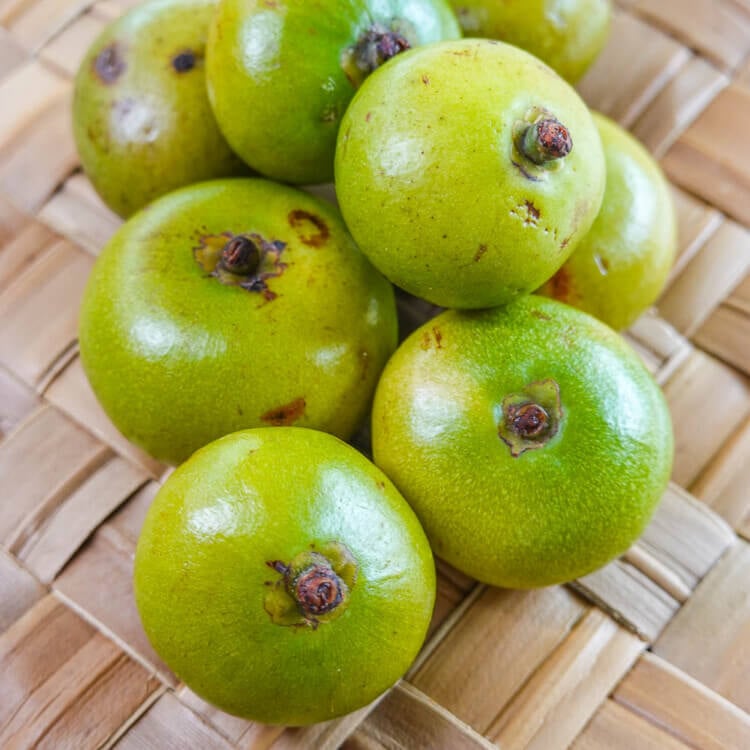
Batuan is the sour fruit that Ilonggo cooks put in the pot where a Tagalog cook would use tamarind. It is small, round, and green, about the size of a golf ball, and it goes into kansi, KBL, and fish stews all over Iloilo and Negros. You will also see it spelled batwan, and both spellings mean the same fruit.
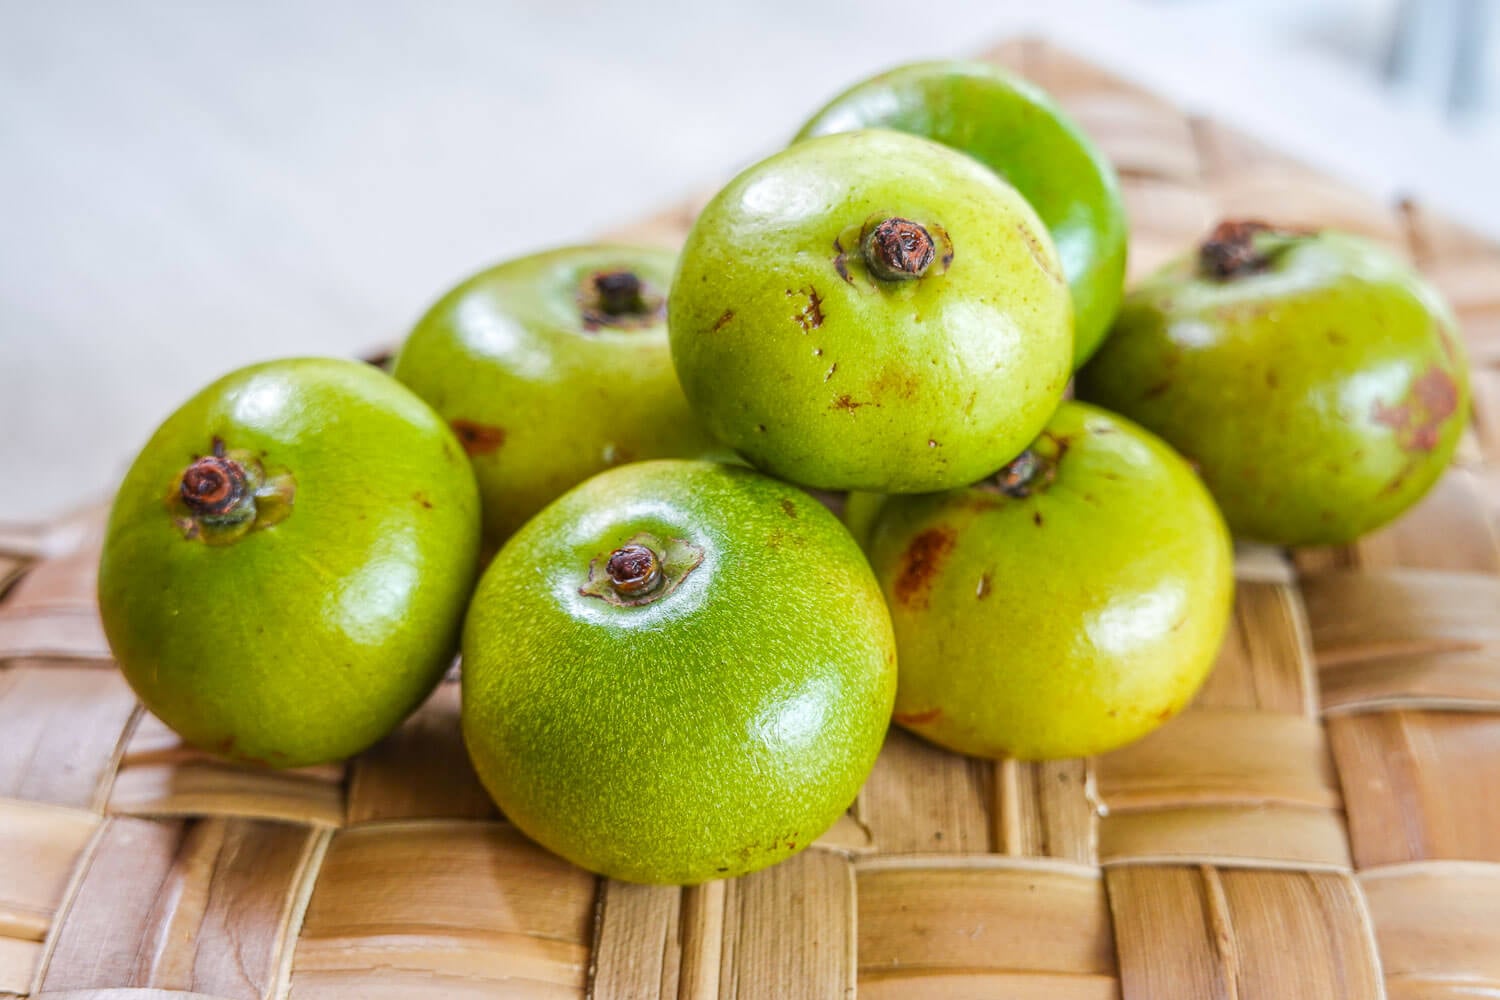
Batuan Sour Fruit

When I wrote my KBL recipe back in 2012, fresh batuan was not available where I lived, so I used sinigang mix in its place. A lot of readers outside Western Visayas are in the same spot, and that is one reason to understand what the fruit does before deciding what to use instead of it.

Batuan sours a broth without making it sharp, and it has almost no smell of its own, so the beef, pork, or fish in the pot still tastes like itself. The powder and paste made in Bacolod and Iloilo do the same job, so you do not need the fresh fruit to cook with it.

What Is Batuan?

Batuan is mainly used to sour soups and stews. It is picked green, when it is at its most sour, and it goes into the pot whole to sour the broth. The Ilonggo word for that job is pang-aslom, and in Iloilo and Negros this is the pang-aslom most cooks reach for. The fruit comes from a tall forest tree native to the Philippines, Garcinia binucao. Mangosteen is in the same genus, so the two are related, but batuan is not a type of mangosteen and does not taste like one.
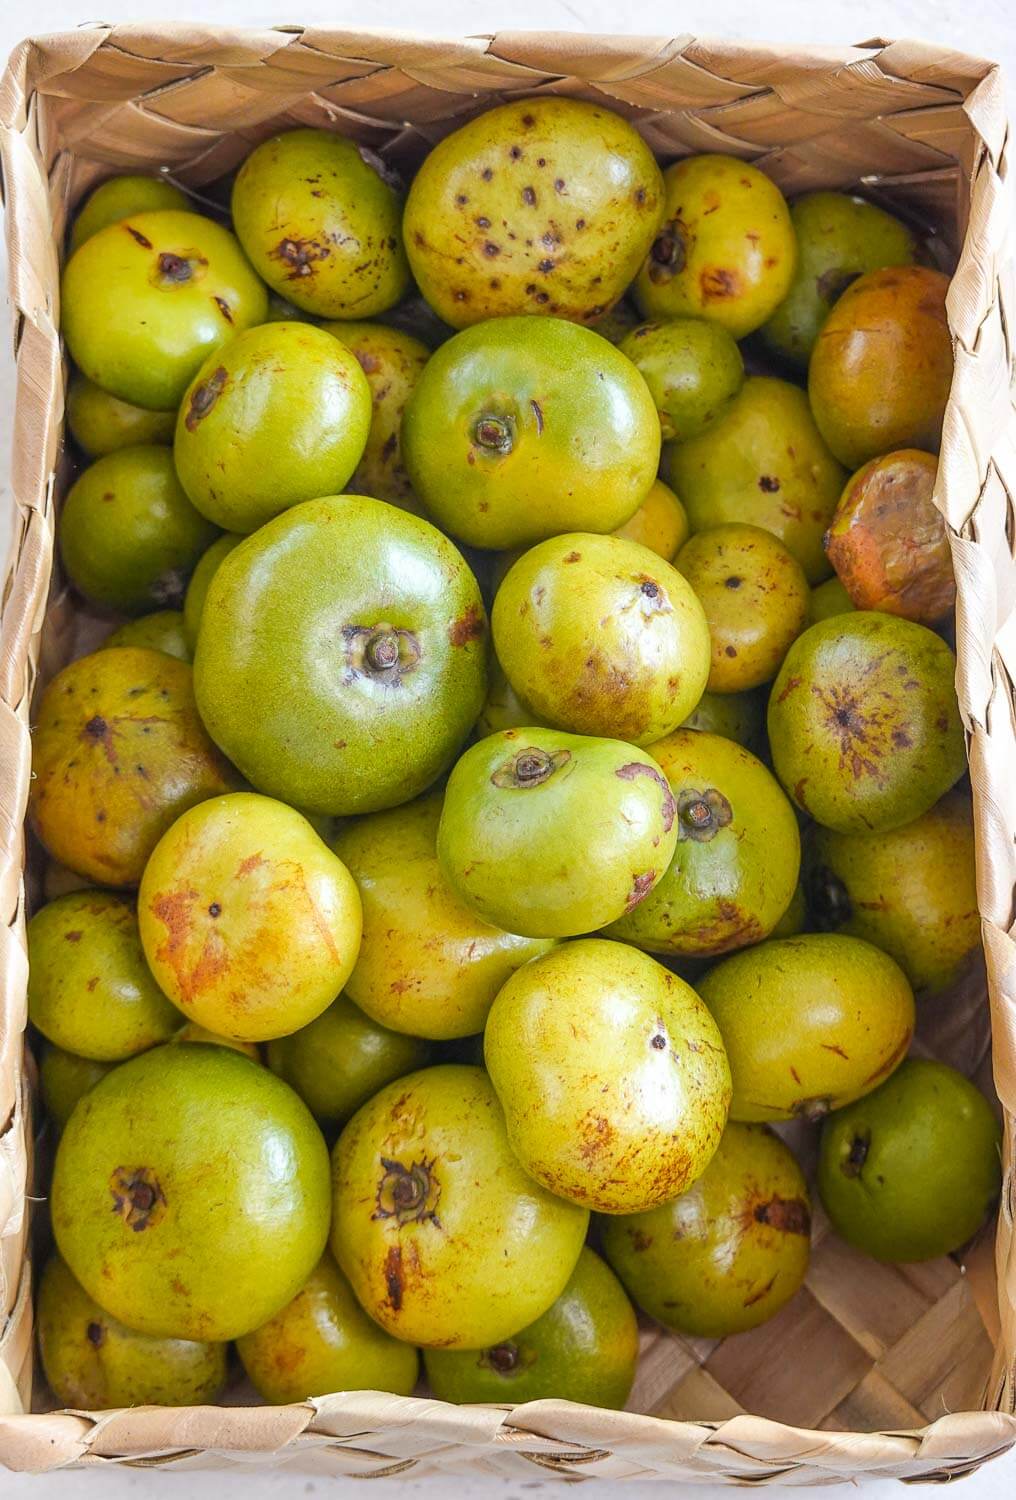
Batuan

Batuan or Batwan: Which Spelling Is Right?

Both are right, and they refer to the same fruit. Batuan is the spelling in Department of Agriculture, Bureau of Agricultural Research, and university sources, and on the Slow Food Ark of Taste listing. Batwan is how the word sounds in Hiligaynon, and it is the spelling you will see more often in Iloilo and Negros, on market signs, menus, and product labels such as batwan powder.

In Tagalog the fruit is binukaw or bilukaw, which is where the species name binucao comes from. Other provinces have their own names for it, but none of them is used nationwide, so outside the Visayas, batuan is still the name most likely to be understood.

What Does the Fruit Look Like?

A fresh batuan is round and green, about 4 to 5 centimeters across, with firm, smooth skin. That green stage is the one cooks want. As the fruit ripens the skin turns yellow and the pulp loses some of its sourness, so a green fruit sours a pot harder than a yellow one. Cut it open and you find juicy, pale pulp around several large seeds. The seeds are not eaten.
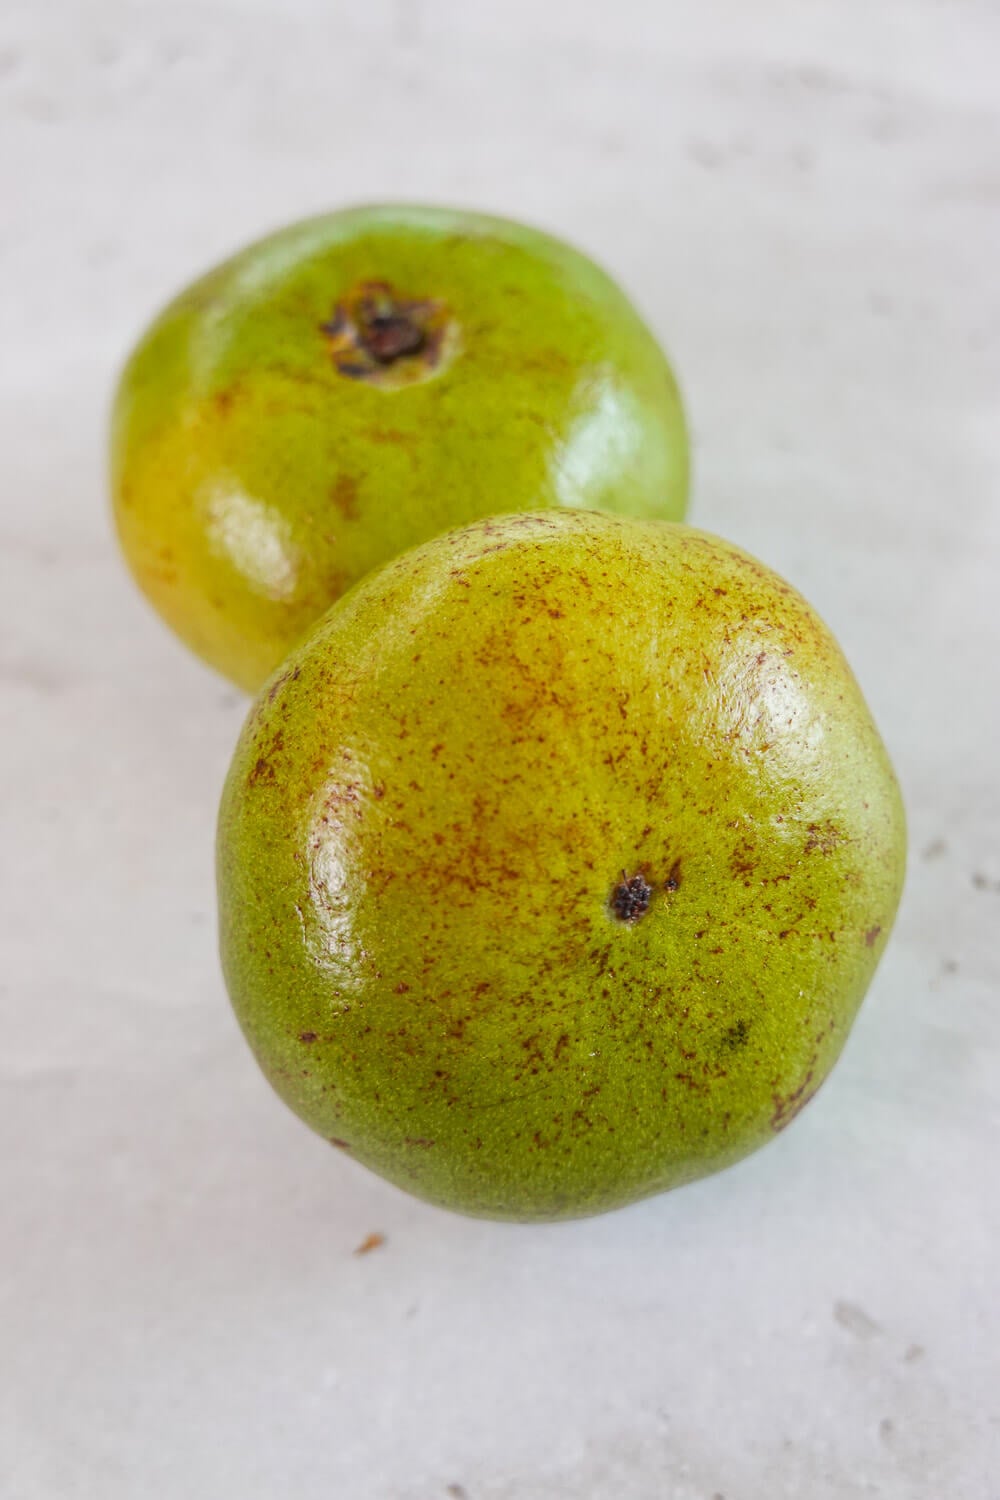
Batuan bottom

The Batuan Tree

The tree is a tall evergreen, up to about 25 meters in the forest, with shiny leaves that come in reddish before turning green. The fruits hang along the branches and the main trunk. It is a lowland tree, and you find it in forests and old farm lots rather than in orchards.

What Does It Taste Like?

It is sour, but not harsh. Cooks in Iloilo describe it as gentler than tamarind or kamias. The fruit has very little smell, so it does not add a fruity note to a dish. What you taste is the sourness and a slight astringent feel at the back of the mouth from the seeds and skin.

A ripe yellow batuan is still sour. The acidity falls as the fruit matures, but no source describes it turning sweet, and cooks prefer the green stage because it sours the pot more.

Why Batuan Matters in Filipino Cooking

Sourness in Filipino cooking is regional. The same pot of pork and vegetables tastes different in Batangas, Pampanga, and Iloilo because each place sours it with what grows nearby. Tamarind is the standard in most of Luzon. I use kamias when I want something sharper, and ripe guava when I want a milder soup. Young tamarind leaves, green mango, santol, and calamansi each have their own dishes and their own provinces. Batuan holds that place in Western Visayas. It fills a similar role in Ilonggo cooking to the one tamarind fills in many Tagalog dishes.

What Is It Used For?

Most cooks use batuan for one thing: souring a savory dish. The whole fruit simmers in a soup or stew, softens, and releases its juice into the liquid. Beef shank, pork hock, and whole fish are the proteins it goes with most, and green jackfruit often shares the pot.

It also goes into fish dishes cooked with little liquid, like pinamalhan, where it takes the place of vinegar. Some cooks put it in marinades or in ginataan instead of tomatoes. Off the stove, the fruit is eaten with salt, brined as a pickle, or sliced and sun-dried.

Filipino Dishes That Use Batuan

Cansi
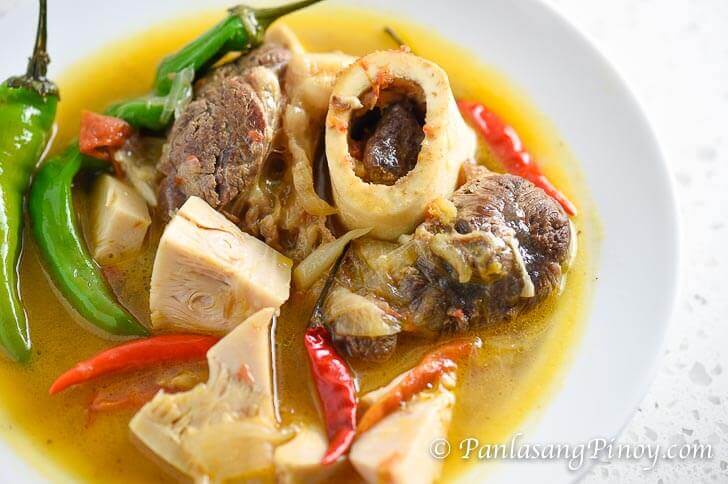
Cans

Cansi is the Ilonggo beef soup people describe as bulalo and sinigang in one pot. Beef shank and marrow bones simmer until the meat falls apart, with lemongrass, green jackfruit, and annatto for the orange color. Batuan goes in after the beef is tender, with the jackfruit, and cooks until it softens. Batuan gives kansi its sourness, while the marrow and jackfruit give the broth its body.

KBL
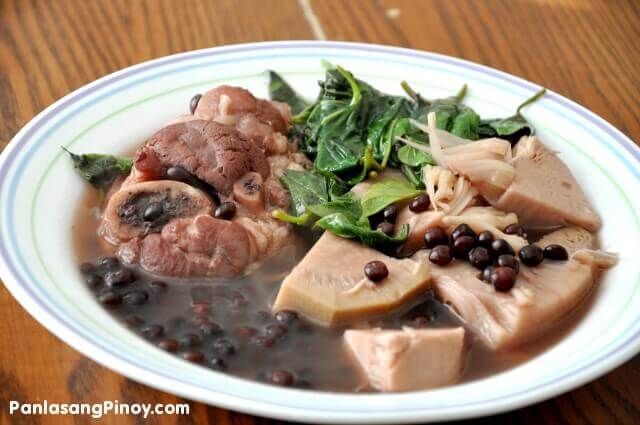
KBL stands for kadyos, baboy, kag langka: pigeon peas, pork, and jackfruit. Pork hocks boil with lemongrass until tender, the pigeon peas cook until soft and turn the broth purple, and green jackfruit goes in last. Batuan sours the Ilonggo version, and because it is mild, you still taste the pork and the peas. Iloilo recipes call for about six to eight fruits for a kilo of pork hocks.

Fish Dishes
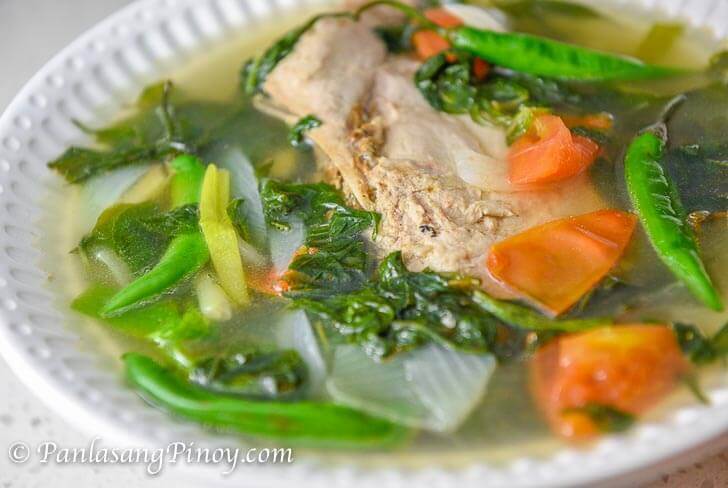
fish tinola

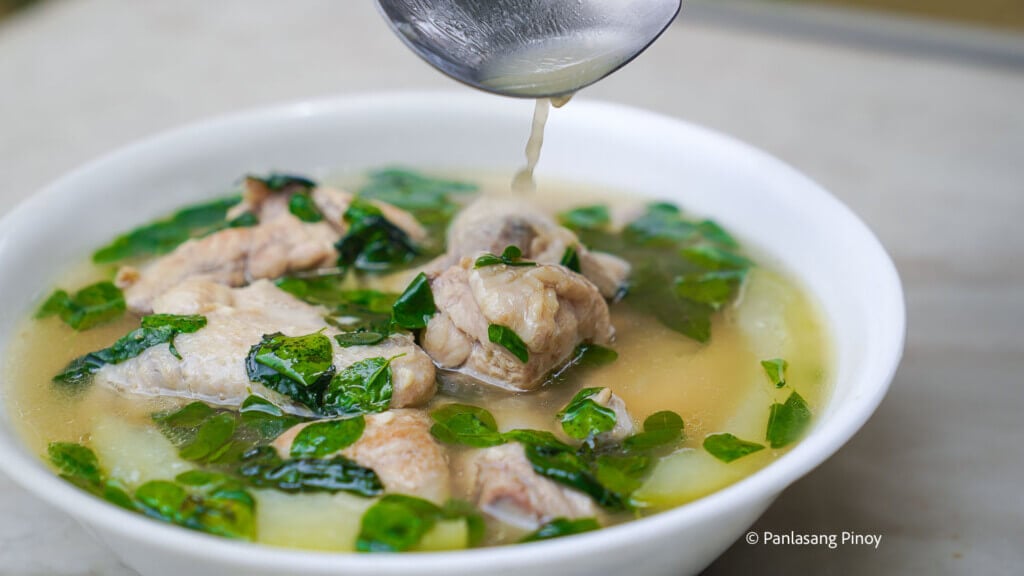
Ilonggo fish tinola is a sour fish broth, not the ginger soup a Tagalog cook means by tinola, and batuan is one of the fruits used to sour it. Pinamalhan, the Ilonggo paksiw where the fish cooks down until nearly dry, is made with vinegar in many households, but many Ilonggo cooks use batuan, and others use kamias, green mango, or guava. Whole fish also get cooked in a batuan broth with vegetables the way sinigang is made elsewhere.

How to Use Fresh Batuan

Wash the fruit and put it in the pot whole. That is how most Ilonggo cooks handle it, and it is the least work.
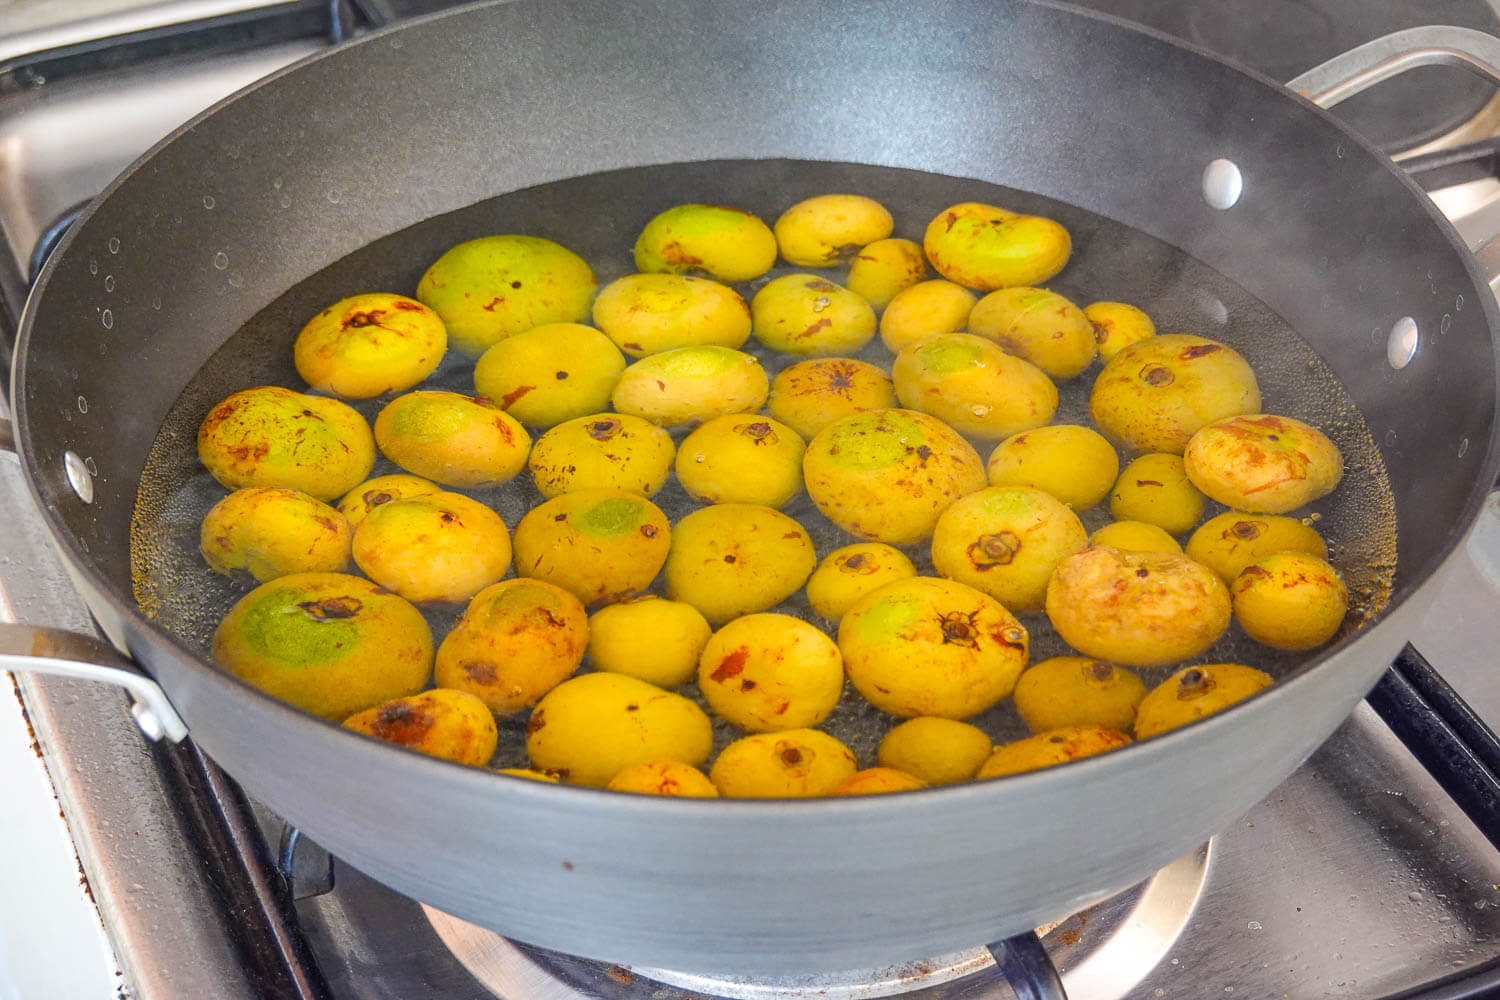
Boiling the batwan fruit

Do You Peel It?

Most cooks do not. The skin softens in the broth along with the pulp. Some cooks peel or halve the fruit first to speed up the souring, but it is a choice, not a requirement.

Do You Cut It or Remove the Seeds?

You do not need to do either before cooking. The seeds stay in while the fruit simmers. Once the fruit is soft, press it against the side of the pot with a spoon to squeeze out the juice. If you do not want pulp and seeds in the bowl, lift the softened fruit out, mash it in a little hot broth, and pour the liquid back through a strainer. Some cooks do this in a cup of boiling water before the fruit ever meets the meat, so they can add the liquid to taste.
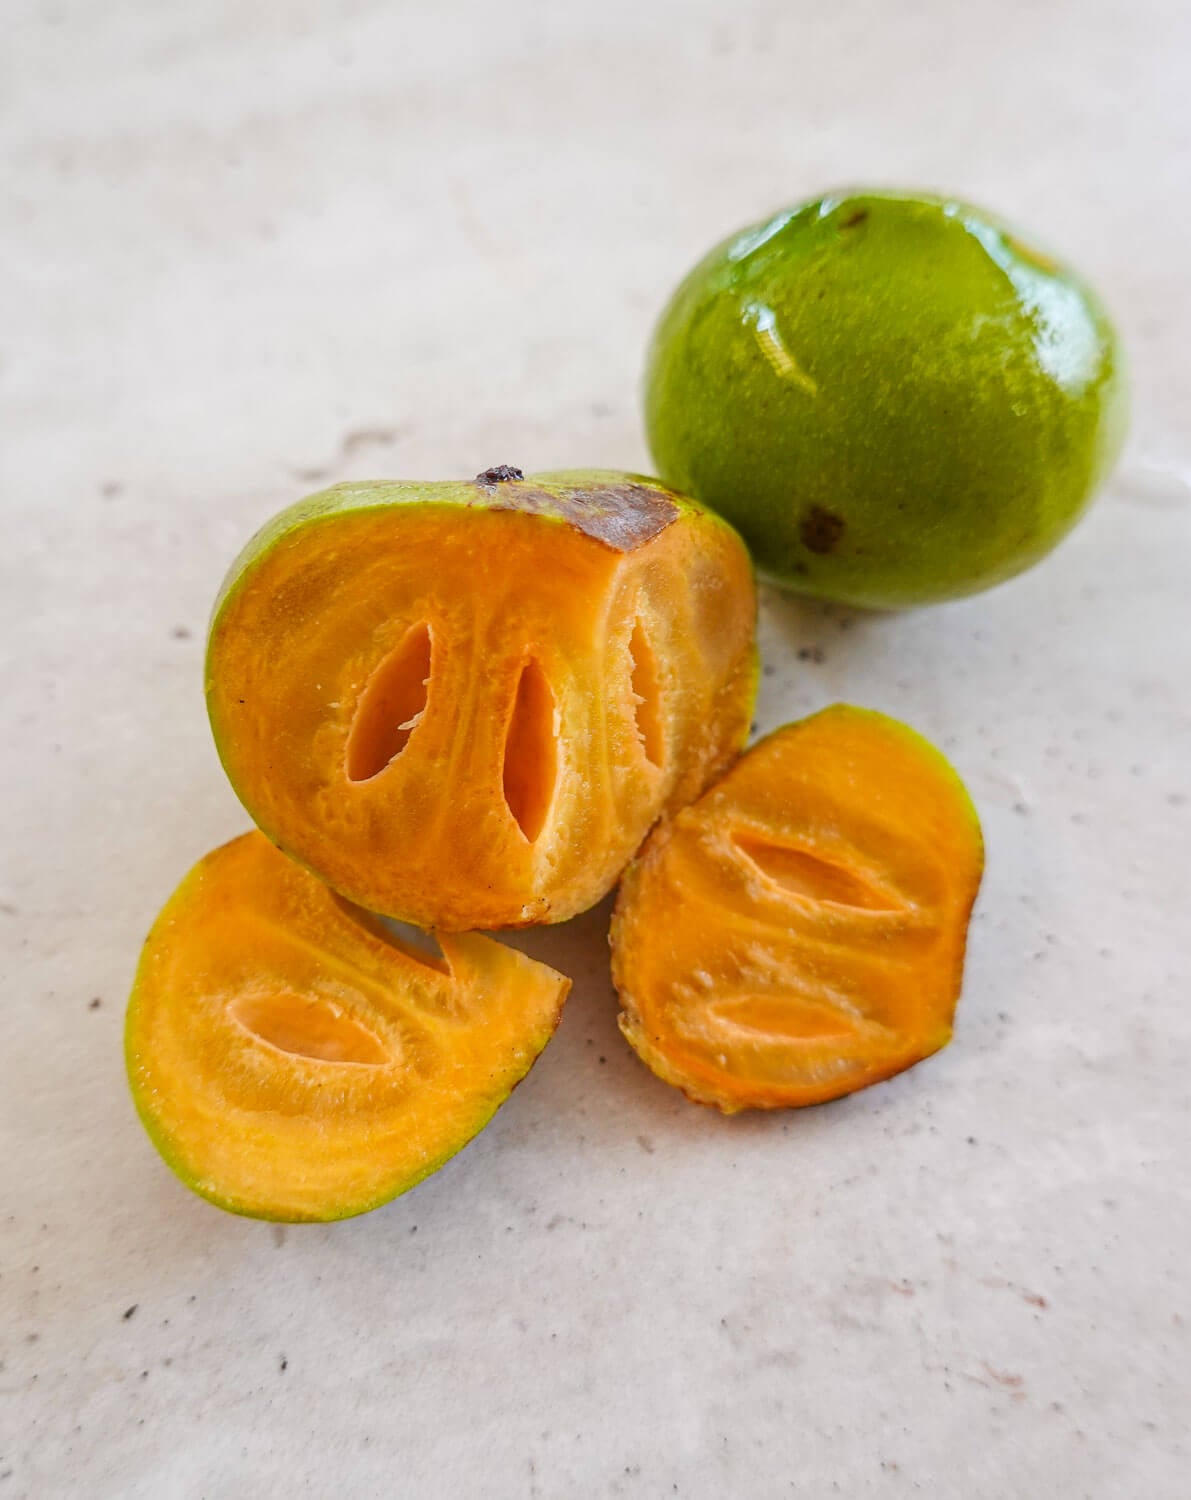
Halved batuan

When Do You Add It?

After the meat is tender. In kansi and KBL the fruit goes in with the jackfruit and cooks another ten minutes or so, until it gives when pressed. Some recipes add it from the start, but the sourness keeps building the longer the fruit sits in the liquid, so a late addition is easier to control.

How Much Should You Use?

There is no fixed ratio, because the fruits vary in size and in how sour they are. Kansi and KBL recipes from Iloilo and Negros cooks fall in a narrow range, though: five to eight fruits for six to eight cups of broth, the pot you would make for a kilo or two of meat. Start at the low end, taste after the fruit softens, and add more if you want it more sour.

How Do You Adjust the Sourness?

Adjust with more fruit rather than more time. A longer simmer makes the pot more sour too, but it also overcooks the vegetables. If the broth is already too sour, add water and season again with fish sauce. Pressing the fruit harder releases more juice, so press lightly at first if you are unsure.

Fresh, Frozen, Puree, Paste, and Powder

Fresh fruit lets you control the sourness by the piece. Most of the year, and everywhere outside the Visayas, you will be choosing among the other forms instead.
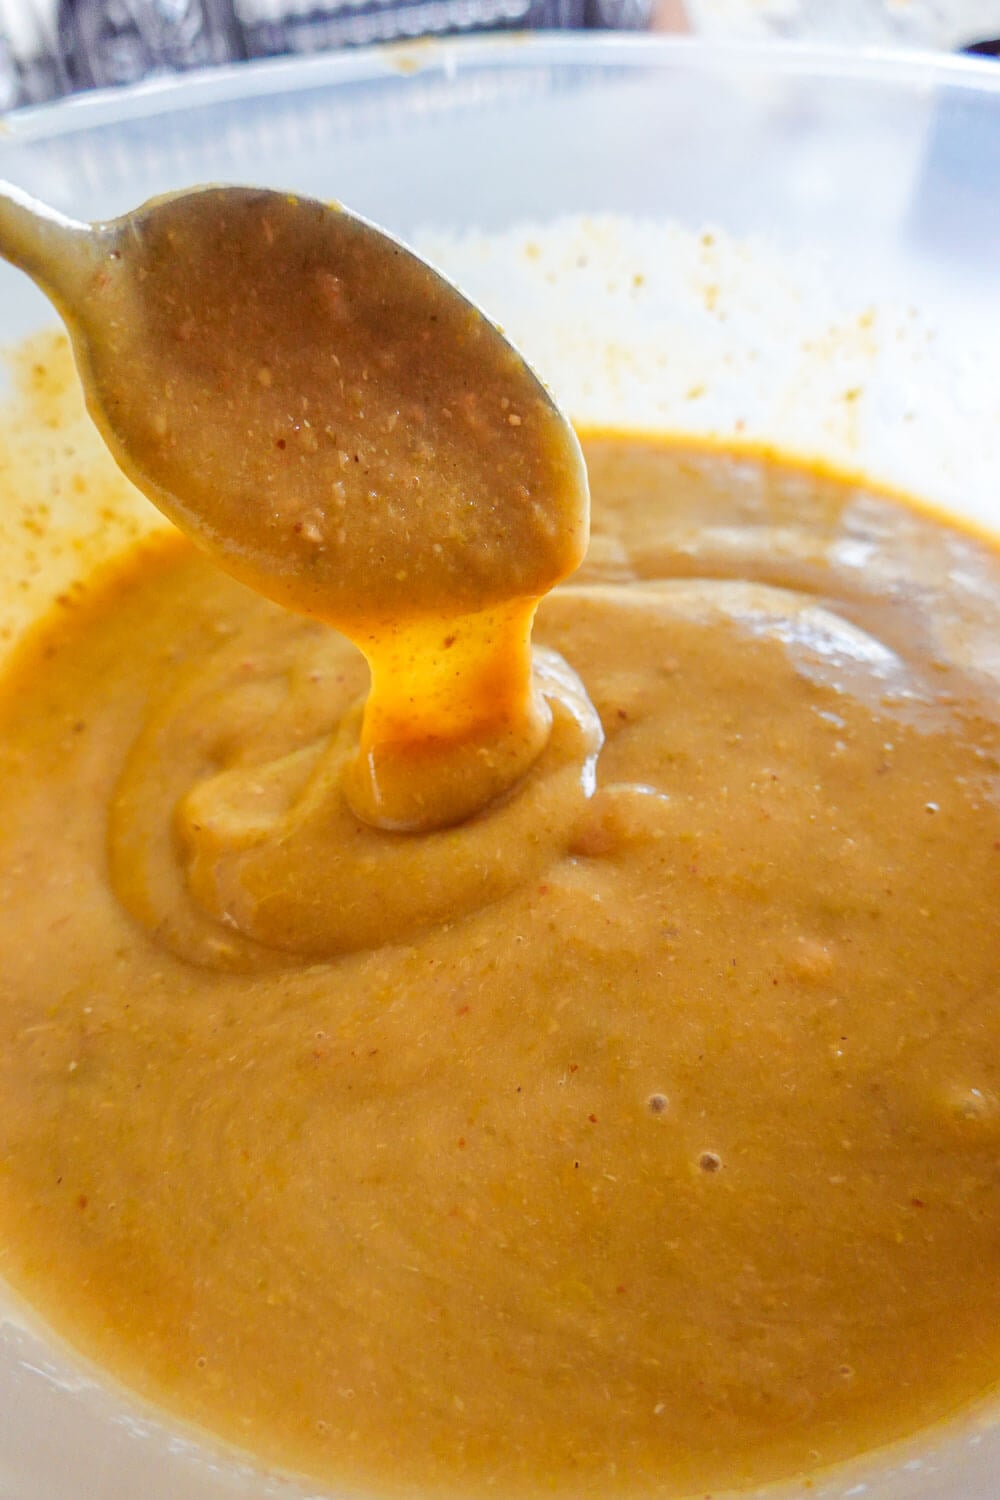
Batuan paste
FormBest useAdvantagesWhat to know
FreshKansi, KBL, fish tinola, pinamalhanEasy to control by the pieceSeasonal; ripens fast at room temperature; hard to find outside Western Visayas
Frozen (whole, home-frozen)Any dish that takes the fresh fruitKeeps the fruit past the season; goes into the pot without thawingNot sold as a product as far as I can find; you freeze it yourself
Brined or pickledAppetizer, side to fried fish, souring a pot in a pinchKeeps for months in the jarSalty as well as sour, so season the dish after adding it
PureeSinigang-style soups, marinadesTastes closest to fresh; spoon it in by the tablespoonSome brands include skin and seed bits; refrigerate after opening; strength varies by maker
PasteKansi, sinigang, any sour brothShelf-stable in a jar; sold in supermarkets and abroadFollow the label amount; some brands add salt
PowderSoups, sinigang mix substituteLightest to ship; keeps six months or more sealedSome brands grind pulp, skin, and seed together; taste and add gradually

There is no reliable conversion between fresh fruit, puree, and powder, because each maker concentrates the fruit differently. A Bacolod puree maker uses about three tablespoons of puree per liter of broth for a fish sinigang, which is a fair starting point. For paste and powder, use the package amount, then taste.

Best Substitutes for Batuan

Any of these will sour the pot. None will taste like batuan, which is milder and less aromatic than all of them, so expect the dish to come out a little sharper or fruitier.

  • Kamias โ€“ The substitute Ilonggo recipes name first. Use it whole the way you would use batuan, and press it once soft. It tastes brighter and more sharply sour, so start with fewer pieces and add as you go.
  • Fresh tamarind or sinigang mix โ€“ The easiest to find, and what I used for my KBL and what my kansi recipe calls for. Tamarind has a stronger flavor and aroma, so start with less than the packet says.
  • Green mango โ€“ Works in fish dishes and pinamalhan, where Ilonggo cooks already use it. Slice it and add it with the fish. The sourness is tart and fruity.
  • Guava โ€“ Less sharply sour than tamarind or kamias, but ripe guava is also sweeter and more aromatic, so it changes the dish more than the others.
  • Calamansi โ€“ Better in a marinade or as a finish than in a long-simmered soup, since the sourness cooks off and the citrus flavor stays. Squeeze it in at the end.
  • Vinegar โ€“ For pinamalhan and paksiw, cane vinegar is the traditional alternative. My guide to Filipino vinegar covers which type to use.

So the best substitute depends on the dish: kamias or tamarind for kansi and KBL, vinegar or green mango for pinamalhan. If you can find batuan powder or paste, use that before any of these, since it is the same fruit.

Can You Eat Batuan Raw?

Yes. In Iloilo and Negros people eat the fresh fruit cut open and dipped in salt. The pulp is the part you eat; the seeds are spat out and the skin is usually left. Brined batuan is served as an appetizer the way salted green mango is, and even the ripe yellow fruit gets salt or bagoong rather than being eaten plain, because it stays sour. Raw eating is a snack habit, though. Most of the fruit goes into the pot.

Where Does Batuan Grow?

Batuan is native to the Philippines. Current botanical references recognize the Philippines as its native range, although some older sources give it a wider Southeast Asian distribution. Within the country it has been recorded across Luzon, on Mindoro, Palawan, Masbate, Panay, Negros, and Leyte, and in parts of Mindanao. It grows mainly in lowland areas.

Is It Only Found in Iloilo?

No. The tree grows across the Philippines, but the cooking tradition around it is strongest in Iloilo and Negros, and those are two different things. Batuan is strongly associated with Iloilo because it appears in several of the region’s best-known dishes, not because the tree grows only there.

When Is Batuan in Season?

Fresh batuan is usually easiest to find around April to June, although the timing varies by place and some trees keep fruiting into the rainy season. There is no reliable nationwide harvest calendar for it. That short season is also one reason processed forms such as powder, paste, and puree are useful.

How to Choose the Fruit at the Market

Look for firm, green fruit with smooth, unbroken skin. Green fruit sours the pot more than yellow, so for cooking, green is what you want; a little yellowing means the fruit is riper and slightly milder, and that is fine. Avoid soft spots, wrinkled skin, or dark patches. Size is not a quality signal, since small fruits are as sour as large ones, but if you are buying by the piece, pick similar sizes so they soften at the same rate.
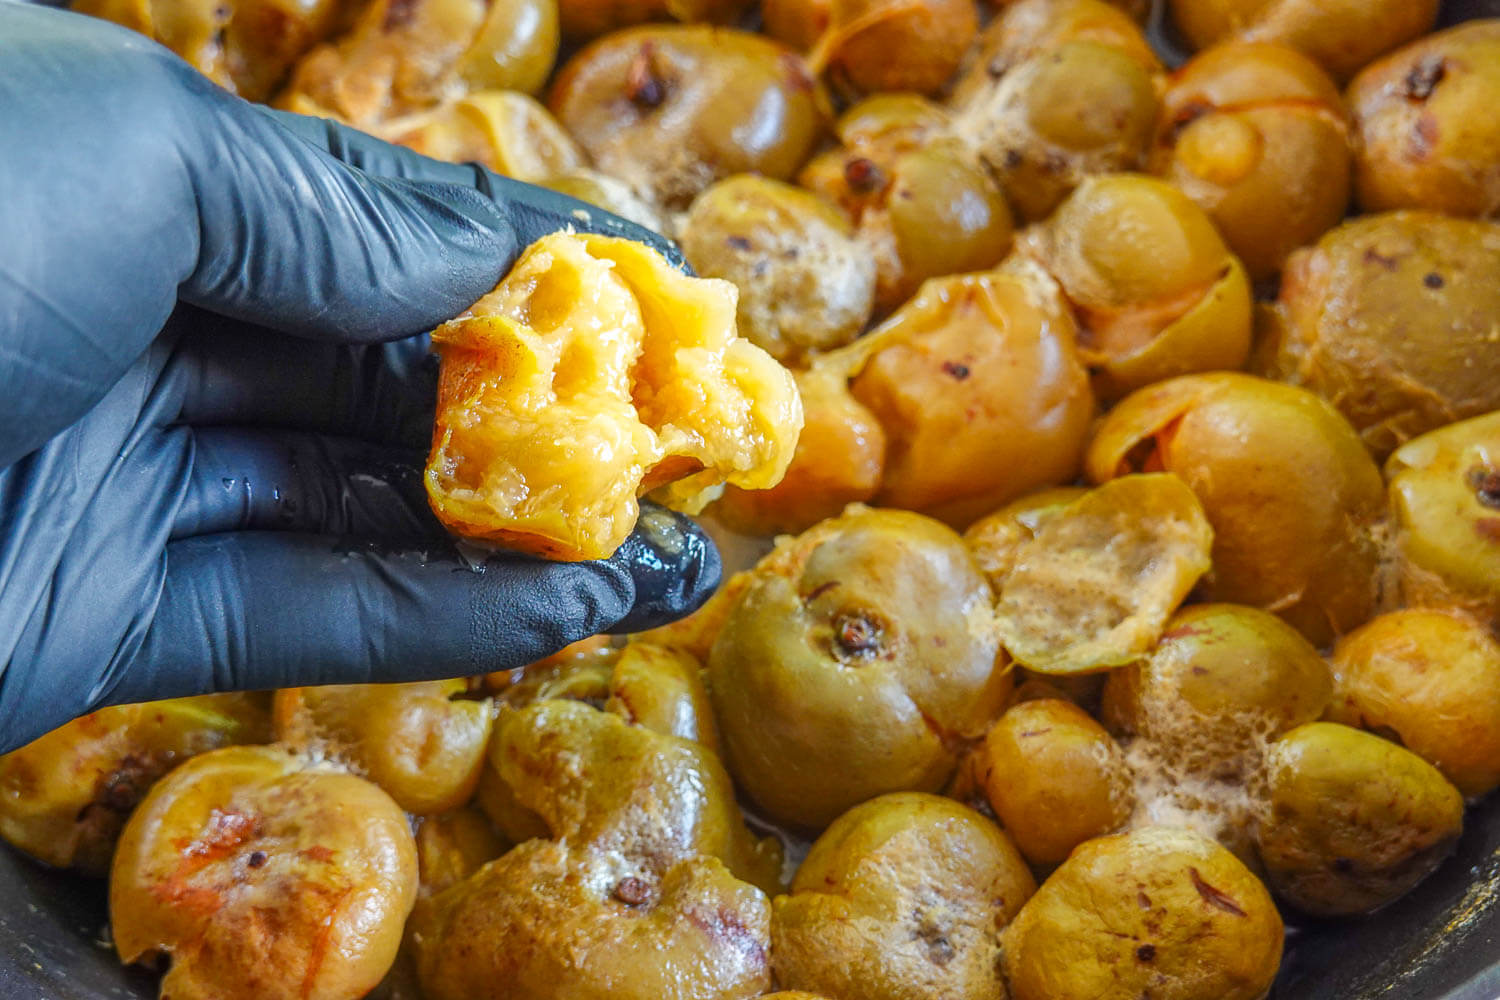
Boiled batuan

How to Store and Freeze It

Fresh batuan ripens quickly at room temperature. Left on the counter it turns yellow within days, and the sourness you bought it for starts to fade. I could not find a published shelf-life study for fresh batuan, so the times below are general fresh-fruit guidance.

  • Room Temperature – A day or two at most, if you plan to cook with it right away.
  • Refrigerator – Keep the whole, unwashed fruit in a paper bag or a loosely closed container in the crisper. It should hold for about a week. Use any fruit that is turning yellow first.
  • Freezer – Freezing is the practical way to keep batuan past its season. Wash and dry the fruit, then freeze it whole in a freezer bag with the air pressed out, or vacuum sealed if you can. There is no need to cut it or remove the seeds. Drop the fruits you need into the pot frozen; they soften in the broth the same way fresh ones do. The sourness holds up well in the freezer. Use it within a few months for the best taste.

Where to Buy Batuan

In the Philippines

Fresh batuan is easiest to find in Western Visayas during the season, in the public markets of Iloilo and Negros Occidental, sold by the piece or by the kilo. Outside those provinces, fresh fruit is a matter of luck. A few weekend market vendors in Metro Manila bring some up from Negros, and Lazada and Shopee sellers ship fresh and pickled batuan from the Visayas, but supply comes and goes. The paste and the powder are much easier to find: Mama Sita’s sells a batuan fruit paste in supermarkets nationwide, and batwan powder from Negros and Iloilo makers is sold online.

Outside the Philippines

Fresh and frozen batuan are not sold commercially abroad as far as I can find, which matches what I found when I lived in the US. What you can buy is the paste and the powder. Mama Sita’s Batuan Fruit Paste is carried by Filipino online grocers in the United States and turns up in Filipino stores in New Zealand and elsewhere, and batwan powder from Negros is sold on Amazon, Etsy, and Filipino online shops in the US. If your local Filipino or Asian supermarket carries Mama Sita’s products, ask them to order the paste. Stock changes, so check before you plan a kansi around it.

Its Place in Filipino Food Culture

Cansi, KBL, and Ilonggo fish tinola are gently sour, and that gentleness comes from this fruit. Made with tamarind instead, they are still good dishes, but they taste different, and cooks from Iloilo notice. Slow Food put batwan on its Ark of Taste, a list of traditional foods at risk of disappearing, because younger cooks in the Visayas are switching to packaged souring mixes that are easier to buy. The powder and paste help here. They let someone from Iloilo who now lives in Manila or California cook kansi the way it is cooked at home.
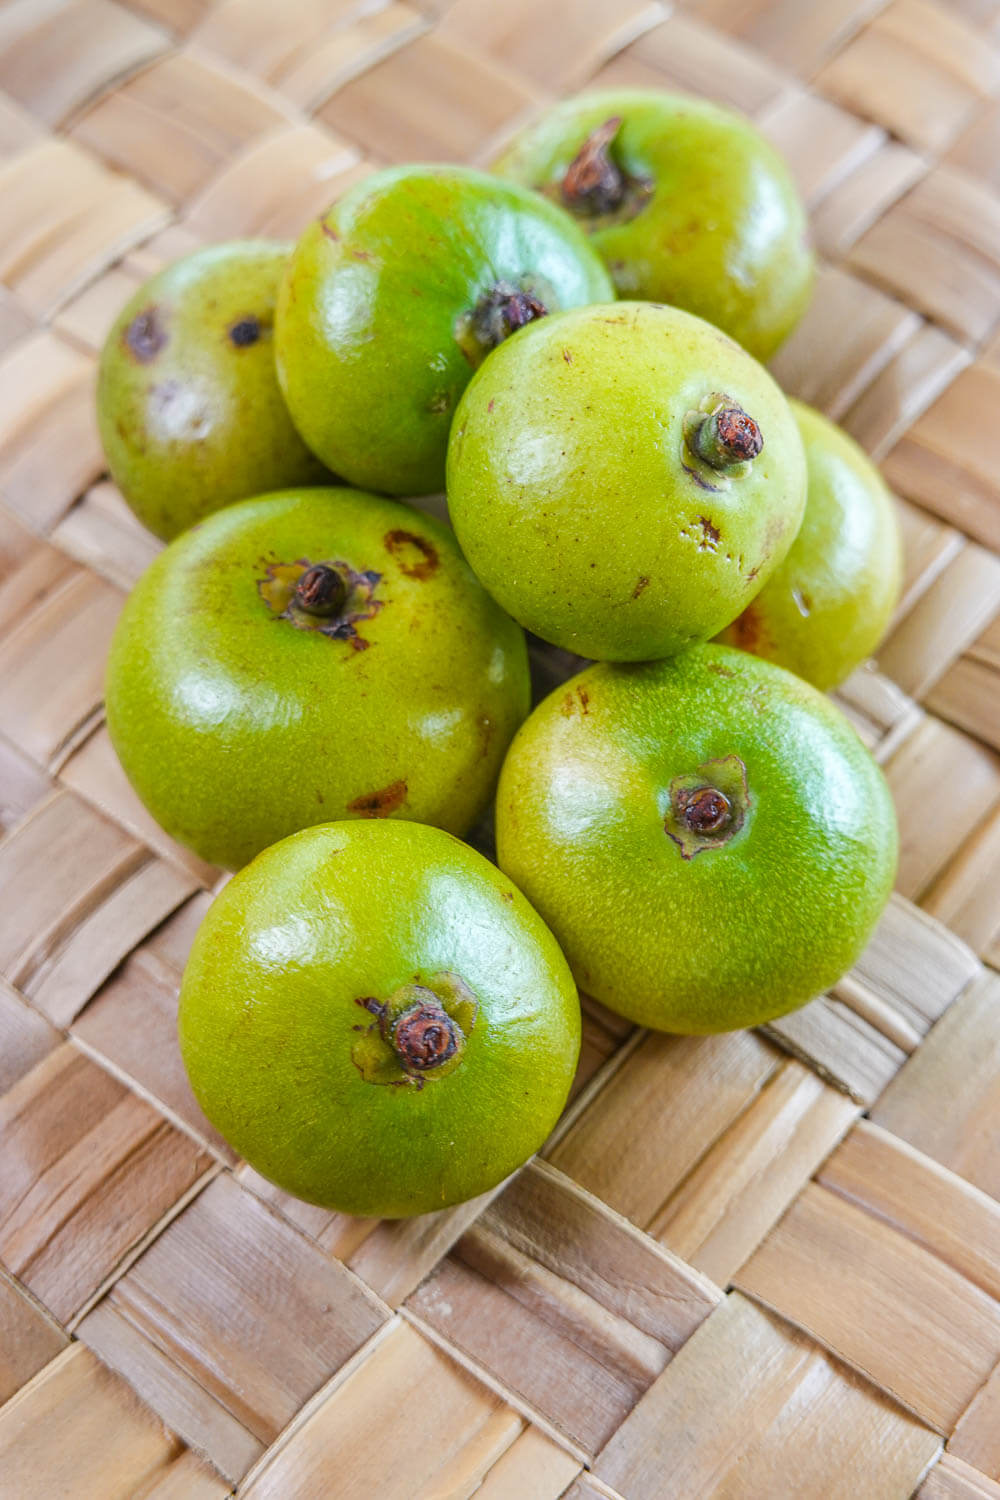
Batuan fruit

Frequently Asked Questions

Is it batuan or batwan?

Both spellings refer to the same fruit. Batuan is the spelling used by most government and research sources, while batwan is common in everyday use in Iloilo and Negros, and you will see both on product labels.

What is batuan called in English?

There is no common English name for it. English-language sources use the local name batuan or batwan, or the scientific name Garcinia binucao. Some older references call it binukaw, the Tagalog name.

How much batuan should I use?

Most kansi and KBL recipes use 5 to 8 fruits for 6 to 8 cups of broth. Start there, taste after the fruit softens, and add more if you want the soup more sour.

What is the best substitute for batuan?

Kamias is the substitute most Ilonggo recipes name first, and sinigang mix or fresh tamarind is the easiest to find. Green mango also work in fish dishes. None of them tastes exactly like batuan, but all of them sour the pot.

Can you freeze batuan?

Yes. Wash and dry the fruit, freeze it whole in a sealed bag, and add it to the pot straight from the freezer. The sourness holds up well after freezing.

Can I use batuan powder instead of fresh?

Yes. Stir a little into the broth near the end of cooking, taste, and add more as needed. Brands differ in strength, so follow the package directions rather than a fixed ratio to fresh fruit.

Batuan Recipes to Try

  • Cansi โ€“ The Ilonggo beef shank soup with green jackfruit, lemongrass, and annatto. My recipe uses sinigang mix; if you have batuan, use five to six fruits in its place and add them with the jackfruit.
  • KBL (Kadyos, Baboy, at Langka) โ€“ Pork hocks, pigeon peas, and jackfruit. The recipe gives five batuan or one and a half tablespoons of sinigang mix, so it works either way.
  • Sinigang na Bangus โ€“ Milkfish in a tamarind broth with okra, sitaw, and kangkong. Fresh batuan works in this pot too; use six to eight fruits instead of the mix and press them once soft.
  • Sinigang โ€“ My main sinigang recipe, soured with young tamarind. It covers how each souring ingredient changes the soup, which is the best way to understand where batuan fits.

Batuan is easier to cook with than to find. If you come across the fresh fruit, buy more than one pot needs and freeze the extra whole. If you cannot find it at all, use the paste or powder before any substitute, since it is the same fruit.

Ginataan Recipe

23 Ginataan Recipe Ideas: Filipino Dishes in Coconut Milk

Ginataan is a cooking method, not one dish. Gata means coconut milk, and anything simmered in it belongs under that name. That is why this list starts with spicy pork belly and ends with sweetened corn. Both are ginataan.

Paksiw na isda sa gata

The word gets used two ways, and that can trip people up. Say ginataan on its own and most people picture the dessert, the warm bowl with bilo-bilo and sago in it. Add an ingredient after it, as in ginataang manok or ginataang hipon, and now you are talking about dinner. I have both here. If you came for the dessert, jump to the sweet section at the bottom.

I have been publishing ginataan recipes since 2009. Going back through the category to build this list, I counted almost seventy of them, which was more than I expected.

The one thing I pay attention to in every one of these is the gata itself. Cook it down until a little oil separates out and rises to the surface. That is the stage where the flavor turns rich instead of milky, and it is worth the extra ten or fifteen minutes on the stove. Keep the heat at a slow simmer while it reduces. A hard boil is what makes coconut milk curdle.

I organized this list by what goes in the pot, because that is how I decide what to cook. Pork, chicken, fish, seafood, vegetables, then the sweet ones. Pick a section and go from there. Some of these are dishes I grew up with in Las Piรฑas. Others I worked out later, after I moved to the US and started cooking for my own family.

Fresh gata is better than canned. There is no comparison, and I say so on almost every recipe here. But canned coconut milk is what I use most of the time because that is what the store carries. If you can get fresh, squeeze it and use the first extraction, the kakang gata, at the end of cooking.

Pork in Coconut Milk

Pork and gata is the combination most people think of first, and Bicol is the reason why. These are the recipes where the coconut milk cooks down the furthest, until the sauce clings to the meat instead of pooling around it.

Bicol express bowl

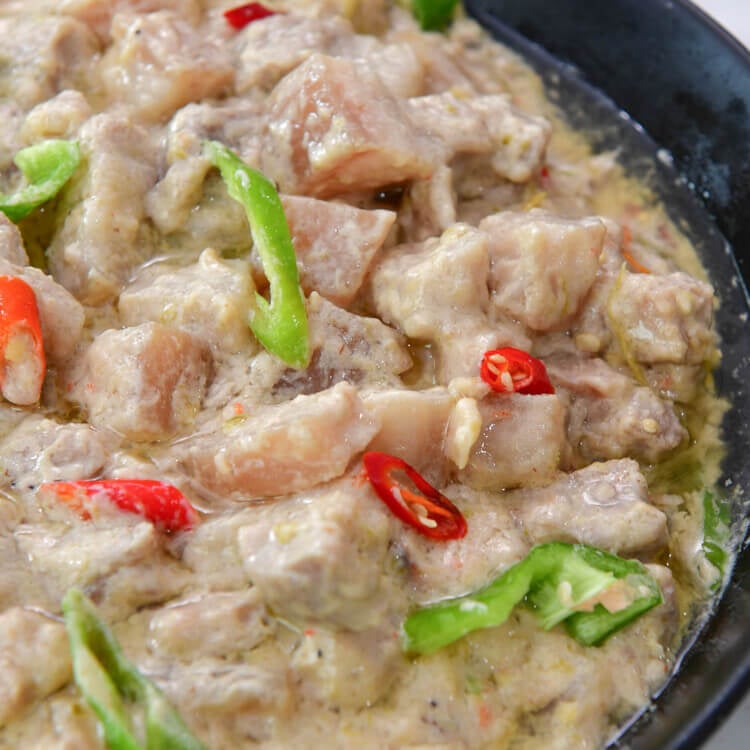
Bicol Express

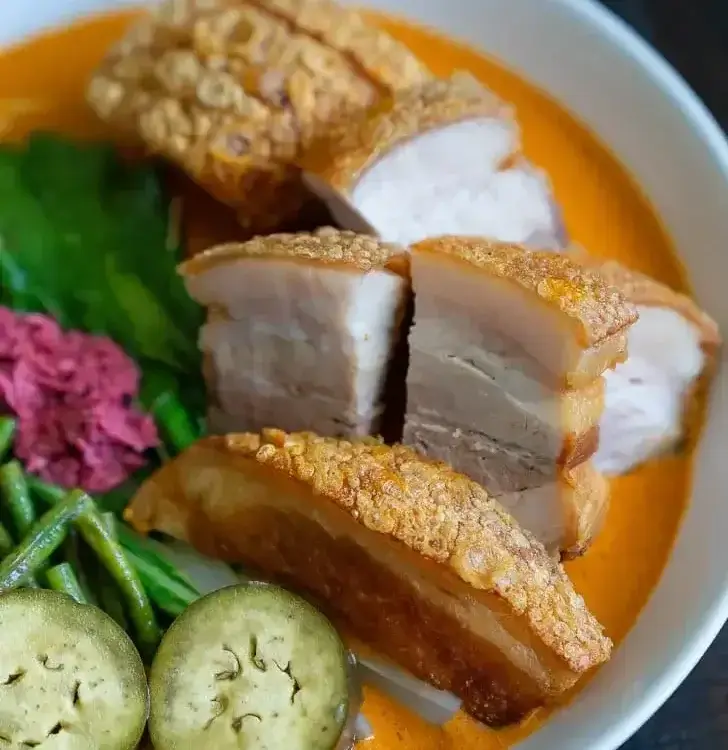
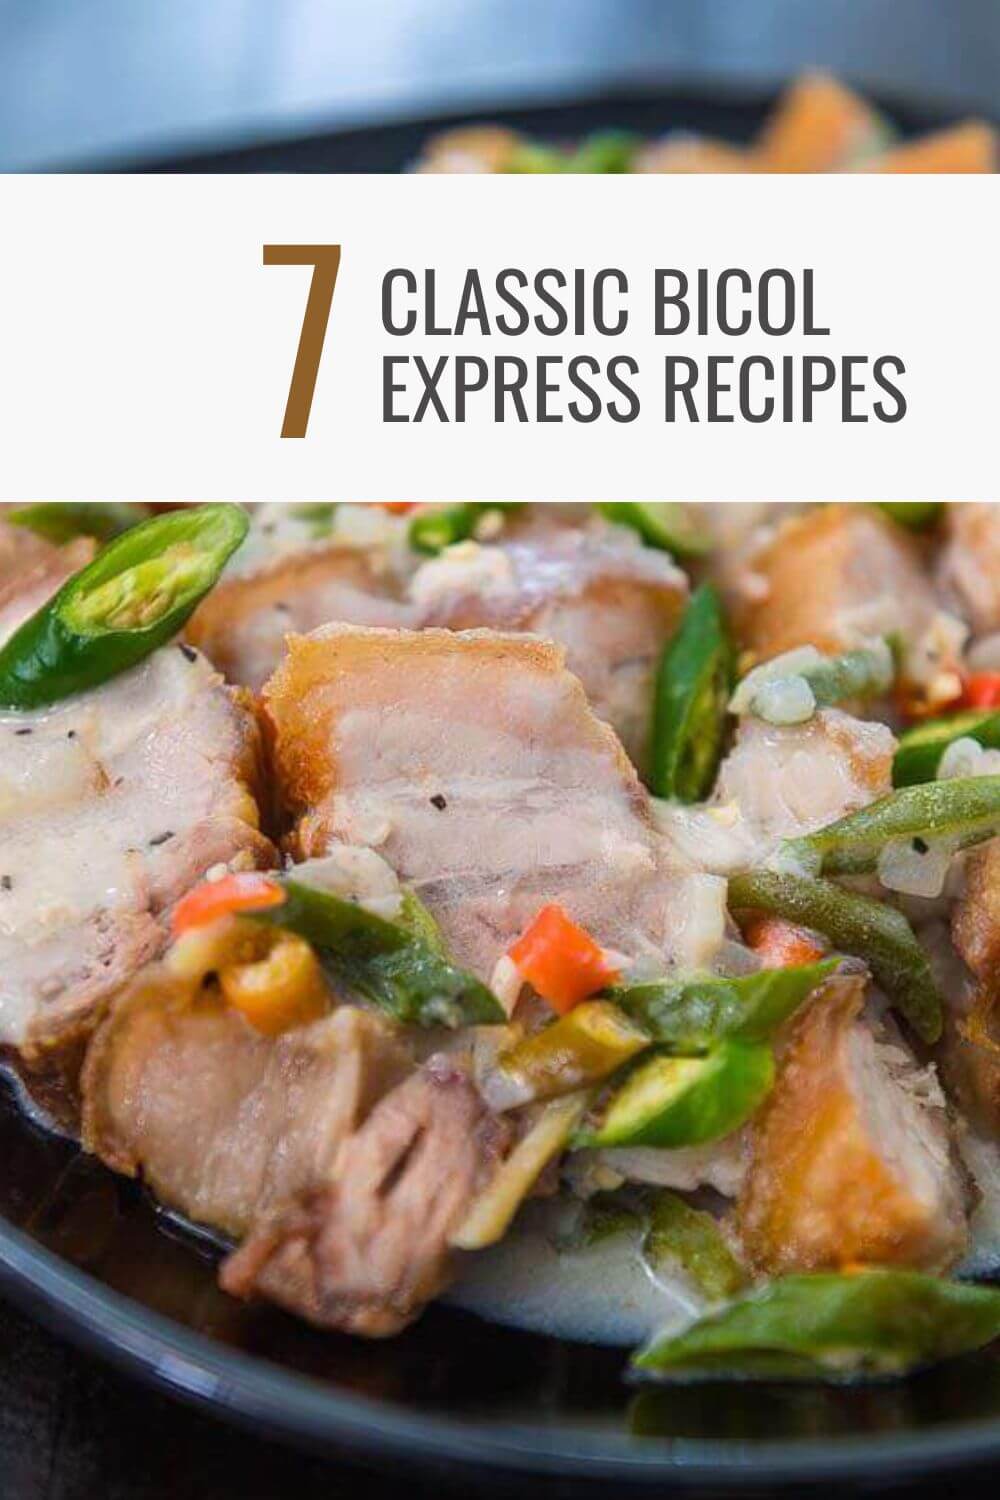
The one that made this whole style famous. Pork belly, plenty of long green chili, shrimp paste, and coconut milk cooked down until the sauce is thick. It was named after a train and popularized in Malate, though Bicolanos will tell you a similar dish called gulay na lada was already being cooked in their province. Reduce the sauce further than you think you should. That is where the flavor is. I have written up seven versions of this one dish if you want to compare them side by side.

GET THE RECIPE
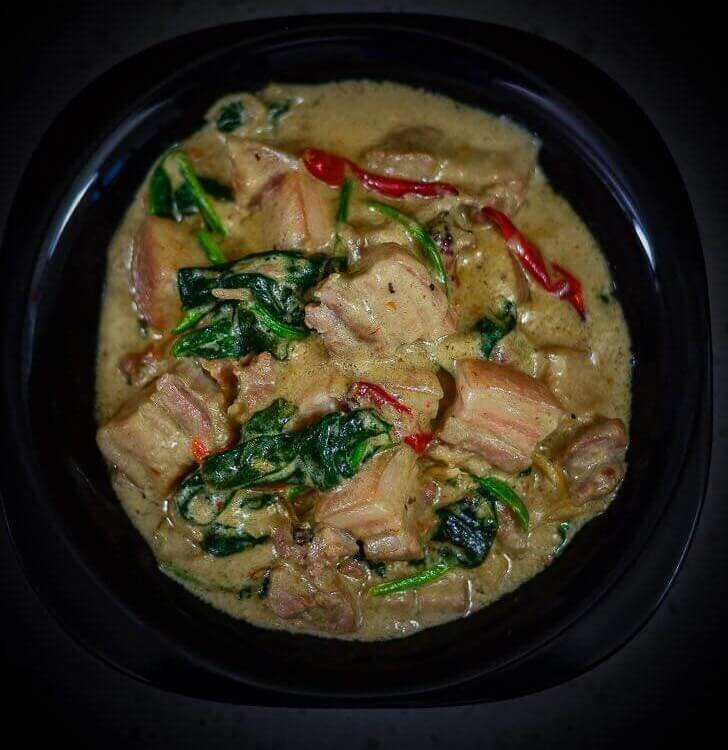
Pork Ginataan Recipe

Pork Ginataan

My version of ginataang baboy. I like it rich, creamy, and spicy, with a thick sauce rather than a soupy one. I use coconut milk and coconut cream together, and about twelve Thai chili peppers go in. Use coconut cream alone if you want it heavier.

GET THE RECIPE

Gising Gising

Ground pork and chopped green beans in coconut milk with bagoong and chili. The name means “wake up,” and the heat is the reason. I eat this for breakfast with white rice. This is easy to put together. If you want the winged bean version, I have that too as Sigarilyas Gising Gising.

GET THE RECIPE
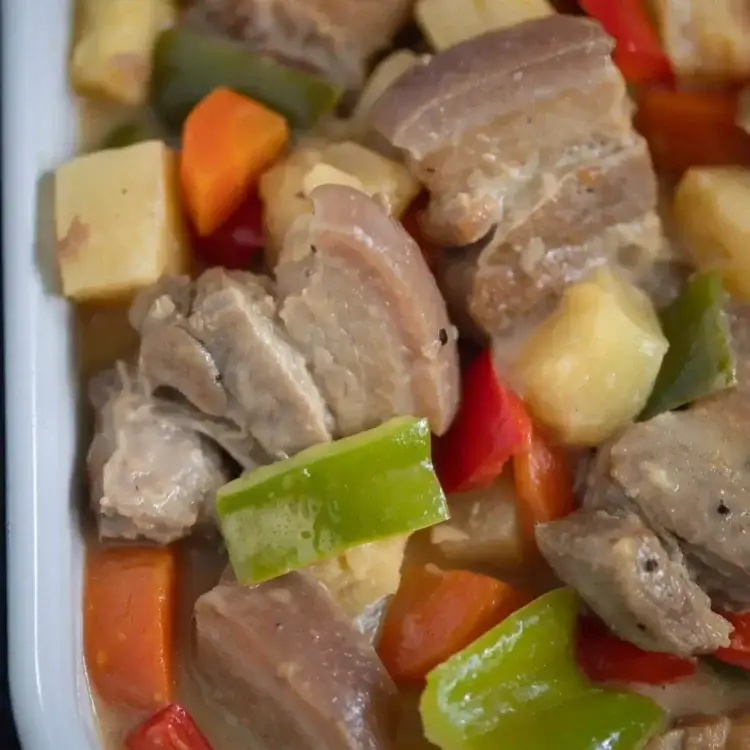
Pininyahang Baboy sa Gata Recipe

Pininyahang Baboy sa Gata

Pork belly simmered with pineapple chunks, pineapple juice, and coconut milk. The pineapple makes this the sweet one in the pork section. Bell pepper and carrots go in near the end. Add half the pineapple chunks with the juice at the start and save the rest for the finish so they hold their shape.

GET THE RECIPE
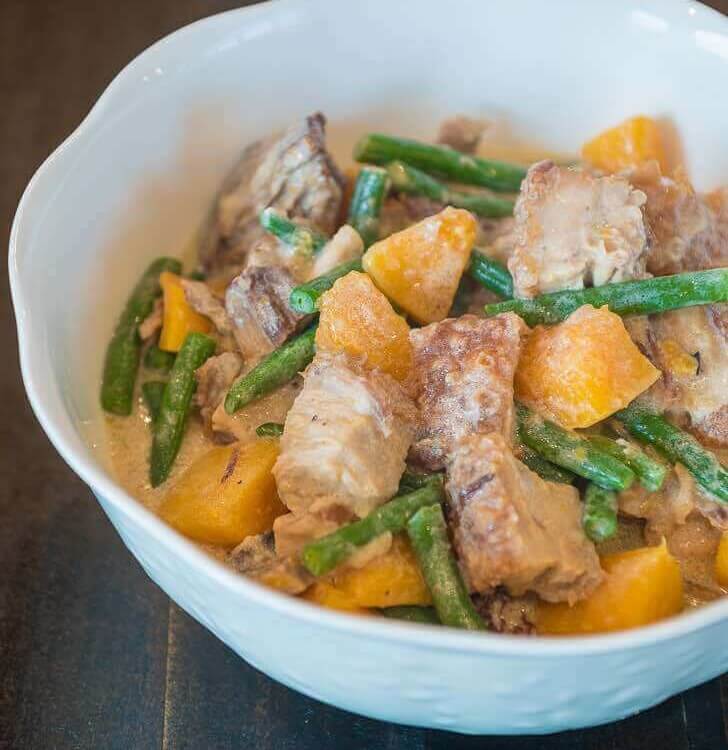
ginataang lechon kawali recipe panlasang pinoy

Ginataang Lechon Kawali with Kalabasa and Long Green Beans

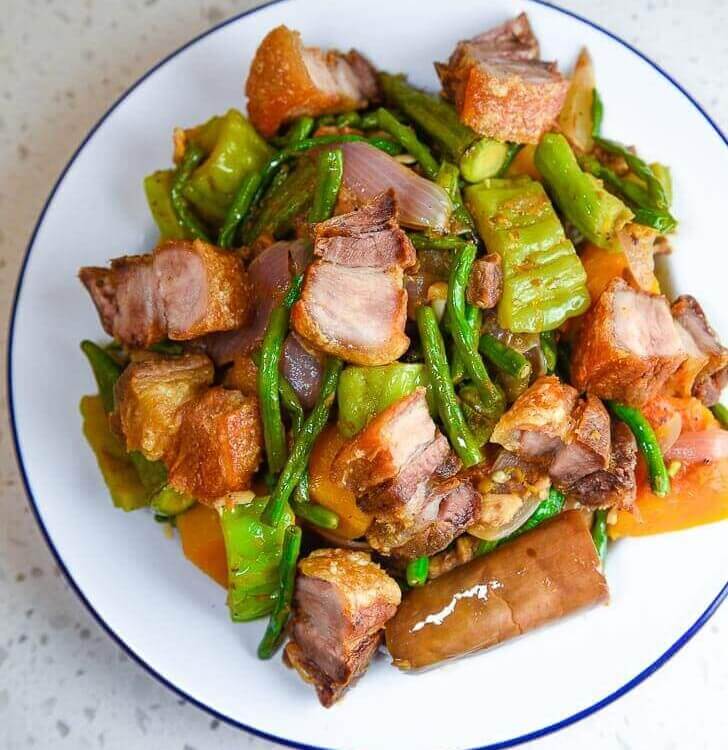
Crispy pork belly dropped into a gata sauce with squash and beans. The crackling softens where it meets the sauce and stays crisp on top, which is the whole point of adding it at the end. This is a good way to use leftover lechon kawali from the night before.

GET THE RECIPE

Chicken in Coconut Milk

Chicken takes gata differently than pork does. There is less fat rendering into the sauce, so the coconut milk has to carry more of the flavor on its own. Bone-in pieces help. I skip breast on its own for these.

Ginataang manok

Ginataang Manok

Cut-up whole chicken, gata, chili, malunggay, and dahon ng sili. No squash, no papaya, nothing to stretch it. Just the chicken and the sauce. This is everyday food, the kind you cook on a regular night to go with rice. Keep the pot from boiling hard once the gata is in.

Ginataang Manok
Ginataang Manok with Papaya

Ginataang Manok with Papaya

Chicken pan-fried first, then simmered in spicy coconut milk with green papaya and spinach. Pan-frying takes about a minute and a half per side and leaves browned bits that add flavor to the sauce. The papaya goes in for the last five minutes so it stays firm. Good when it is chilly out.

GET THE RECIPE
chicken bicol express recipe

Chicken Bicol Express

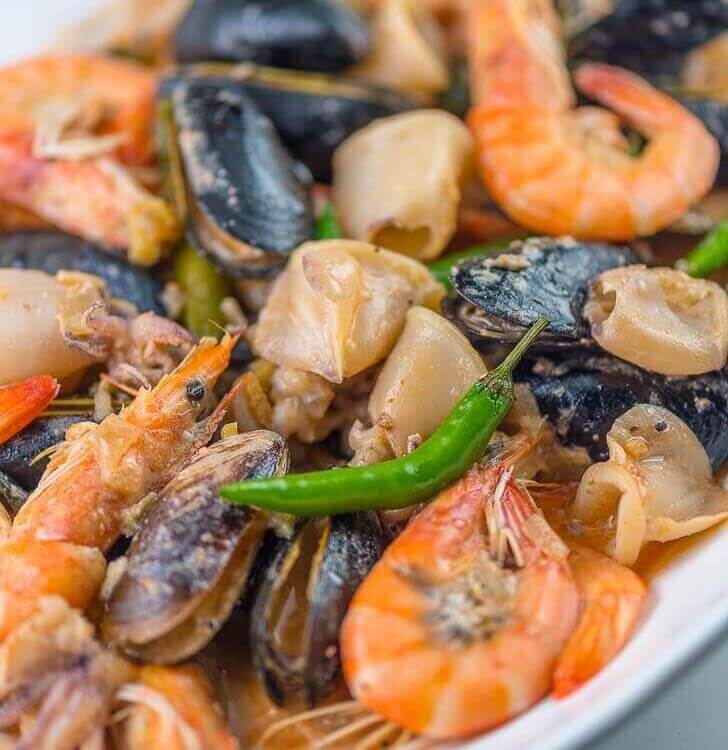
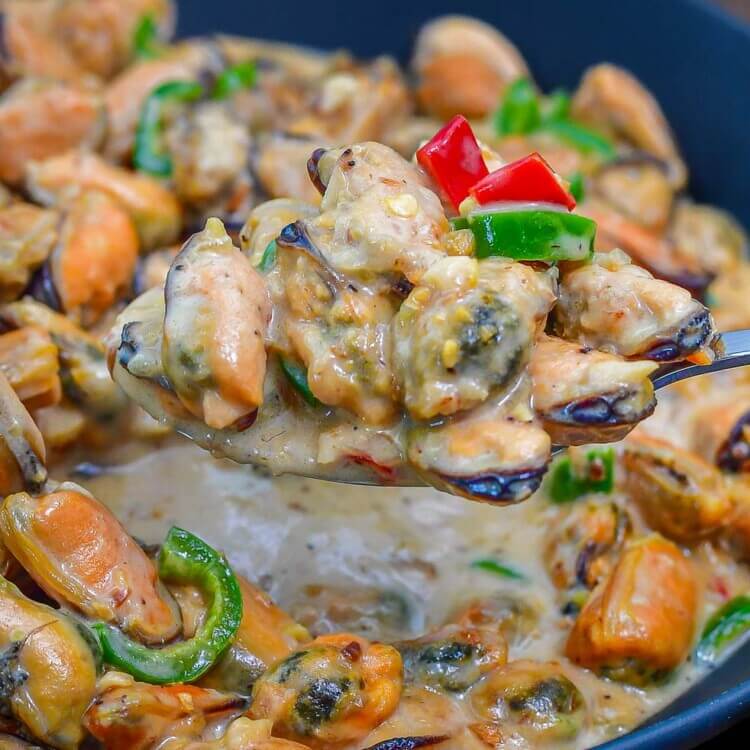
Bicol express built on chicken instead of pork belly. Same shrimp paste, same chili, same reduced coconut sauce. The chicken makes it less rich than the pork belly version, and it cooks faster. If you want the whole family of these, I also have Seafood Bicol Express and Pork Chop Bicol Express.

GET THE RECIPE

Fish in Coconut Milk

Fry the fish before it goes into the gata. My mom taught me that and I have never stopped doing it. The coating holds the fish together through the simmer, and it thickens the sauce a little as it cooks. Delicate fish can fall apart during the simmer.

ginataang tilapia recipe

Ginataang Tilapia

Fried tilapia simmered in coconut milk with spinach, ginger, garlic, and chili. Get the onion, garlic, and ginger fragrant before the gata goes in. I season with fish sauce. This is the kind of dish where you look down and realize you have already gone through two cups of rice.

GET THE RECIPE
sinanglay na tilapia recipe

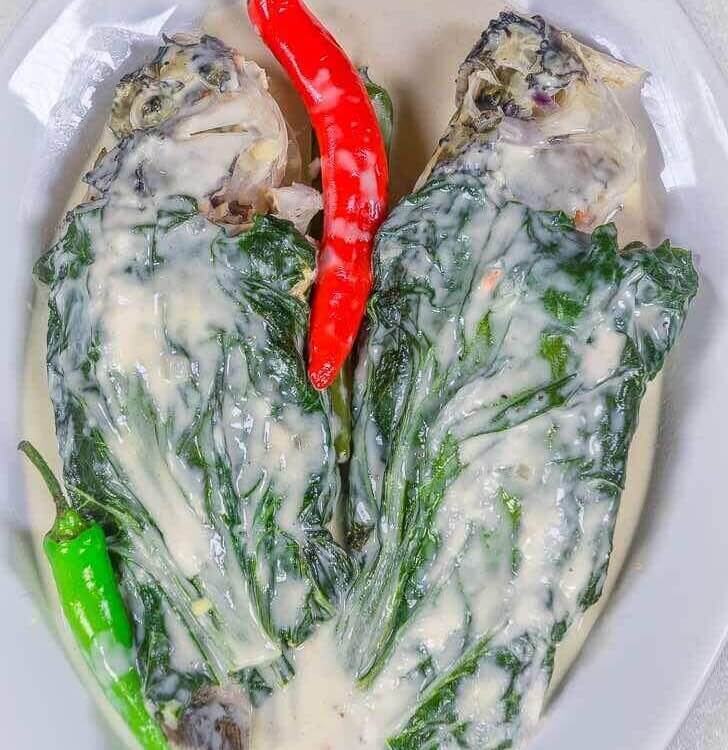
Sinanglay na Tilapia

A Bicolano dish. The tilapia is stuffed with tomato, onion, ginger, and garlic, wrapped in bok choy, then simmered in coconut milk. I use two bok choy leaves per fish so the whole thing is covered. A friend from Bicol told me they tie the fish with lemongrass instead, which holds the stuffing in and adds aroma to the sauce.

GET THE RECIPE

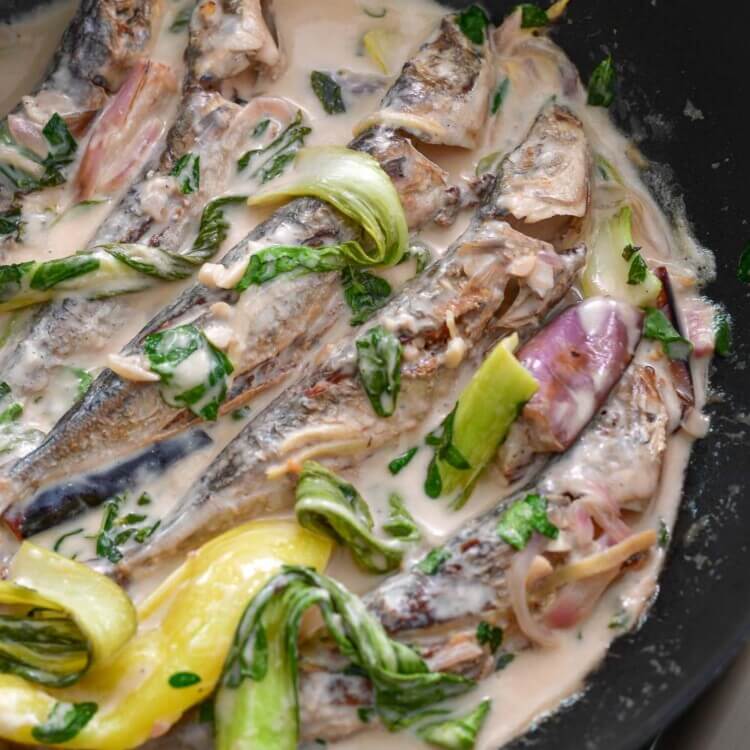
Creamy Coconut Milk Fish Stew

Galunggong fried crisp, then simmered with eggplant, baby bok choy, and malunggay. A splash of vinegar cuts through the richness of the coconut milk. Season the fish first and let it sit ten minutes before frying. Tilapia, bangus, or tanigue all work if galunggong is hard to find.

GET THE RECIPE
ginataang salmon

Ginataang Salmon

Salmon in gata with vegetables. Salmon carries more fat than tilapia or galunggong, so it holds together in the sauce without being fried first. Add it late and give it just a few minutes, because it goes from done to dry quickly.

GET THE RECIPE

Shrimp, Crab, and Squid in Coconut Milk

Seafood cooks fast, and coconut milk takes twenty minutes or more to reduce properly. So the order matters here. Reduce the sauce first, then add the seafood at the end.

Ginataang Hipon

Ginataang Hipon

Shrimp in reduced coconut milk with garlic, ginger, and chili. Let the gata boil down by half before the shrimp goes in, which takes about twenty to twenty-five minutes over medium heat. The shrimp only needs five to seven minutes after that.

GET THE RECIPE

Ginataang Alimasag

Blue crabs with spinach in coconut milk, with shrimp paste and Thai chili. Cook the gata until it thickens and the oil comes out, which can take more than twenty minutes. Cut the crabs in half vertically before they go in so the flavor gets into the sauce. Squash and string beans work in place of the spinach.

GET THE RECIPE
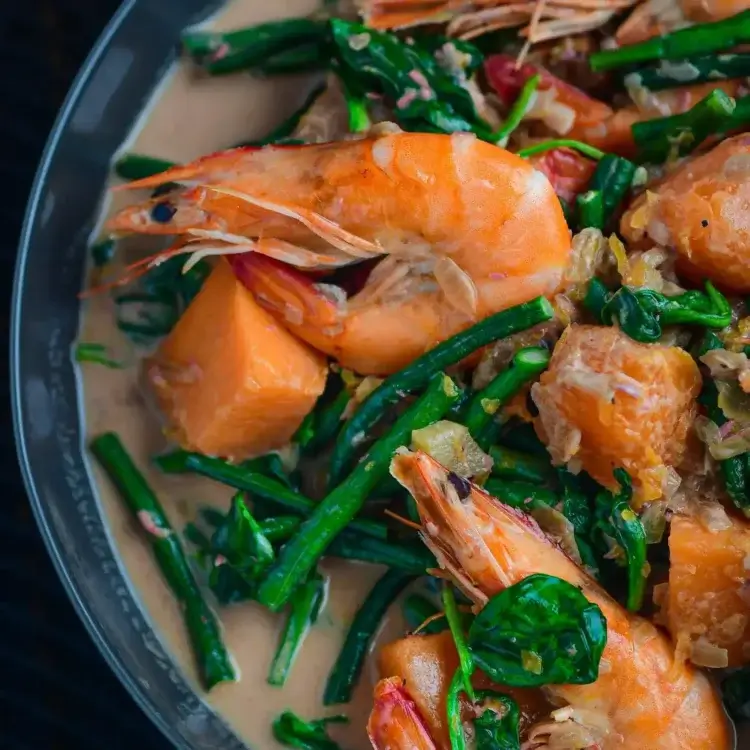
Ginataang Kalabasa at Sitaw with Crab

Ginataang Kalabasa at Sitaw with Crab

Squash and string beans simmered in coconut milk with crab. Use boiled pork belly and cook it until the skin crisps before the vegetables go in. Slice the beans into two-inch pieces and cube the squash before you start, because once the gata is in the pot everything moves quickly.

GET THE RECIPE

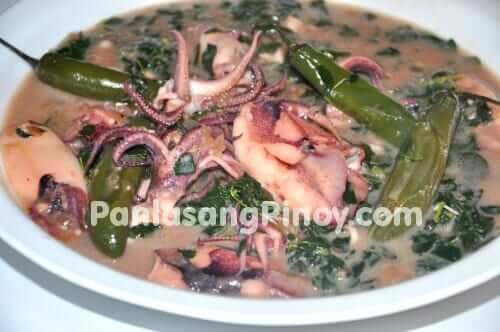
Ginataang Pusit

Squid in coconut milk with malunggay and Serrano peppers. Cook the squid for one minute, take it out, then reduce the gata for twelve to eighteen minutes before putting it back. That keeps the squid tender. Remove the ink sac when you clean it so the sauce stays pale.

GET THE RECIPE

Vegetables in Coconut Milk

Vegetables in gata are filling enough to be the main dish. A little pork or shrimp is usually all the meat these need, since the coconut milk carries most of the flavor. For tofu-based versions, I have a ginataang gulay with tofu and shrimp and a ginataang talong with malunggay and tofu.

Laing

Dried taro leaves cooked in coconut milk with pork, chili, and shrimp paste. In Bicol they call it pinangat. No oil and no sautรฉing are needed here. Combine everything with the coconut milk and boil until the pork is tender. Do not stir right after the dried taro leaves go in. Let them sit in the coconut milk and cook down first. I also have a Spicy Laing, a Laing with Shrimp, and a Laing na Gabi made with fresh taro leaves instead of dried.

GET THE RECIPE
Ginataang Kalabasa

Ginataang Kalabasa

Squash and string beans simmered with seared pork belly and bagoong. The coconut milk goes in early and simmers forty to fifty minutes with the pork before the vegetables ever touch it. Add the squash for eight minutes and the beans for five. Start with a small amount of shrimp paste and taste before adding more.

GET THE RECIPE

Ginataang Langka

Unripe jackfruit in coconut milk, cooked down until the langka is soft enough to break with a spoon. This is a main dish, not a side. Wear gloves or oil your hands when you cut fresh langka because of the sap. I have versions with malunggay and dilis, with tinapa flakes, and with pork.

GET THE RECIPE

Ginataang Puso ng Saging

Banana blossom with ground pork in coconut milk. Vinegar goes in before the gata and cooks for about two minutes, which takes the raw edge off the blossom. Prepare the puso ng saging by peeling off the tough outer layers until you reach the pale core.

GET THE RECIPE

Sweet Ginataan

The sweet versions follow the same method, with coconut milk, sugar, and starch to thicken the mixture. These are meryenda, though I eat ginataang bilo-bilo cold for breakfast.

ginataang bilo bilo recipe

Ginataang Bilo-bilo with Langka

Glutinous rice balls, sago, and ripe jackfruit in sweetened coconut cream. Add the bilo-bilo after the langka and stir every three minutes so it does not settle and stick. I like this warm in the afternoon and cold in the morning. Two of the three need a little preparation, so here is how to cook sago pearls and how to make bilo-bilo.


GET THE RECIPE

Ginataang Halo-halo

The loaded one. Sweet potato, ube, taro, saba bananas, sago, and bilo-bilo, all in coconut milk. In Davao and other parts of the country this is called binignit. Add the tubers before the bananas since they take longer to soften. The bilo-bilo goes in near the end so it does not overcook into the sauce.

GET THE RECIPE

Ginataang Mais

Corn kernels and glutinous rice cooked in coconut milk with sugar. It takes under twenty-five minutes from start to finish and has the shortest ingredient list of any dessert here. Stir it often once the malagkit starts to thicken so it stays smooth and does not catch on the bottom of the pot.

GET THE RECIPE

More Ginataan Recipes You Might Like

  • Ginataang Bangus โ€“ Fried milkfish in coconut milk with shrimp paste, string beans, and Thai chili.
  • Chicken Adobo sa Gata โ€“ Chicken adobo with coconut milk added near the end of cooking.
  • Adobong Baboy sa Gata โ€“ The pork version, with the gata going in after the meat is tender.
  • Pork Binagoongan sa Gata โ€“ Pork belly and bagoong with coconut milk and pan-fried eggplant.
  • Ginataang Hipon, Sitaw at Kalabasa โ€“ Shrimp with squash and string beans, an easier option than dealing with crab shells.
  • Ginataang Galunggong โ€“ Round scad simmered in coconut milk with Serrano peppers.
  • Adobong Pusit sa Gata โ€“ Squid adobo finished with coconut milk. Remove the squid early so it does not toughen.
  • Ginataang Baka โ€“ Beef in coconut milk with green beans and spinach.
  • Pork Kaldereta sa Gata โ€“ Kaldereta with coconut milk in place of some of the tomato sauce.
  • Ginataang Kuhol โ€“ Apple snails in coconut milk. Soak them overnight before cooking.
  • Mixed Seafood in Coconut Milk โ€“ Shrimp, squid, and mussels together in one gata sauce.
  • Ginataang Gulay โ€“ Squash and snake beans with pork and shrimp.
  • Utan nga Langka โ€“ The Visayan version of ginataang langka, made with dried fish.
  • Paksiw na Isda sa Gata โ€“ Fish steaks in coconut milk with vinegar, so no bones to work around.
  • Binignit โ€“ The Visayan dessert with taro, saba, and landang.
  • Ginataang Tulingan โ€“ Bullet tuna in coconut milk with eggplant. This one needs time to cook down.
  • Ginataang Santol (Sinantolan) โ€“ Minced cotton fruit in coconut cream with ground pork.
  • Shrimp Laing โ€“ Laing built around shrimp rather than pork.
  • Adobong Hipon sa Gata โ€“ Shrimp adobo finished with coconut milk.
  • Beef Kaldereta sa Gata with Peanut Butter โ€“ Coconut milk and peanut butter in the same pot.
  • Pinakbet sa Gata with Squid โ€“ Pinakbet made with coconut milk instead of plain water.
  • Crawfish in Coconut Milk with Spinach โ€“ Worth making if you can get crawfish in season.
  • Snails with Spinach in Coconut Milk โ€“ A smaller-batch take on ginataang kuhol.
  • Kilawing Tuna with Coconut Cream โ€“ No stove is needed. The vinegar does the cooking and the gata smooths it out.

Frequently Asked Questions

What does ginataan mean?

It comes from gata, the word for coconut milk. In practice you will see it two ways. Ginataan on its own usually points to the dessert, the one with bilo-bilo and sago in it. Ginataang plus an ingredient names the dish, as in ginataang manok or ginataang hipon. Both are the same cooking method.

Should I use fresh or canned coconut milk?

Fresh is better. The flavor is cleaner, and it reduces into a richer sauce. I use canned most of the time because of availability, and it works. If you buy fresh, the first extraction is the kakang gata, and it is thicker. Save it for the end of cooking.

Why did my coconut milk curdle?

The heat was too high. Coconut milk separates when it boils hard. Bring it up to a boil once, then drop the heat and let it simmer. Stirring too little also causes it, especially in a thick pot.

How do I get that oil that comes out of the sauce?

Keep reducing. Coconut milk cooked long enough at a steady simmer will release a small amount of oil that sits on the surface. It usually takes twenty minutes or more. Once you see it, the sauce is where you want it.

What is the difference between Bicol Express and gising gising?

Bicol express uses pork belly cut into strips with long green chili as the main vegetable. Gising gising uses ground pork with chopped green beans. Both are seasoned with bagoong and cooked in coconut milk. I have a version that combines them if you cannot pick.

Can I make these without shrimp paste?

Yes. Fish sauce is the closest substitute. It adds salt and some fermented flavor, though it will not taste exactly like bagoong. Salt on its own works if you have neither. The dish will taste lighter, so add a little at a time and taste as you go.

How long does ginataan keep?

Two to three days in the refrigerator in an airtight container. Coconut milk spoils faster than most sauces, so do not leave it out on the counter. Reheat it slowly over low heat, since a hard boil will split the sauce. A splash of water or coconut milk brings it back if it thickened too much.

For the savory dishes, watch the pot near the end. Coconut milk goes from thin to thick to broken in a short stretch, so turn off the heat as soon as you see oil beading on the surface. Serve them hot with plenty of white rice. Share and enjoy!

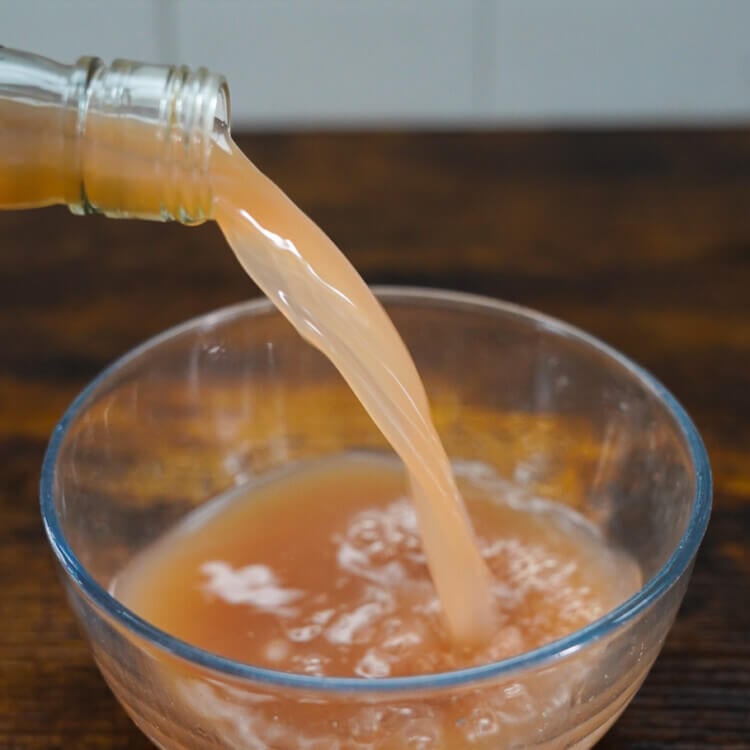
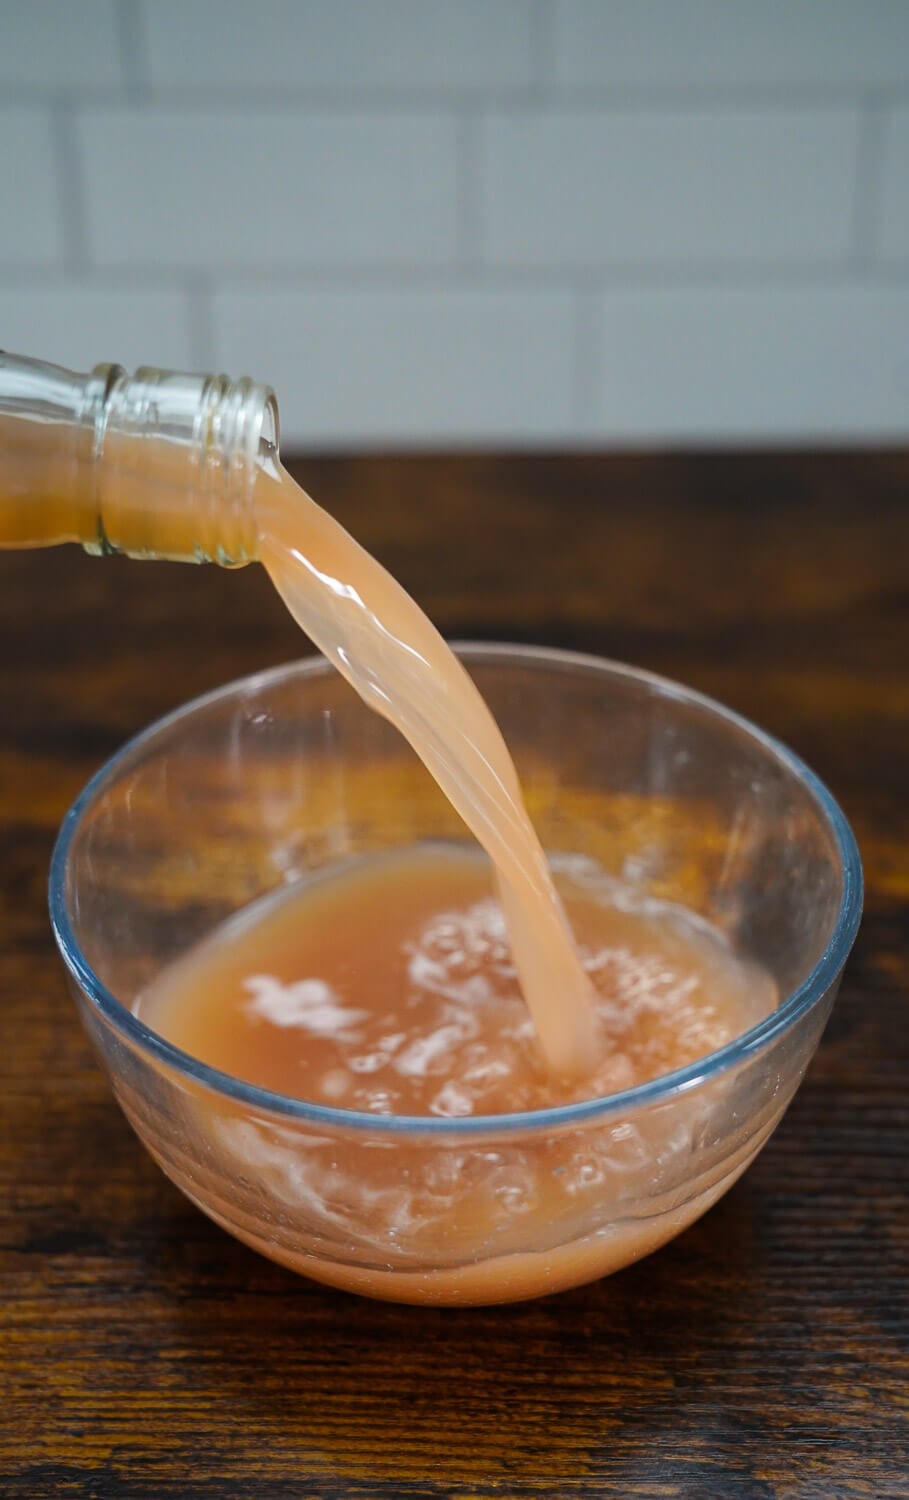
Pouring sukaรฅng tuba into a bowl

Filipino Vinegar: A Home Cook’s Guide

Let me guess. A recipe told you to “add vinegar,” you went to the store, and there were five different bottles of suka staring back at you. Which one did they mean? Does it even matter?

It does, and that is exactly what this guide is for. Filipino cooking uses more than one kind of vinegar, and they are not the same. Grab the wrong one and your adobo can come out sharper or flatter than you wanted. Grab the right one and the dish just clicks. I have been cooking with these for over thirty years, so let me walk you through them like I would a friend standing in my kitchen.

I keep several kinds on hand. Cane vinegar is my everyday workhorse. Coconut vinegar comes out for seafood, and spiced vinegar lives on the table whenever something fried is involved. By the end of this, you will know which bottle to reach for too.

What Is Filipino Vinegar?

Suka is the Filipino word for vinegar, but Filipino vinegar is not just one kind. It can be made from sugarcane juice, coconut sap, nipa palm sap, kaong sap, rice, or fruit. The ingredient used to make it affects how the vinegar smells, how sour it tastes, and which dishes it works well with.
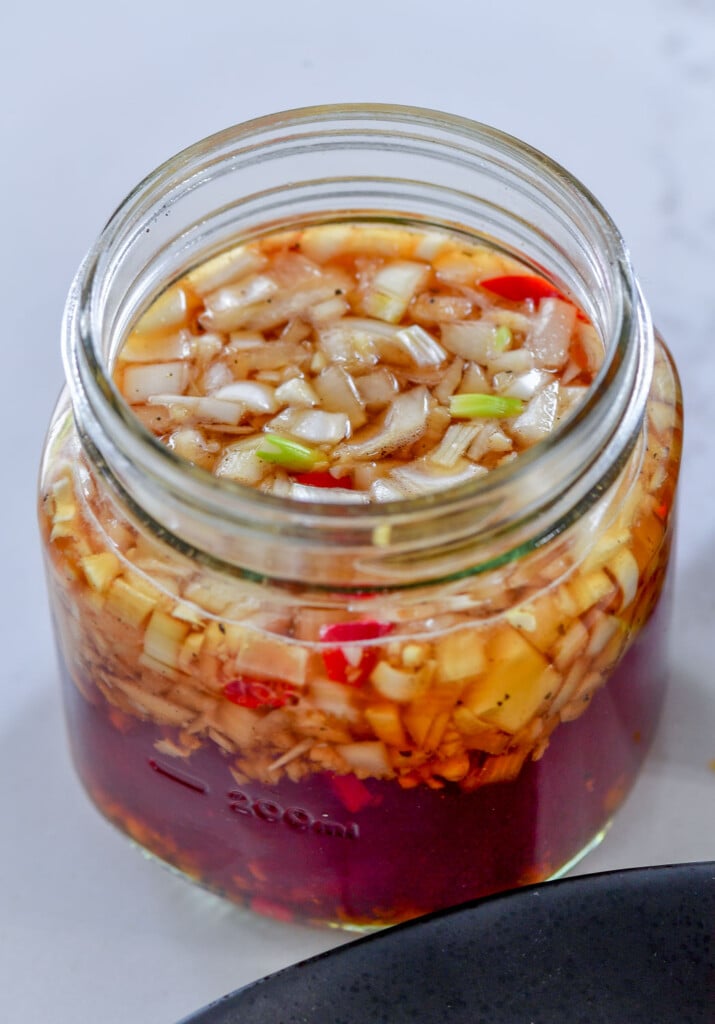
Pouring sukaรฅng tuba into a bowl

Traditional vinegar begins with something sweet. The natural sugar first ferments into alcohol. Acetic acid bacteria then convert that alcohol into vinegar. This also explains the connection between some Filipino vinegars and local fermented drinks. Coconut sap can first become tuba, then go through another fermentation to become sukang tuba.

Why does this matter in the kitchen? A cane vinegar may give adobo a direct, familiar sourness, while coconut vinegar can add a more noticeable fermented aroma to kinilaw or paksiw. The strength can also change from one producer to another, so two bottles labeled cane vinegar may not taste exactly the same.

Check the label before buying. Naturally fermented vinegar may retain some of the aroma and flavor of the sap, juice, or fruit used to make it. Distilled white vinegar often has a more direct sour taste, even when the acidity on the label is similar.

Do not rely on color alone. Some naturally fermented cane vinegars are pale gold, while others are clear. A darker bottle is not automatically naturally fermented, and a clear one is not automatically synthetic. Look at the ingredient list and check for terms such as โ€œnaturally fermentedโ€ or โ€œnaturally brewed.โ€

The Filipino Vinegar Cheat Sheet

In a hurry? Here is the whole family at a glance. Scroll down for the full story on each one.

VinegarMade FromReach For It When…
Cane (sukang maasim)Sugarcane juiceAdobo, paksiw, pickles, everyday cooking
Coconut sap (sukang tuba)Sap from the coconut flowerKinilaw, seafood, spiced vinegar
Coconut water vinegarWater from inside the coconutLighter dishes, dressings, dipping
Nipa (sukang Paombong)Nipa palm sapPaksiw, atchara, when you want it tangy
KaongKaong sugar palm sapDipping sauces, dressings, light marinades
Sukang IlokoBasi (Ilocano cane wine)Ilocano food, grilled meat, a richer adobo
Fruit vinegarsPineapple, banana, mango, bignayDipping sauces, marinades, salad dressings
Spiced vinegarPlain vinegar plus chili and aromaticsAnything fried or grilled

The Main Types of Filipino Vinegar

Cane, coconut, nipa, and kaong are considered the four main vinegars of the Philippines. Get to know these and you have got the foundation covered.

Cane Vinegar (Sukang Maasim)

If you only ever buy one Filipino vinegar, make it this one. Cane vinegar is made from fermented sugarcane juice, and it is the bottle I reach for most days of the week. It is mild and easygoing, so it does not steamroll the other flavors in a dish. The label might say cane vinegar, sukang maasim, or sukang puti, and you will spot Datu Puti and Silver Swan in just about every Filipino store.

I use it for adobo, paksiw, atchara, and most dipping sauces. One small habit worth picking up: taste a spoonful when you open a new bottle, because one cane vinegar can be a fair bit sharper than the next.

Coconut Vinegar

Here is where a lot of guides oversimplify, so let me clear it up. The coconut tree actually gives us two different vinegars, and they are not the same thing even though they come from the same plant.

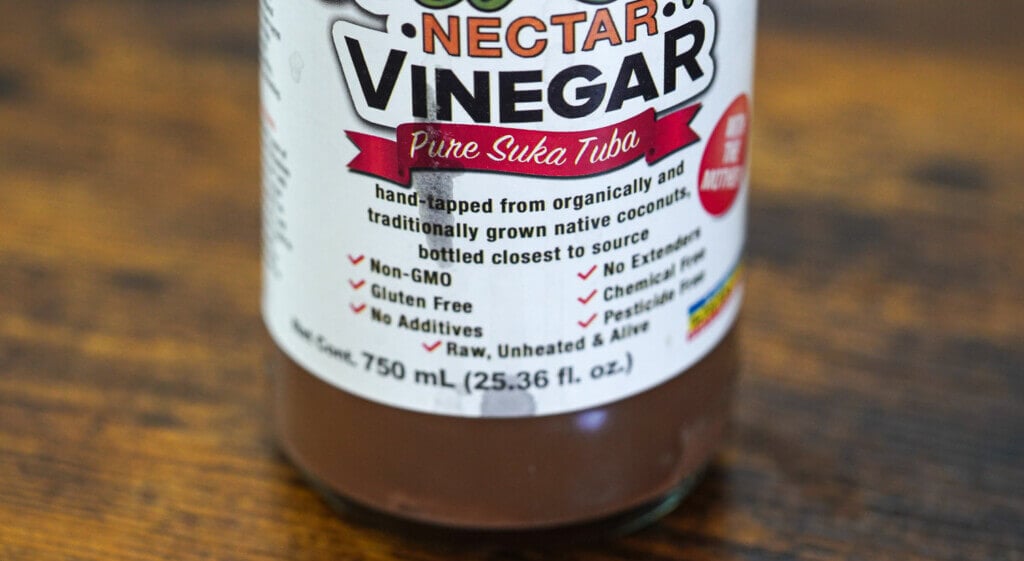
Nectar vinegar -sukang tuba
  • Sukang tuba is the traditional one. It is made from coconut sap, the tubรข tapped straight from the tree’s flower stalk. It does not taste like coconut at all. The flavor comes from the fermented sap, and it carries a real fermented aroma. This is the prized one, sold at roadside stands near coconut country, and it is fantastic for kinilaw because its gentler acid firms up the fish without toughening it.

  • Coconut water vinegar is the other one. It is fermented from the coconut water inside the nut rather than the sap. It tends to be lighter and milder. A lot of bottles sold abroad simply say “coconut vinegar,” and they can be either type, so check the source on the label. If a recipe asks for sukang tuba, look for the words coconut sap vinegar.

Both are wonderful with seafood. Reach for coconut vinegar in kinilaw na tanigue and sinuglaw, or any time you want the vinegar itself to add a little aroma.

Nipa Palm Vinegar (Sukang Paombong)

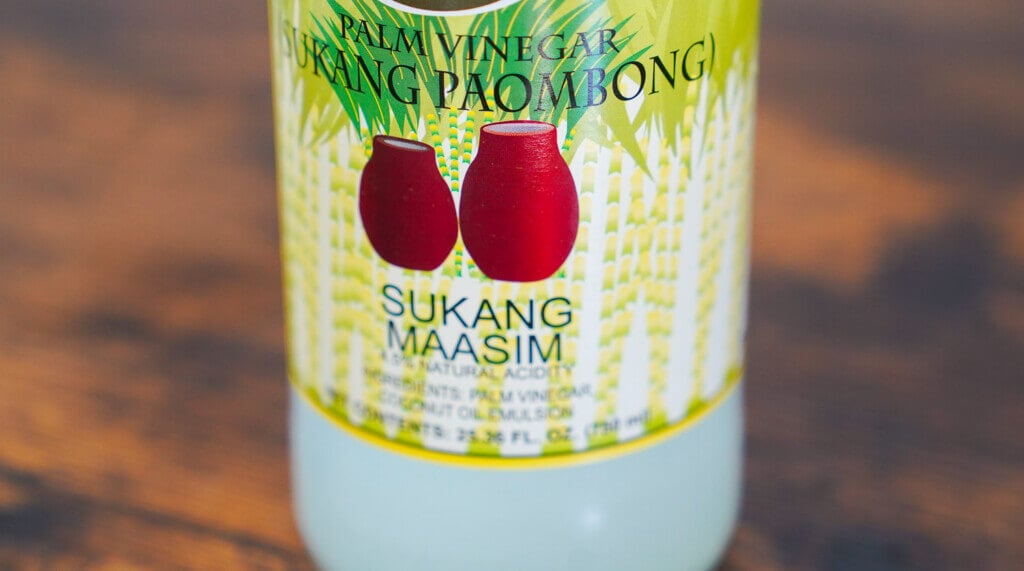
Nipa palm vinegar - sukang paombong

Nipa vinegar comes from the sap of the nipa palm, the one that grows in mangroves and along riverbanks. You might see it labeled sukang sasa, sukang nipa, or sukang Paombong, after the town in Bulacan that is famous for it. How it tastes really depends on the maker and how long it has aged. Younger batches can lean a touch sweet or faintly saline, and longer fermentation can push some bottles more sour. So taste before you commit it to a dish. It is lovely in paksiw, atchara, and marinades, especially when you want that sourness to stay front and center after cooking.

Kaong Palm Vinegar

Kaong vinegar comes from the sap of the kaong sugar palm, the same tree that gives us those sweet kaong beads in halo-halo. It is the gentle one of the group, usually mild with a little natural sweetness and even a fruity note. It is also the hardest to find, because tapping the sap is slow work and the season is limited. If you do come across a good bottle, save it for dipping sauces, dressings, and lighter marinades where you do not want the vinegar shouting over everything.

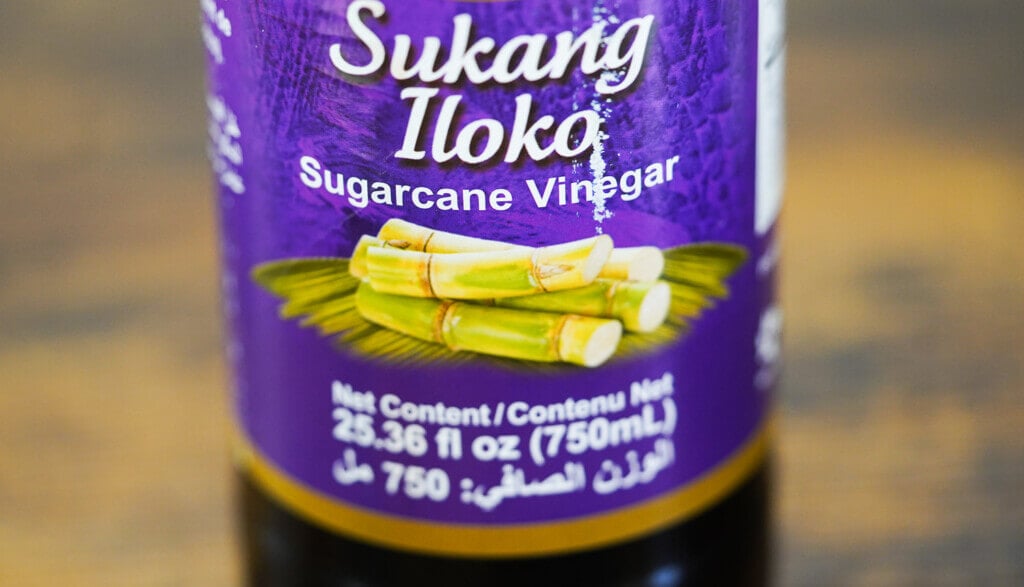
Sukang Iloko

Sugarcane vinegar - sukang iloko

This one is special. Sukang Iloko is a cane vinegar, but not the everyday kind. It is made from basi, the Ilocano sugarcane wine, often aged in burnay, the big clay jars traditionally used up in the Ilocos region. That aging gives it a darker color and a deeper, richer sugarcane flavor than ordinary commercial cane vinegar. I keep it apart from my regular sukang maasim because it genuinely tastes different. Try it with longganisa, bagnet, and Ilocos empanada, or use it in adobo when you want something with more backbone, just taste first since it can be stronger than you expect.

Filipino Fruit Vinegars

Cane and palm get all the attention, but Filipino makers turn all sorts of fruit into vinegar too. These are more regional and harder to track down, but they are worth grabbing if you spot one.

  • Pineapple vinegar (sukang pinya) โ€“ fermented from pineapple juice, sweet and tart at the same time. It is great in dipping sauces for lumpia and spring rolls, and in pork or chicken marinades.
  • Banana vinegar (sukang balsa) โ€“ made from banana, with a mellow sweetness and a gentle fruity edge. It plays nicely in stews and braises.
  • Mango vinegar โ€“ tangy and fragrant, lovely in salad dressings and light marinades.
  • Bignay vinegar โ€“ made from the small native bignay berry, more of a specialty find, prized where it is produced.

The rule of thumb with fruit vinegars: they are sweeter, so taste as you go and you may not need as much.

Spiced Vinegar

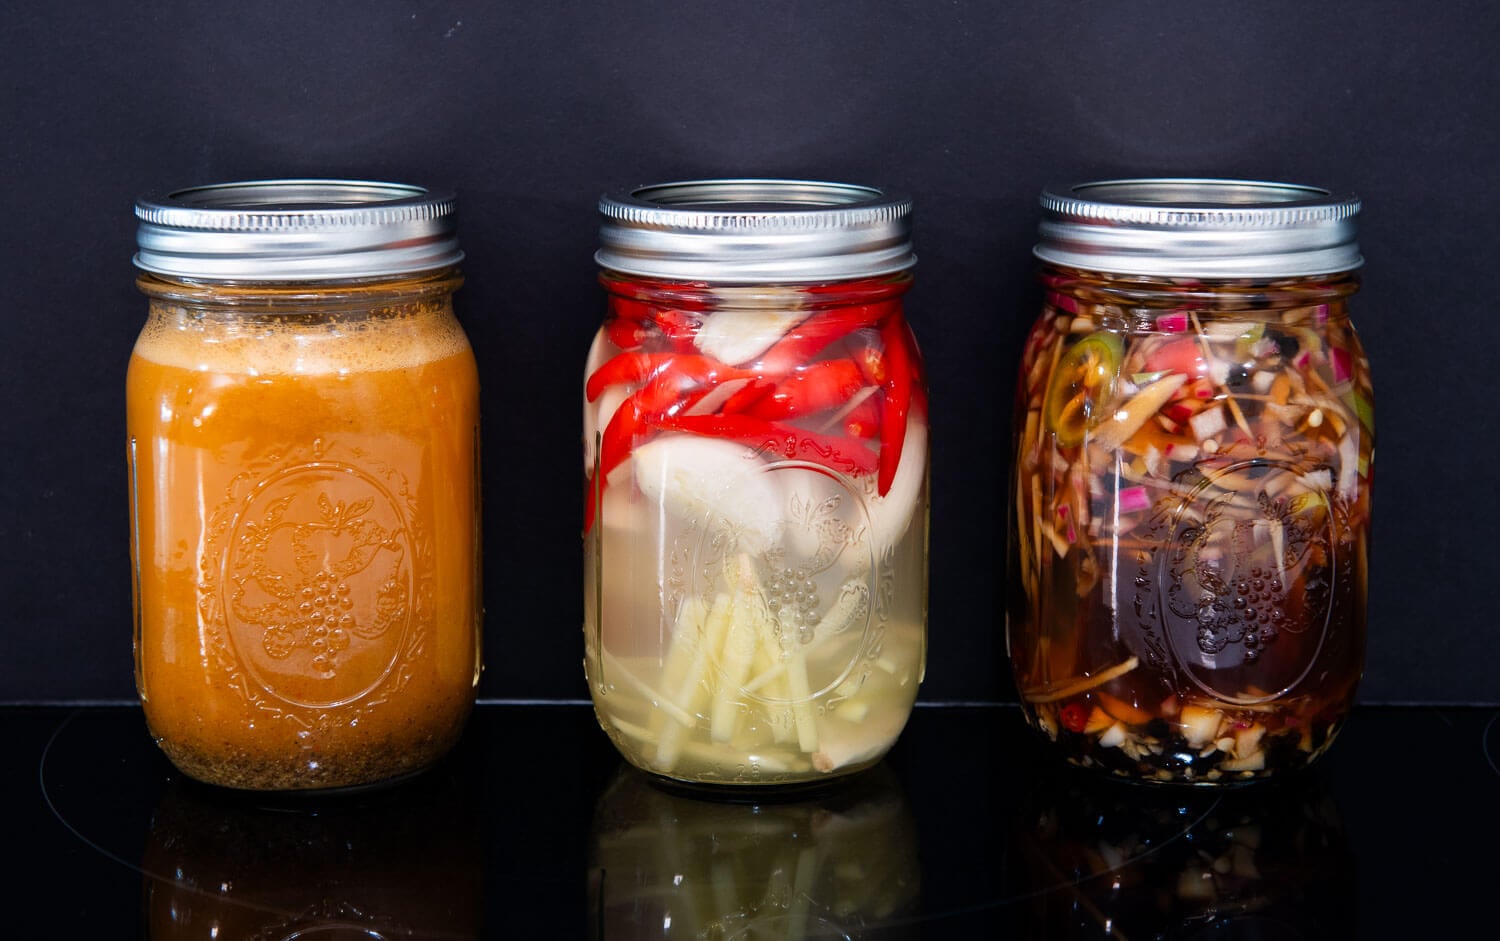
Filipino spiced vinegars

This is the vinegar most people picture: plain vinegar loaded up with chili, garlic, ginger, shallots, and peppercorns. It is mostly a dipping sauce, the thing you splash on anything fried or grilled, though you can cook with a little of it when the seasonings fit. There are a few you will hear about again and again.

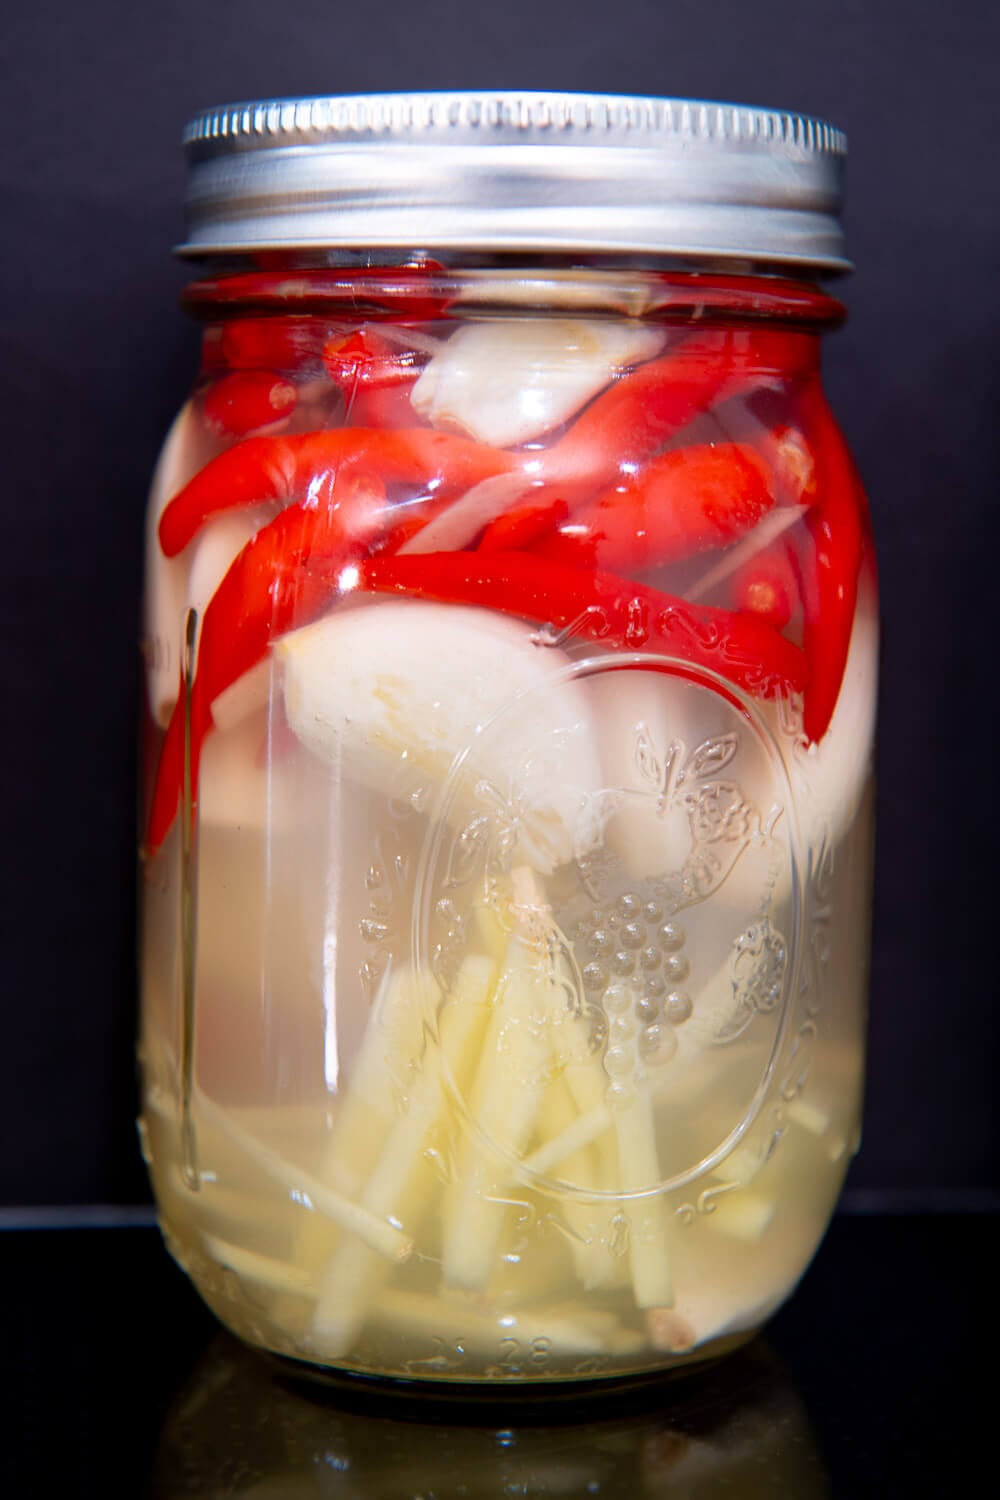
Sinamak

Sinamak

The Ilonggo classic from Western Visayas. Recipes vary, but most pack in vinegar, chili, garlic, ginger or langkawas, and peppercorns. It is the secret behind that distinct chicken inasal flavor, and it is glorious with grilled fish, fried seafood, lumpia, and pork barbecue. Want to make your own? Here is my sinamak recipe.

Pinakurat

Fun fact: pinakurat is technically a brand, not a vinegar type, even though most people use the name loosely. It is a spiced coconut vinegar from Iligan City, and the name comes from the Cebuano word for “surprise,” which tells you everything about that first punchy mouthful. It already has chili, garlic, and seasoning in it, so taste before you add soy sauce, salt, or more chili.

Sukang Quezon

Less famous than the other two, but it belongs in the same family. It is another regional spiced vinegar, and like sinamak and pinakurat, every maker has their own blend of chili and aromatics.

Or Just Make a Quick Sawsawan

Filipino spiced vinegar

You do not need a fancy bottle. For a fast dipping sauce, stir vinegar together with chopped onion, garlic, chili, and a crack of pepper, or a splash of soy sauce, depending on what you are eating. My Filipino vinegar dipping sauce guide has three versions ready in minutes.

Which Vinegar Should You Use?

Here is the cheat code, dish by dish.

Chicken Adobo Filipino Dish
  • Adobo: start with cane vinegar. It works beautifully with soy sauce, garlic, peppercorns, and bay leaves without taking over. Coconut vinegar gives a more fermented aroma, and sukang Iloko makes it richer. Cook it with cane first, then play around. Begin with pork adobo, chicken adobo, or pork and chicken adobo.
bangus paksiw recipe
  • Paksiw: vinegar is the star here, so it carries the dish. Cane works for almost any version, coconut is great with fish, and nipa is your pick when you want the sourness to really come through. Try paksiw na isda, paksiw na bangus, or inun unan.
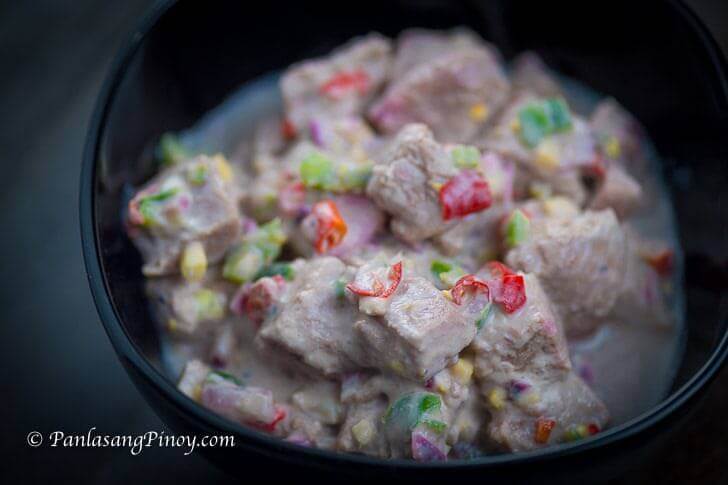
Kilawing Tuna with Coconut Cream
  • Kinilaw: coconut vinegar is the move, because its softer acid works with the seafood, ginger, onion, and chili. Cane works too. Just keep an eye on the time, because too long in acid turns the fish tough. See kinilaw na tanigue or kinilaw na tuna.
easy atchara
  • Atchara and pickles: cane vinegar is your friend. Its mild sourness sits well with the sugar, salt, ginger, and vegetables. Use it for atchara and other fridge pickles. If you are doing a tested canning recipe, check the acidity on the label and do not swap in a weaker vinegar unless the recipe says you can.
Panlasang Pinoy Inihaw na Galunggong with Ensaladang Talong Recipe
  • Anything fried or grilled: this is spiced vinegar’s moment. The acidity cuts the salt and grease, and the chili and garlic do the rest. I serve it with Bangsilog, Crispy Adobo Flakes, Tokneneng, and Lechon Kawali.

A Quick Word on Tasting and Adjusting

Every bottle is a little different, so taste a spoonful whenever you open a new one. Notice how sour it is, whether it has that fermented smell, and if there is any sweetness. Then you will know how heavy a hand to use. A few quick fixes:

  • Too sharp? Use a little less, or add a splash of water. Let it cook before you add any sugar.
  • Too mild? Add it bit by bit until the dish is as sour as you like.
  • Still tastes raw? Keep simmering. Vinegar mellows once it cooks.
  • Way too sour? A little water or broth helps, and a pinch of sugar softens it. Go easy, though.
  • Tastes flat? Check the salt before reaching for more vinegar. It might just need seasoning.

Vanjo’s Advice

Should You Let Vinegar Boil Before Stirring?

Many Filipino cooks let the vinegar come to a boil before stirring the pot. This is a useful practice, especially in adobo and paksiw, but stirring too early does not trap the vinegar in the dish or ruin the sauce.

What matters more is giving the vinegar enough time to cook. When cooks say vinegar tastes raw, they mean it still has a strong smell and a sharp sour taste that seems separate from the other ingredients. After a few minutes of simmering, that sharpness softens and the vinegar begins to blend into the sauce.

Here is what a home cook should do:

  • If you add the vinegar after sautรฉing the meat and seasonings โ€“ Pour it in and let the liquid come to a boil. Leave it undisturbed for about 1 to 2 minutes, then stir and continue simmering.
  • If the vinegar goes in with the water, soy sauce, and other liquids โ€“ You can stir everything from the start. Just give the dish enough time to simmer.
  • If the sauce still smells strong or tastes too sharp โ€“ Continue simmering before adding sugar, water, or more seasoning.
  • Taste only after the vinegar has cooked for several minutes โ€“ The flavor can change a lot once it has had time to blend with the other ingredients.

The simple rule is this: you do not need to be afraid of stirring vinegar. Let it boil, give it time to cook, and taste the sauce after it has simmered.

No Filipino Vinegar? Here Is What to Use

Stuck without the real thing? You can still cook. Check the acidity on the label and expect the flavor to land a little differently.

  • White cane vinegar – usually your best bet for Filipino cane vinegar. The kind in Latin grocery stores is easy to find, though strength still varies.
  • Distilled white vinegar – sharper than Filipino cane or coconut vinegar, so start with a little less, let it cook, then taste and add more.
  • Unseasoned rice vinegar – works in salads, dipping sauces, and some marinades. It is milder, so you may want more.
  • Seasoned rice vinegar – has added sugar and salt, so do not swap it in directly unless you adjust the rest of the seasoning.
  • Apple cider vinegar – works in some adobo and paksiw, but it brings a fruity note.
  • Balsamic vinegar – not a good stand-in for traditional adobo, paksiw, kinilaw, or atchara. Its sweetness, color, and grape flavor change the dish too much.

Real vs. Synthetic

Here is one that surprises people: not all commercial vinegar is actually fermented. Some is made with diluted synthetic acetic acid instead. Back in 2019, a study from the Philippine Nuclear Research Institute reported that a lot of vinegars on local shelves were using synthetic acetic acid rather than natural fermentation. They figured this out with carbon-14 lab testing, which can tell plant-based acetic acid from the synthetic kind, so it is not something you can spot by eye at the store.

Now do not let that scare you off your favorite bottle. The acetic acid itself behaves the same either way. If you want to be sure you are getting naturally fermented vinegar, it is easy: read the ingredient list, look for “naturally fermented” or “naturally brewed,” and buy from a producer you trust.

Is Kinilaw Safe to Eat?

People have loved kinilaw for generations, so let me put your mind at ease and walk you through how to enjoy it well. The one thing to understand is this: even after the vinegar and calamansi turn the fish opaque and firm, kinilaw is still raw. The acid changes the texture, but it does not cook the fish the way heat does. That is not a reason to be scared of it. It just means a little care up front goes a long way.

Kilawin


Here is all you really need to do:

  • Buy from a source you trust โ€“ ideally one that handles fish for raw eating, and tell them that is what you are making.
  • Keep it cold โ€“ from the store all the way to your kitchen, and serve it the same day.
  • Ask about freezing โ€“ some fish for raw dishes is frozen under the right conditions first to take care of parasites, so check what your fishmonger recommends for your fish.
  • Remember that “fresh” is not the whole story โ€“ very fresh fish is not automatically safe for raw eating without the right sourcing and handling.

One gentle note: if you are pregnant, feeding very young kids or older folks, or anyone with a weakened immune system, it is kindest to cook the fish instead. Serve them sinuglaw or a quick paksiw na isda so everyone can still join in. Everybody gets to enjoy the meal, just a little differently.

How to Store Your Vinegar

Vinegar is one of the easiest ingredients to keep in the kitchen. Plain vinegar lasts a long time, and you usually do not need to refrigerate it. Spiced vinegar needs a little more attention, especially when it contains fresh ingredients.

  • Plain store bought vinegar โ€“ Keep the bottle tightly closed in a cool, dark cabinet. There is usually no need to take up space in the refrigerator.
  • Store bought spiced vinegar โ€“ Check the label and follow the storage instructions from the manufacturer. Some bottles can stay in the cabinet, while others should be refrigerated after opening.
  • Homemade spiced vinegar โ€“ Follow the storage directions in the recipe. Be more careful when the bottle contains fresh garlic, onion, herbs, chili, or fruit. Keep the ingredients submerged and refrigerate it when the recipe instructs you to do so.
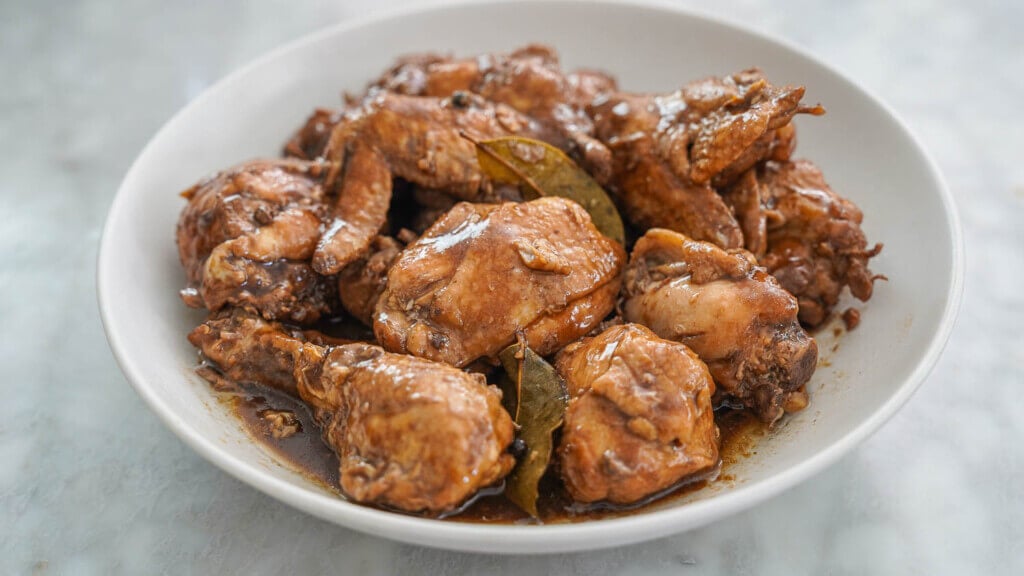
You may also notice cloudiness, sediment, or a thin layer called a vinegar mother in naturally fermented vinegar. This can be normal and does not always mean the vinegar has spoiled. Check the label or the producerโ€™s instructions when you are unsure. If the vinegar develops an unusual smell, visible mold, or anything that does not look right, it is safer not to use it.

Filipino Vinegar FAQ

Which Filipino vinegar should I buy first?

Cane vinegar. It covers adobo, paksiw, pickles, marinades, and dipping sauces, so it is the most useful bottle to start with.

Is coconut vinegar the same as sukang tuba?

Not quite. Sukang tuba is made from coconut sap. Other bottles labeled coconut vinegar are made from coconut water, which is milder. Same tree, different liquid, so check the label.

What vinegar is best for adobo?

Cane vinegar is the dependable starting point. Coconut vinegar and sukang Iloko also work and add a stronger fermented flavor.

Can I mix two vinegars in one recipe?

Absolutely. Taste the blend first, since strength varies. Start with equal parts only when you already know both bottles.

Can I cook with spiced vinegar?

Yes, when the chili and garlic suit the dish. Just remember it is already seasoned, so adjust the salt.

Does Filipino vinegar need refrigeration?


Plain commercial vinegar is happy in a cool, dark cupboard. Follow the label for commercial spiced vinegar, and the recipe for homemade infusions.

Which Bottles Should Live in Your Kitchen?

If you are just starting out, keep it simple. Get a bottle of cane vinegar for everyday cooking and a spiced vinegar for the table. Add coconut vinegar when you want to make kinilaw or paksiw. From there, nipa, kaong, sukang Iloko, and the fruit vinegars are all fun to collect whenever you find a good producer.

And whatever you bring home, taste it before you cook. Filipino vinegar changes from bottle to bottle, even within the same type. Once you know how sour and how aromatic yours is, you will know exactly how much to use. Happy cooking!

Turmeric healthy ingredient

Turmeric

You know that bright yellow color in curry? That comes from turmeric. This spice has been around for thousands of years, and there is a good reason it shows up in so many Filipino dishes. It adds color, a bit of warmth, and plays well with coconut milk.

Turmeric healthy ingredient

I remember my grandma adding slices of fresh turmeric root to her ginataan. She called it luyang dilaw and told me it was good for the stomach. I did not think much of it back then. But after cooking for over 30 years, I understand why she reached for it so often. Turmeric does not shout for attention. It just makes the dish look and taste better without taking over.

What is Turmeric?

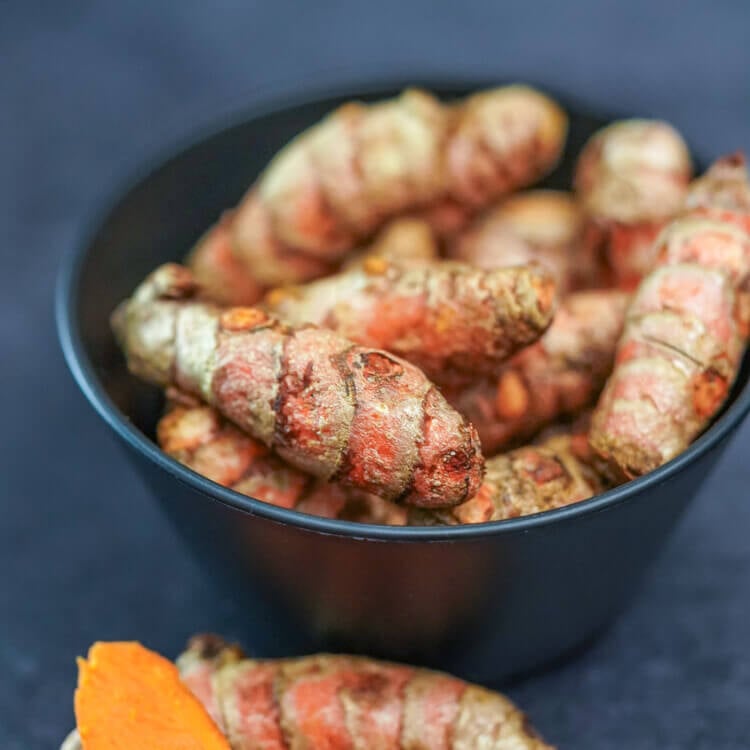
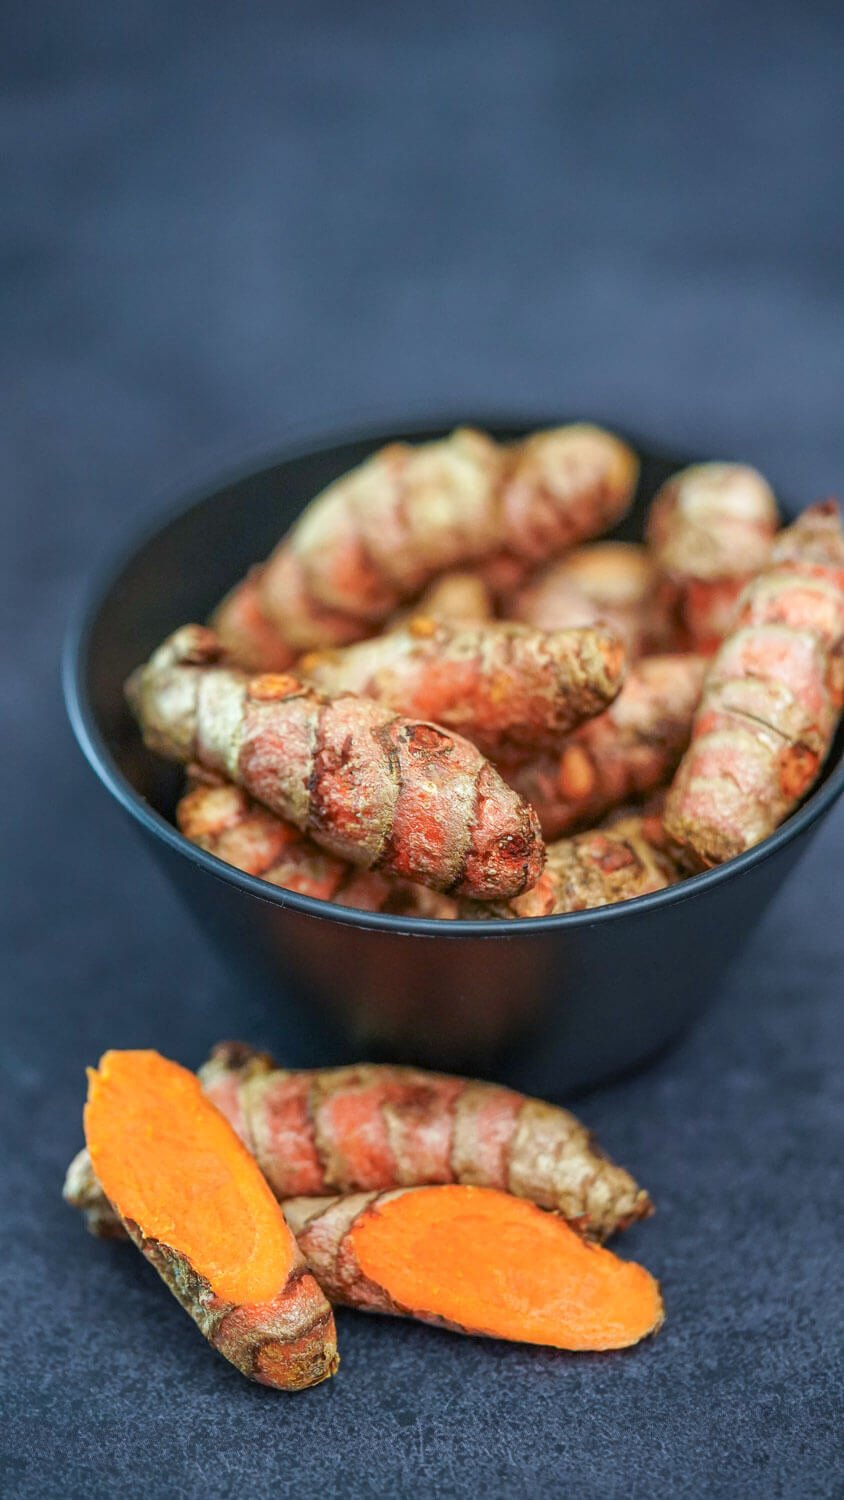
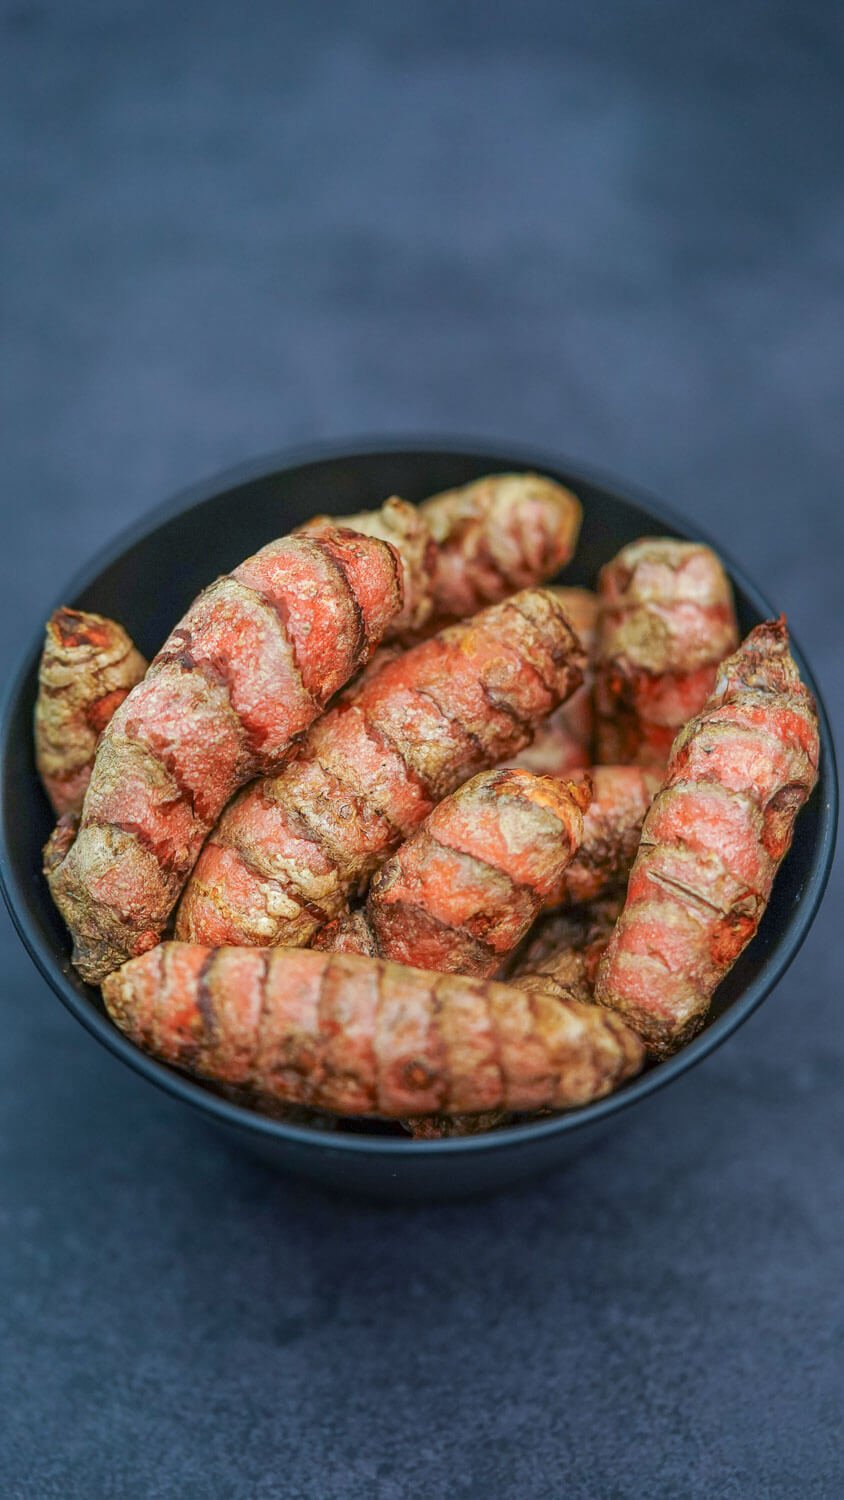
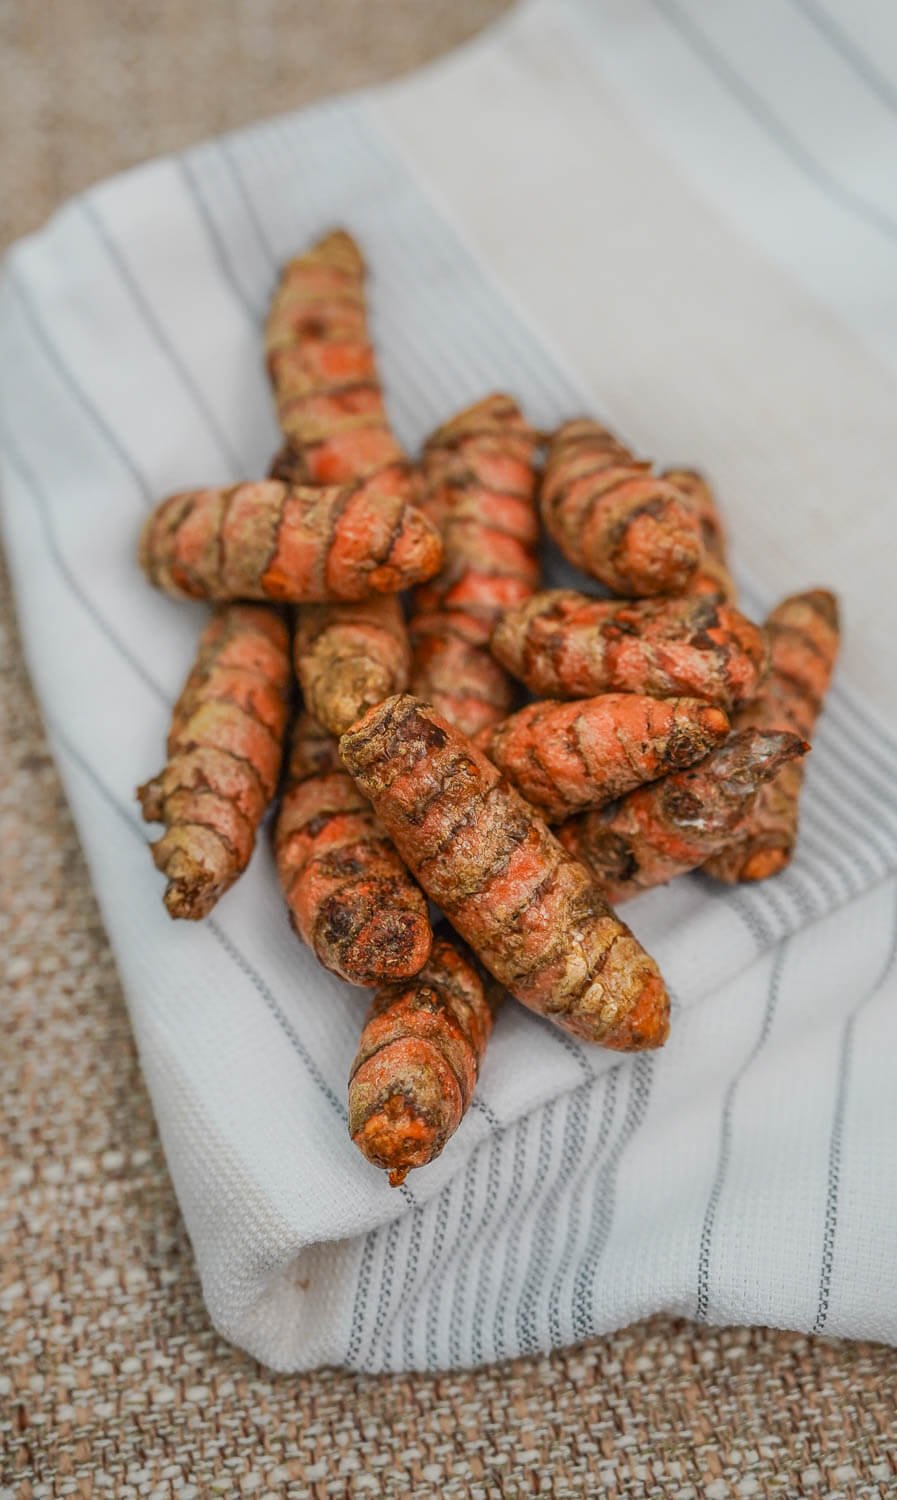
Turmeric comes from the root of a plant called Curcuma longa. It belongs to the ginger family, which explains why fresh turmeric looks like ginger root, just smaller and more orange inside. The plant grows in tropical areas and needs warm, humid weather to thrive. India produces most of the world’s turmeric, though it also grows in Southeast Asia.

People have been using turmeric for at least 4,000 years. It showed up in Ayurvedic medicine, got used as a dye for cloth, and eventually made its way into kitchens everywhere. In the Philippines, we call it luyang dilaw, which means “yellow ginger.” That name makes sense when you see the two side by side.

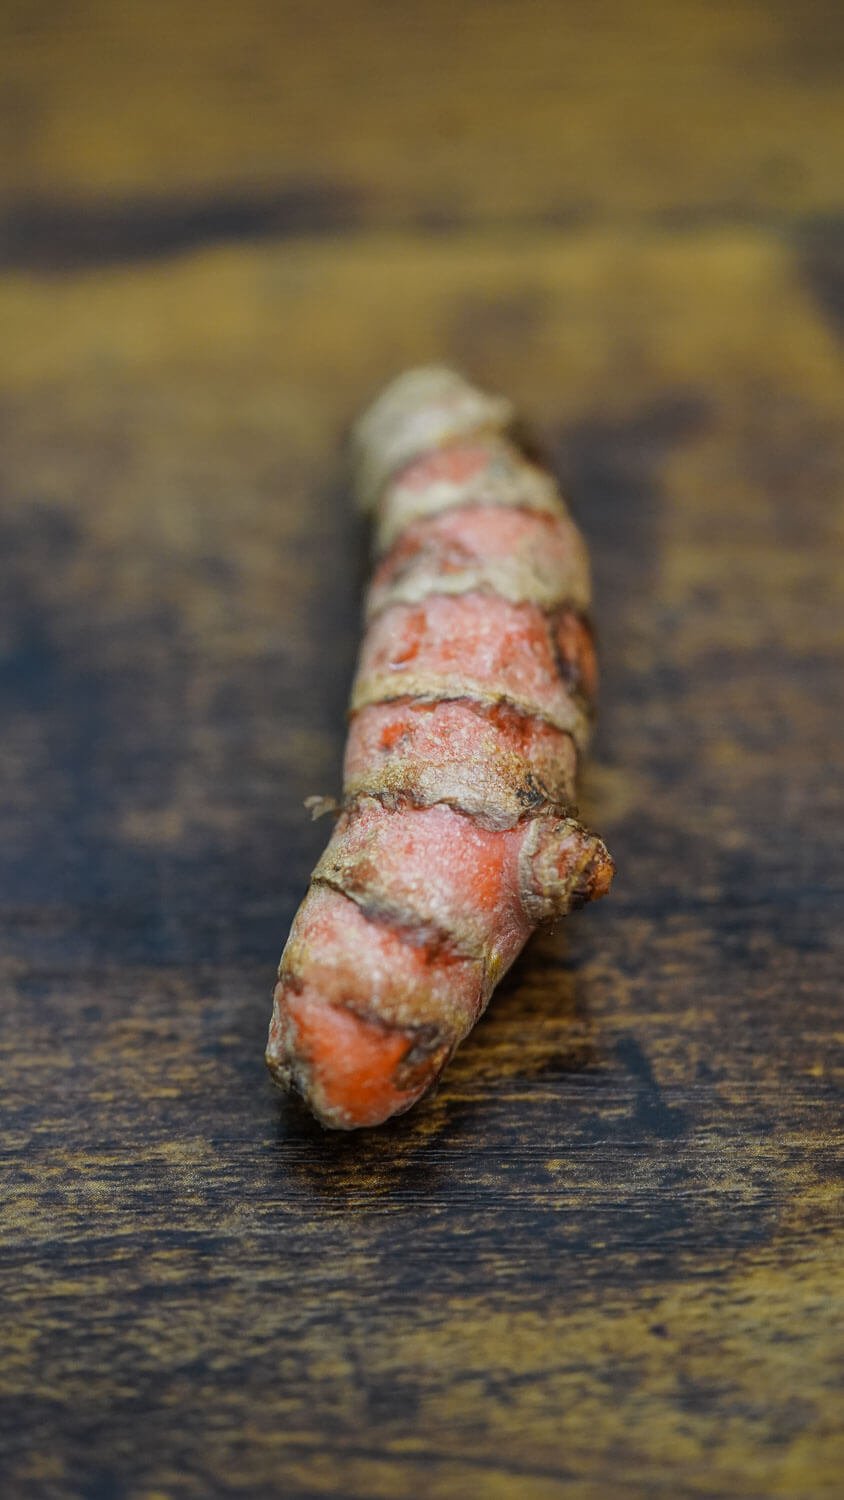
The part we eat is the rhizome, the underground stem. When you cut into fresh turmeric, you see that deep orange flesh that stains everything it touches. The compound responsible for that color is curcumin. This is also what researchers study when they look at turmeric’s potential health effects.

Fresh turmeric has a sharper, brighter taste compared to the dried powder. The powder is more concentrated and a bit more bitter. Both have that earthy, warm quality that works so well with ginger and other spices. The flavor is hard to describe exactly. It is earthy, slightly peppery, a little bitter, and kind of mustardy all at once. Not spicy hot like chili. Just warm.

Different Forms of Turmeric

When you go shopping, you will find turmeric in a few different forms. Each one has its use.

  • Ground Turmeric Powder โ€“ This is what most people have in their spice rack. Fine golden-orange powder that dissolves into dishes easily. You can find it in any grocery store. Good for curries, rice, marinades, and pretty much anything where you want that yellow color.
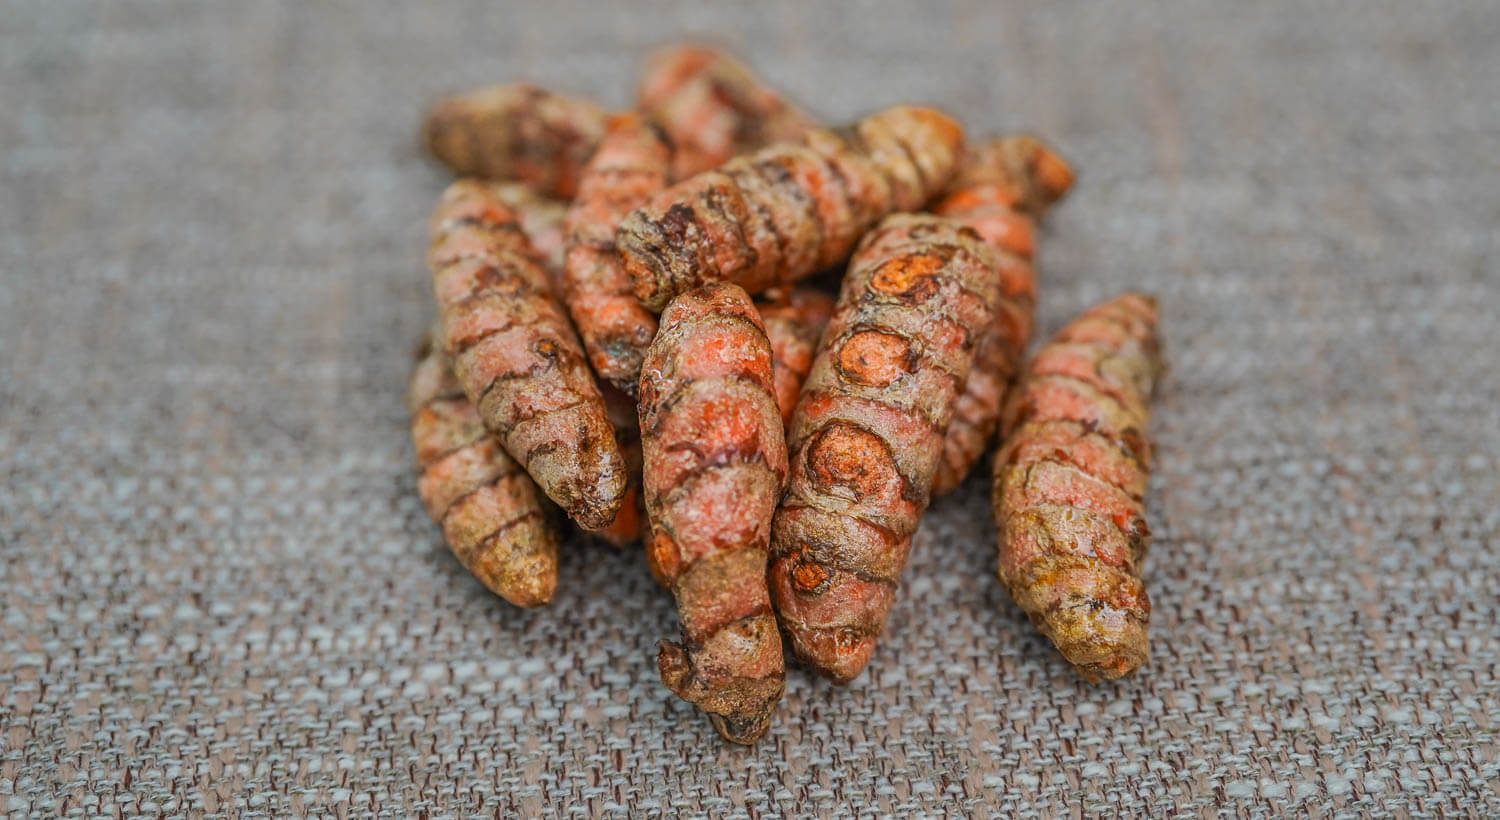
  • Fresh Turmeric Root โ€“ Small knobby pieces with brown skin and orange flesh inside. The flavor is brighter and less bitter than powder. Asian grocery stores carry it, and some regular supermarkets stock it near the ginger. Fresh turmeric is nice in smoothies, teas, and dishes where you want a cleaner taste.
  • Turmeric Paste โ€“ Some stores sell ready-made paste, which is fresh turmeric that has been peeled and ground up. Convenient if you do not want to deal with the prep work and staining.
  • Supplements โ€“ Capsules and gummies with concentrated curcumin. These are not for cooking. If you are thinking about taking turmeric supplements, talk to your doctor first. They can affect how certain medications work, and high doses may cause stomach issues.

My advice? Keep a jar of turmeric powder in your spice cabinet for everyday cooking. If you see fresh turmeric at the store and want to try it, grab a few pieces. But the powder handles most jobs just fine.

How to Pick Good Turmeric

Quality matters. Bad turmeric tastes flat and does not give you that golden color.

Turmeric

For powder:

  • Look for a deep golden-orange color. If it looks pale or dull, it might be old.
  • Smell it if you can. Good turmeric has an earthy, slightly spicy scent. Musty or flat means it has been sitting too long.
  • Check the date. Buy from stores that move product quickly.

For fresh root:

  • Pick pieces that feel firm, not soft or spongy
  • The skin should look tight, not wrinkled or dried out
  • Avoid anything with soft spots or mold
  • A mild earthy smell is fine. Strong off odors are not.

Storage

Storing turmeric right keeps it flavorful longer.

Ground turmeric powder goes in an airtight container in a cool, dark spot. Your pantry or spice cabinet works. It stays good for about a year, though the flavor is strongest in the first six months. If your turmeric looks faded and smells like nothing, replace it.

Fresh turmeric root keeps for two to three weeks in the refrigerator. Wrap it in a paper towel and put it in a paper bag or container. The paper towel soaks up moisture and stops mold from forming. Make sure the root is dry before you store it.

Freezing works well if you buy more fresh turmeric than you can use. Cut it into pieces, wrap in paper towel, put in a freezer bag, and squeeze out the air. It lasts up to six months frozen. You can grate it straight from the freezer without thawing.

About Curcumin and Health

Turmeric has gotten a lot of attention for its potential health benefits. The research focuses on curcumin, the compound that gives turmeric its color. Studies suggest curcumin may have anti-inflammatory and antioxidant properties. Some research shows promise for joint health, brain function, and heart health.

Here is the thing though. Most of this research uses concentrated curcumin supplements, not the amount of turmeric you would use in cooking. And curcumin does not absorb well on its own. Your body has a hard time using it.

Black pepper helps. A lot. Black pepper contains piperine, which can increase curcumin absorption by around 2,000 percent. That number comes from actual studies. The piperine slows down how fast your liver breaks down the curcumin, so more of it gets into your bloodstream. This is why so many traditional Indian recipes combine turmeric with black pepper. They figured this out centuries ago.

Fat helps too. Curcumin dissolves in fat, not water. Cooking turmeric with oil, coconut milk, or ghee makes it easier for your body to absorb. Again, traditional cooking got this right without knowing the science.

A note of caution: Some high-bioavailability turmeric supplements have been linked to liver problems. Regular turmeric in food is generally considered safe. But if you are thinking about taking supplements, especially the enhanced-absorption kinds, check with your doctor.

Want to know more about turmeric’s potential health benefits?

I looked into what current research has to say, and it was an eye opener for me. After reading through the studies, I found myself using turmeric more often in my cooking. Take a look at some of the health benefits linked to turmeric and see what the science suggests.

Turmeric can be used to cook different dishes

Cooking with Turmeric

Here is how I use turmeric in my kitchen:

  • Bloom It in Oil – This is my go-to method. Heat a little oil in your pan. Add turmeric powder along with your other spices. Stir for 30 to 60 seconds. The heat releases the flavor compounds and spreads the color through the oil. Everything you cook in that oil picks up the turmeric. Note: Be careful not to burn it. Burnt turmeric tastes bitter. Keep the heat medium and keep stirring.
  • Simmer in Liquid – For soups, stews, and ginataan dishes, you can add turmeric straight to the liquid. The long cooking time lets the flavor mellow and spread evenly. I do this with most of my curry and coconut milk recipes.
  • Add to Rice – A half teaspoon of turmeric in your rice cooking water gives you beautiful yellow rice. Add it before the water boils. This is the base for Java rice and arroz amarillo.
  • Use in Marinade – A pinch of turmeric in a marinade adds color to chicken, pork, or fish. It does not change the flavor much but makes the meat look appetizing after cooking.
  • Grate Fresh Turmeric – If you have fresh turmeric, peel it and grate it like ginger. Fresh turmeric works well in smoothies, teas, or when you want a brighter flavor. Use about three times as much fresh as you would powder. One tablespoon of fresh equals about one teaspoon of powder.

How Much to Use

A little turmeric goes a long way. Too much makes food bitter.

  • Start with half a teaspoon for a dish that serves four to six people. You can always add more.
  • For rice, half to one teaspoon is enough for two cups of uncooked rice.
  • For curries and stews, one teaspoon usually does the job.
  • For golden milk or tea, a quarter to half teaspoon per cup works.
Turmeric rhizome

Flavor Pairings

Turmeric works well with these spices and ingredients:

  • Black pepper โ€“ Not just for absorption. The flavors go together.
  • Ginger โ€“ They are related, and it shows. Great combination in soups and curries.
  • Cumin โ€“ Earthy meets earthy. A classic pairing in curry powder.
  • Coriander โ€“ Balances turmeric’s slight bitterness.
  • Cinnamon โ€“ Adds warmth. Nice in sweet applications like golden milk.
  • Coconut milk โ€“ The fat carries the flavor and mellows the bitterness.
  • Garlic and onion โ€“ Standard aromatics that work with turmeric in savory dishes.
  • Lemon or lime โ€“ Acid brightens the earthy notes.

The Staining Problem

I need to mention this. Turmeric stains everything. Your fingers, your cutting board, your counter, your clothes, your plastic containers. The color is stubborn.

When working with fresh turmeric, wear gloves if you do not want yellow fingers for a day or two. Clean up spills right away. Lemon juice can help remove stains from skin. A paste of baking soda and water can help with counters.

For plastic containers, the stain might not come out completely. Use glass or stainless steel if you are worried about it.

I have a dedicated wooden spoon and plastic container that I just accept will be yellow forever. That is life with turmeric.

Fresh turmeric on the table

Turmeric in Filipino Cooking

Turmeric shows up in several Filipino dishes. It is not as common as in Indian cooking, but it has its place.

Adobong Dilaw is a version of adobo without soy sauce. Fresh turmeric slices give the dish its golden color and subtle earthiness. The flavor is different from regular adobo, lighter and tangier.

Ginataang Manok na may Luyang Dilaw is chicken cooked in coconut milk with fresh turmeric. The turmeric colors the coconut milk gold and adds depth to the sauce.

Java Rice gets its yellow color from turmeric and annatto. It goes with grilled meats and fried dishes.

Filipino Curry uses turmeric as part of the spice blend. Our curry is milder than Indian curry, but that golden color still comes from turmeric.

Common Questions

What does turmeric taste like?

Earthy, warm, slightly bitter, and a little peppery. Not spicy hot. Fresh turmeric tastes brighter and more ginger-like. The powder is deeper and more mellow. The flavor blends into dishes rather than standing out.

Can I use dried turmeric instead of fresh?

Yes. Use one teaspoon of powder for every tablespoon of fresh grated turmeric. The powder works fine in cooked dishes. Fresh is better for smoothies and teas where you want a cleaner taste.

How much turmeric per day is okay?

In cooking, a teaspoon or two daily is generally considered safe. The World Health Organization says up to about 1.4 mg of curcumin per pound of body weight is acceptable. For supplements, talk to your doctor.

Why add black pepper to turmeric?

Black pepper contains piperine, which increases curcumin absorption by about 2,000 percent. Your body can actually use the curcumin when you eat it with black pepper.

Does turmeric go bad?

Turmeric powder loses potency over time but does not spoil in a dangerous way. It just becomes less flavorful. If it smells musty or looks faded, replace it. Fresh turmeric can mold if stored wet. Throw it out if you see soft spots or mold.

What is turmeric called in Filipino?

Luyang dilaw, which means “yellow ginger.”

Is turmeric the same as curry powder?

No. Turmeric is one spice. Curry powder is a blend of spices that includes turmeric along with cumin, coriander, and others. Turmeric gives curry powder its yellow color, but they are not the same thing.

Some of My Favorite Recipes with Turmeric

Here are my favorite recipes that use turmeric. Try one and see how this spice works in your cooking.

chicken bbq

BBQ Chicken with Java Rice

Grilled chicken served over turmeric-colored rice. The smoky chicken goes well with the earthy rice. A complete meal that looks like it took more effort than it did.

BBQ Chicken with Java Rice Recipe
Pork Curry Tinola Recipe Panlasang Pinoy

Pork Curry Tinola

A fusion dish combining curry flavors with tinola’s soupy comfort. Turmeric and curry powder work together to create a warming soup for rainy days.

Pork Curry Tinola Recipe
Grilled Rib Eye Steak with Arroz Amarillo

Grilled Rib Eye Steak with Arroz Amarillo

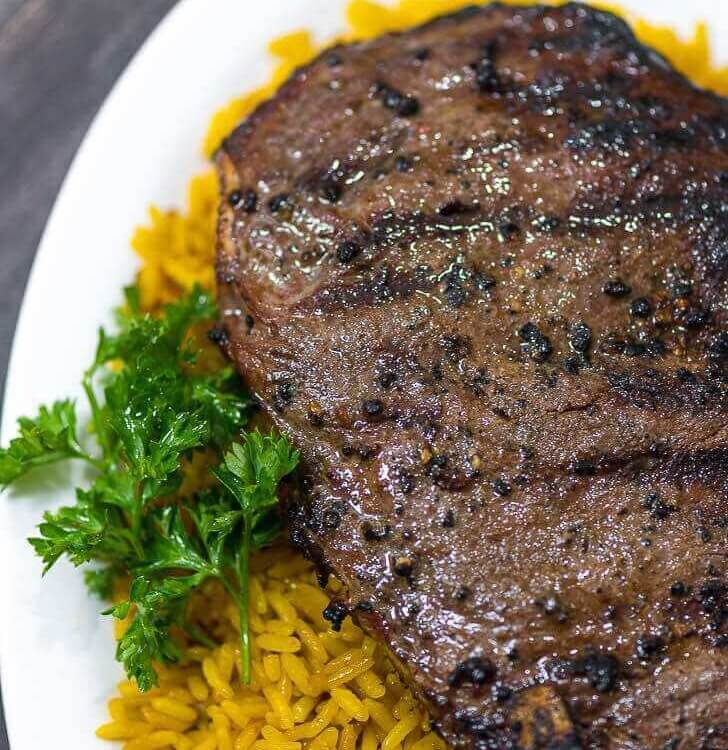
Yellow rice made with turmeric and paprika alongside grilled steak. The colorful rice makes a simple steak dinner look restaurant-quality.

Grilled Rib Eye Steak with Arroz Amarillo Recipe
What is broccoli

What is Broccoli?

If you have ever ordered beef broccoli from a Chinese restaurant or spotted those little green trees at the grocery store, you already know what broccoli looks like. But there is so much more to this vegetable than most people realize. It is one of those ingredients that can go from boring to absolutely delicious depending on how you cook it.

What is broccoli

I will be honest with you. I was not always a fan. Growing up, broccoli was that vegetable I pushed around my plate. But somewhere along the way, I figured out how to make it taste really good. Now? My family asks for it all the time. Once you learn a few simple tricks, you will wonder how you ever skipped over it at the grocery store.

What is Broccoli?

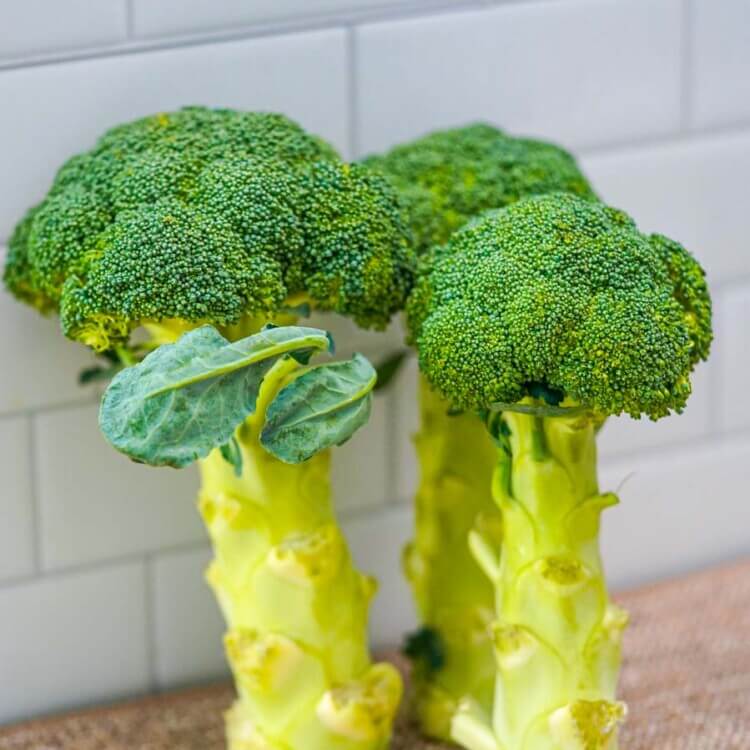
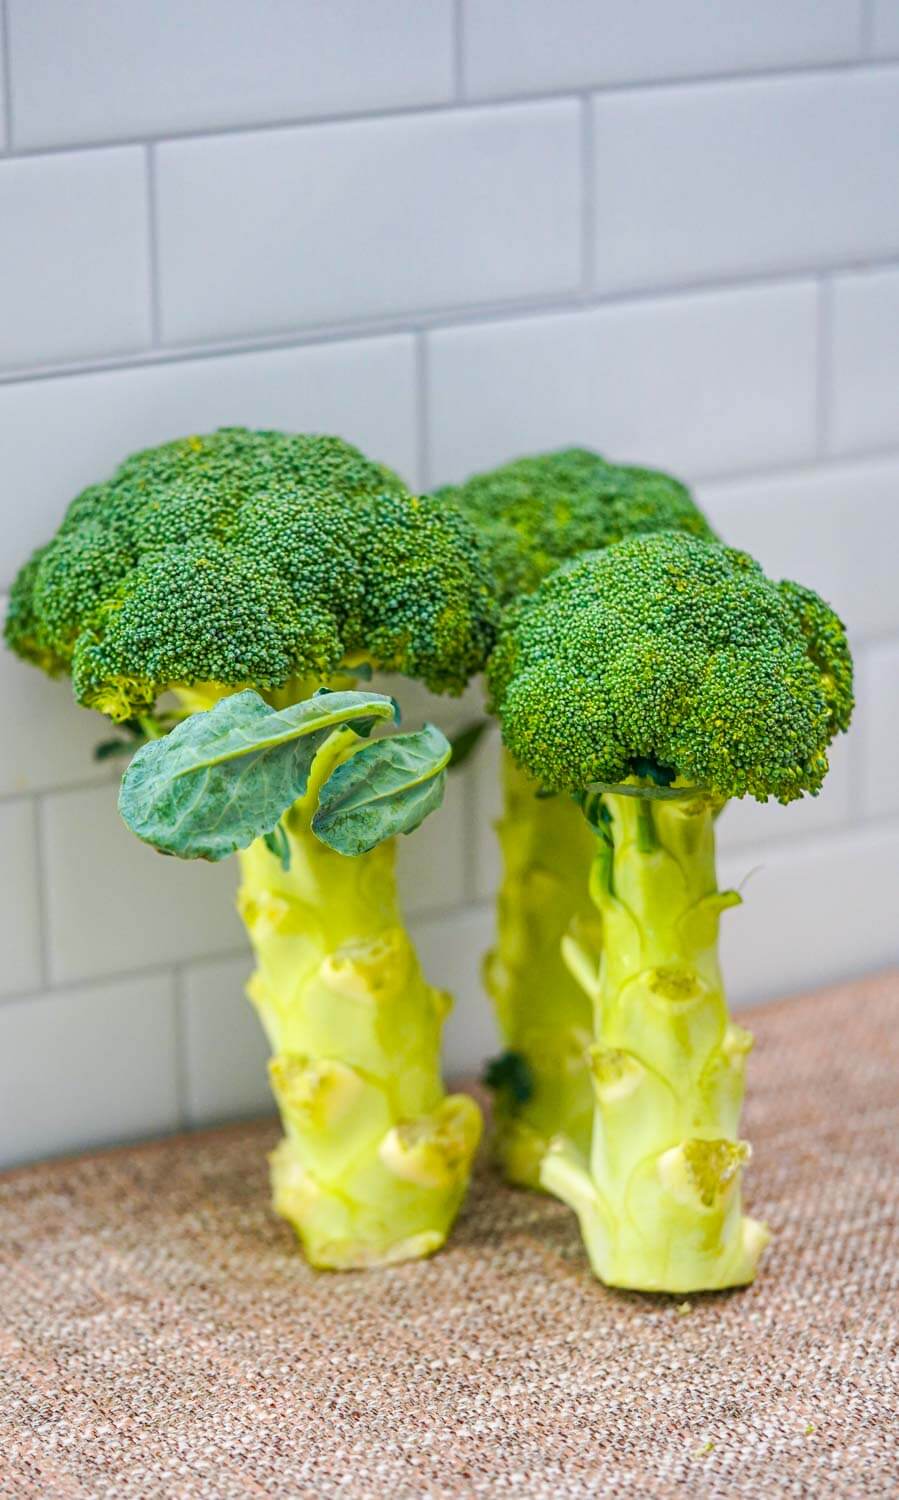
Broccoli is a green vegetable that belongs to the cabbage family. It is related to cauliflower, cabbage, and kale. The broccoli plant originally came from the Mediterranean, and Italy really made it popular.

Here is what you are actually eating: those green parts that look like tiny trees are called florets. They are flower buds that have not opened yet. Once you see yellow, the broccoli is past its prime and will taste bitter. The thick stem underneath is also edible. A lot of people throw it away, but that is a mistake. Peel off the tough outer layer and you have got perfectly good broccoli hiding inside.

Broccoli on a placemat

The flavor is mildly bitter with a little sweetness, especially when you cook it right. Raw broccoli is crunchy and firm. Steam it and it turns tender. Roast it and you get these amazing crispy edges that taste almost nutty. It is one of those vegetables that changes completely based on how you prepare it.

Broccoli is also packed with good stuff. Vitamins C and K, fiber, antioxidants. The deep green color tells you it is loaded with nutrients. My grandma always said to eat your greens, and she was right.

Different Varieties You’ll Find

Not all broccoli is the same. Here are the types you might see:

  • Calabrese Broccoli โ€“ This is the one you know. Big dome-shaped head, thick stem. Named after Calabria in Italy. You can find it pretty much anywhere, and it works in almost every recipe.
  • Sprouting Broccoli โ€“ Instead of one big head, this one has lots of smaller florets on thin stems. The purple variety is popular in some places. The stems are more tender, so you can eat the whole thing without much trimming.
  • Chinese Broccoli (Gai Lan) โ€“ Smaller florets, longer stems, bigger leaves. A little more bitter than regular broccoli. You see this a lot in Cantonese cooking, usually blanched and drizzled with oyster sauce.
  • Broccolini โ€“ A cross between broccoli and Chinese broccoli. Long thin stems, small florets. More tender and sweeter. Cooks faster too.
  • Romanesco โ€“ This one looks wild. Lime green with spiraling florets that form a fractal pattern. Milder and nuttier than regular broccoli.
Broccoli florets on a bowl

My advice? Stick with Calabrese for everyday cooking. It is affordable, easy to find, and holds up great in stir fries, soups, and roasted dishes. Once you get comfortable with that, try the others.

Picking the Best Broccoli

Okay, this part is important. Good broccoli makes a real difference in how your dish turns out. Here is what I look for:

  • Color โ€“ You want deep, rich green. Stay away from heads with yellow or brown spots. That means it is old. A little purple tinting on the florets is actually fine and means more antioxidants.
  • Firmness โ€“ Press the head gently. It should feel tight and compact. If the florets are soft or spongy, leave it. The stem should be firm too, not bendy or rubbery.
  • Smell โ€“ Fresh broccoli smells clean. Maybe a little vegetal. If it smells sour or like sulfur, do not buy it. That smell means it is breaking down.
  • Floret Buds โ€“ Check that those tiny buds are closed tight. Any yellow flowers starting to bloom? That broccoli has been sitting too long.
  • Stem Condition โ€“ Look at the cut end. It should be moist and fresh looking, not dried out or cracked.

Here is the thing. At the wet market, you usually find fresher broccoli because everything moves faster. Supermarket broccoli is fine too, just check those signs I mentioned. A little extra attention when shopping saves you from a disappointing dish later.

Storage Tips That Actually Work

Broccoli does not last forever, but you can stretch it with proper storage. Here is what I do:

  1. Do not wash it yet. Wait until you are ready to cook. Water makes it go soft and moldy faster.
  2. Refrigerator is key. Put unwashed broccoli in a loose plastic bag or wrap it in a damp paper towel. Keep it in the crisper drawer. It stays fresh for about 5 to 7 days this way.
  3. Save that stem. If you only need florets for a recipe, wrap the stem separately. It keeps a bit longer and you can use it another day.
  4. Freeze it for later. Blanch florets in boiling water for 2 to 3 minutes, then drop them in ice water to stop the cooking. Dry them well and put them in freezer bags. Frozen broccoli keeps for up to 12 months.
  5. Know when to let go. Yellow color, slimy texture, bad smell? Time to toss it. A little wilting is okay if you cook it right away, but anything beyond that is not worth your time.

Nutritional Profile

Broccoli really is as healthy as everyone says. One cup of raw broccoli gives you more than your daily vitamin C needs. It is also loaded with vitamin K for bone health, plus fiber, folate, and potassium.

The calorie count is low, so you can eat a lot without worrying. The fiber keeps you full longer and helps with digestion. And those antioxidants? They help protect your cells.

Florets on a chopping board

There is also something called sulforaphane in broccoli that researchers have been studying for years. Eating it regularly as part of a balanced diet is just good for you. No magic claims here, just solid nutrition.

Cooking Techniques That Work Best

Alright, here is where things get fun. Broccoli responds well to so many cooking methods. These are the ones I use most:

  1. Steaming โ€“ My go-to when I want broccoli that is tender but still bright green and crunchy. Just put florets in a steamer basket over boiling water for 3 to 5 minutes. The key is to not overdo it. I have a whole guide on how to steam broccoli if you want more details.
  2. Stir-Frying โ€“ This is how I cook broccoli most of the time, especially for beef broccoli or chicken broccoli. High heat, quick cooking, and the florets stay crisp. Add the broccoli toward the end so it does not turn to mush.
  3. Blanching โ€“ Quick boil, then straight into ice water. Great for prepping ahead or before adding broccoli to a cold salad. Also works well before stir-frying if you want slightly softer florets.
  4. Roasting โ€“ Toss florets with olive oil, salt, and garlic powder. Roast at high heat until the edges get crispy and a little charred. This brings out a nutty sweetness that surprises people. My oven roasted broccoli recipe is a family favorite.
  5. Sautรฉing โ€“ Like stir-frying but lower heat. Sautรฉ broccoli with garlic and a splash of oyster sauce for a quick side dish. Goes with almost anything.

Want all the details on different methods? Check out my guide on how to cook broccoli.

Preparation Tips

Getting broccoli ready is easy. Just a few things to keep in mind:

  • Wash it well. Rinse under cold water. Those tight florets can hide dirt, so swish it around in a bowl of water if you need to.
  • Cut evenly. Slice florets from the main stem and make them similar sizes. That way everything cooks at the same rate.
  • Use the stem. Peel off the tough outer layer with a knife or peeler. The inside is mild and stays crunchy even when cooked. Do not throw it away.
  • Dry before cooking. Especially for roasting or stir-frying. Wet broccoli steams instead of getting crispy.

Best Flavor Pairings

Broccoli plays well with so many ingredients. Here are combinations that really work:

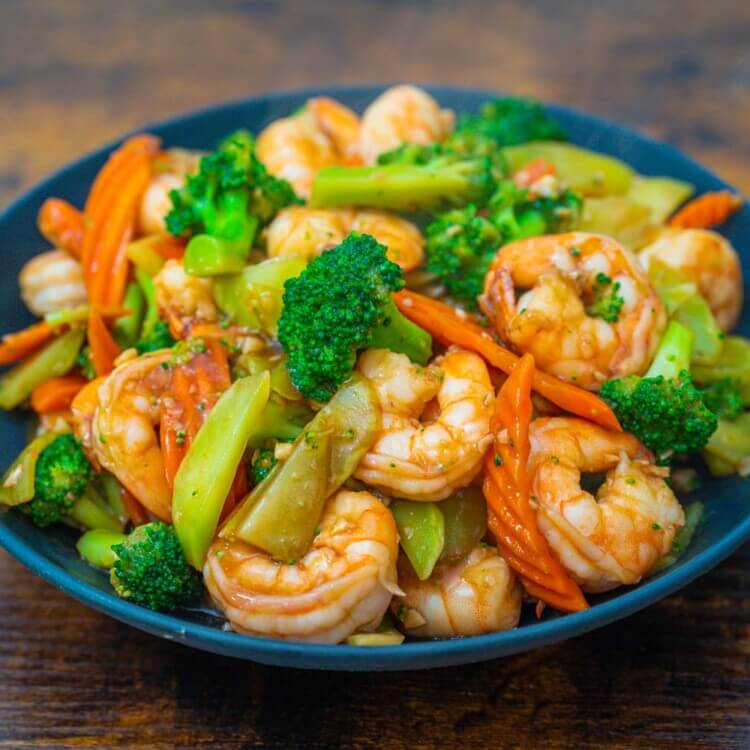
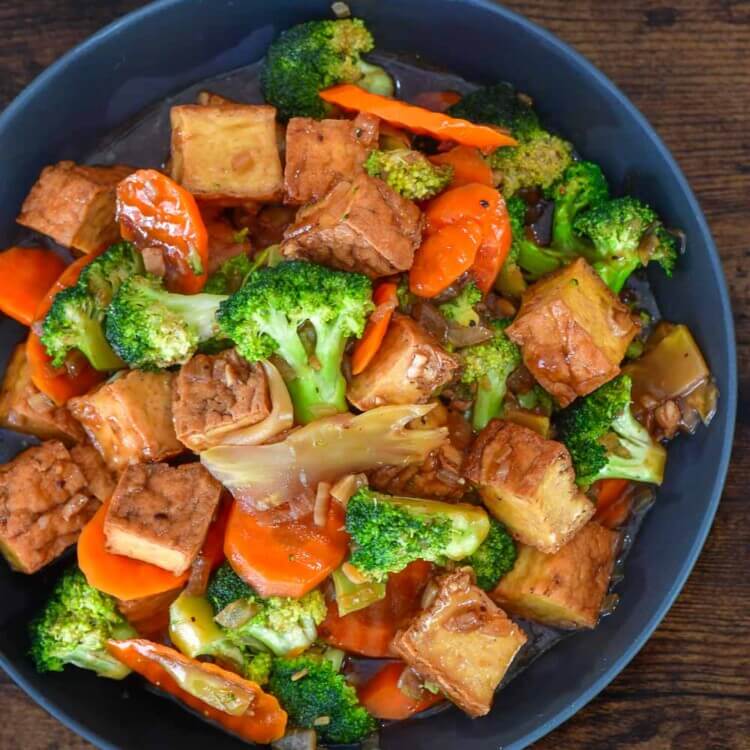
  • Proteins โ€“ Beef, chicken, shrimp, tofu. They all go great with broccoli. The vegetable soaks up savory sauces and balances the richness of meat.
  • Sauces โ€“ Oyster sauce, soy sauce, garlic. These are the classics. Sesame oil adds a nice nutty aroma. Cheese lovers? Cheddar and broccoli is killer.
  • Aromatics โ€“ Garlic and ginger make broccoli taste even better without overpowering it. A little onion adds sweetness.
  • Other vegetables โ€“ Carrots bring color and sweetness. Snow peas, bell peppers, and baby corn work great in mixed stir fries like chop suey.
  • Rice โ€“ I love serving broccoli stir fry with Yang Chow fried rice. The sauce from the broccoli mixes into the rice and it is just perfect.

Here in Tampa, broccoli shows up on our table at least once a week. My family especially loves it in stir fries where the florets soak up all that savory sauce. It is one of those vegetables that everyone actually finishes.

Common Questions Answered

How do I clean broccoli properly?

Rinse the whole head under cold water, then soak it in a bowl for a few minutes to loosen any dirt hiding in the florets. Swirl it around, lift it out, and pat dry. Simple as that.

Can I eat broccoli raw?

Absolutely. Raw broccoli is crunchy and works well in salads or with dips. Some people find it harder to digest, so start with small amounts if you are new to it.

What part of broccoli do I throw away?

Honestly? Very little. The florets are what most people eat, but the stem is perfectly good once you peel the tough outer layer. Even the leaves are edible. You can sautรฉ them like other greens.

How do I keep broccoli from getting soggy?

Do not overcook it. That is really it. Whether you are steaming, boiling, or stir-frying, take it off the heat while it still has some crunch. For stir-fries, add broccoli toward the end.

Is broccoli a vegetable or a flower?

Good question. We are actually eating the flower buds before they open, so technically it is a flowering vegetable. If you left it in the ground, those green buds would turn into small yellow flowers.

What is broccoli called in Filipino?

We just call it broccoli. It is not native to the Philippines, so there is no traditional Filipino name. You will see it labeled as broccoli in supermarkets and wet markets.

Why does my broccoli taste bitter?

Usually overcooking. The longer it cooks, the more sulfur compounds come out. Old broccoli or heads turning yellow can also taste bitter. Fresh broccoli, cooked quickly, should taste mild and slightly sweet.

Recipes with Broccoli

Here are some of our favorite broccoli recipes. Each one shows how well this vegetable works with the bold, savory flavors we love.

beef broccoli recipe

Beef with Broccoli

Tender beef slices stir-fried with crisp broccoli in a savory oyster sauce. This is the classic beef broccoli my family has been making for years. The marinade makes all the difference.

Beef with Broccoli Recipe

Chicken with Broccoli

Crispy cornstarch-coated chicken tossed with fresh broccoli in oyster sauce. Budget-friendly and great for weeknight dinners.

Chicken with Broccoli Recipe
Shrimp and Broccoli Recipe

Shrimp and Broccoli Stir Fry

Tender shrimp and bright green broccoli in a quick savory stir fry. The blanching step keeps the broccoli perfectly crisp.

Shrimp and Broccoli Stir Fry Recipe
tofu and broccoli stir fry

Tofu and Broccoli Stir Fry

Crispy fried tofu with broccoli florets in oyster sauce. Quick, affordable, and my vegetarian friends love it.

Tofu and Broccoli Stir Fry Recipe

Cheesy Broccoli Soup

Creamy, comforting soup with chopped broccoli and melted cheddar. This is exactly what you want on a cold, rainy day.

Cheesy Broccoli Soup Recipe

Broccoli might seem simple, but once you know how to pick it, store it, and cook it right, it becomes one of the most useful vegetables in your kitchen. There are so many ways to enjoy it. Give some of these recipes a try. I think you will be surprised how good broccoli can taste.

how to cook pork belly with bell peppers

35 Best Pork Belly Recipes

Pork belly recipes are some of the most beloved dishes in Filipino cooking. If you have ever bitten into a piece of perfectly crispy lechon kawali or enjoyed tender pork adobo with rice, you know exactly what I mean. Pork belly, or liempo as we call it in the Philippines, is the star of countless family gatherings and everyday meals.

Easy Liempo Inihaw Recipe

I have been cooking pork belly recipes for over three decades now, and I still get excited every time I hear that crackling sound when the skin turns golden and crispy. There is something special about this cut of meat. The layers of fat keep it juicy, the skin turns into amazing crackling, and it takes on flavor beautifully whether you fry it, roast it, grill it, or braise it.

This collection brings together 35 of my favorite pork belly recipes. I organized them by cooking method so you can easily find what you are looking for, whether you want something crispy for a celebration or something tender and saucy for a cozy weeknight dinner. Each recipe has been tested many times in my own kitchen, and I am sharing the tips I learned along the way to help you get great results every single time.

What is Pork Belly (Liempo)?

Pork belly is a boneless cut of meat from the underside of the pig. It has beautiful layers of meat and fat running through it, which is why it becomes so tender and flavorful when cooked. In the Philippines, we call it liempo, and it holds a special place in our food culture.

Pork Belly

Pork Belly vs Bacon

You might be wondering how pork belly is different from bacon. They actually come from the same part of the pig. The difference is that bacon is cured and smoked, while pork belly is fresh and uncured. Pork belly also comes with the skin attached, and that skin is what gives us the amazing crackling we all love in dishes like lechon kawali and bagnet.

bacon wrapped sea scallop in herbed butter sauce recipe

Why Filipinos Love Pork Belly

Filipino families have been cooking liempo for generations. It shows up at birthday parties, fiestas, Christmas celebrations, and New Year gatherings. But it is also something we enjoy on regular days when we want a satisfying meal.

The versatility of pork belly is what makes it so special. You can:

  • Deep fry it for crispy lechon kawali
  • Roast it in the oven for lechon liempo
  • Grill it for smoky inihaw na liempo
  • Braise it for tender adobo or humba
  • Air fry it for a healthier crispy option

No matter how you cook it, pork belly always delivers on flavor and satisfaction.

How to Choose the Best Pork Belly

Getting good results starts with picking the right piece of pork belly at the store. After years of selecting pork belly for my recipes, here are the things I always look for:

Pork Belly

Thickness

Look for a piece that is at least 1.5 inches thick and has even thickness throughout. If one end is much thinner than the other, it will cook unevenly. The thin parts might dry out before the thick parts are done. For lechon kawali, I prefer pieces that are about 2 inches thick.

Fat to Meat Ratio

A good piece of pork belly has nice alternating layers of meat and fat. This marbling is what keeps the meat juicy and gives it flavor. Avoid pieces that are mostly fat with very little meat, or pieces that are too lean. The fat renders during cooking and bastes the meat from the inside.

Fresh vs Vacuum Packed

When possible, buy pork belly fresh from the butcher counter instead of the pre-packaged ones. Vacuum packed pork belly sits in its own juices, which makes the skin wet and wrinkled. This can affect how crispy the skin gets when you cook it.

If you can only find vacuum packed, make sure to:

  • Pat the skin completely dry with paper towels
  • Leave it uncovered in the refrigerator for a few hours or overnight
  • The dry fridge air will help dry out the skin

Skin Condition

The skin should be dry and relatively flat. Wrinkled or wet skin is harder to get crispy. If the skin has been scored (those shallow cuts you sometimes see), check that the cuts do not go too deep into the meat. Deep cuts can cause juices to bubble up during cooking, which prevents the skin from getting crispy.

Where to Buy Pork Belly

I usually buy my pork belly from:

  • Costco – They have large slabs at good prices, great for feeding a crowd
  • Asian markets – Often have fresh pork belly at the butcher counter
  • Local butcher shops – Can cut it to your preferred thickness
  • Grocery stores – Check the meat counter, not just the pre-packaged section

Essential Pork Belly Cooking Methods

Before we get to the recipes, let me give you a quick overview of the main ways to cook pork belly. Each method gives you a different result, so you can choose based on what you are in the mood for.

Deep Frying

how to cook lechon kawali

This is the classic Filipino way. The pork is boiled first until tender, then deep fried until the skin becomes incredibly crispy. The meat stays juicy inside while the outside turns golden and crunchy. This method gives you the crispiest crackling but uses the most oil.

Oven Roasting

Lechon Belly

Great when you want crispy pork belly without all the oil. The pork roasts slowly in the oven, then gets blasted with high heat at the end to crisp up the skin. This is how I make Roasted Pork Belly for holiday dinners.

Grilling (Inihaw na Liempo)

Grilled Liempo Panlasang Pinoy

Gives pork belly a smoky, charred flavor that is hard to beat. We call this inihaw na liempo, and it is a staple at Filipino barbecues. The marinade caramelizes on the grill and creates those beautiful grill marks.

Braising

liempo estofado recipe

Turns pork belly into fall apart tender meat in a flavorful sauce. This is the method for pork adobo, estofado, and humba. The long, slow cooking breaks down the fat and connective tissue until the meat is incredibly soft.

Air Frying

turbo crispy liempo recipe

A newer method that gives you crispy results with less oil. I have been experimenting with this more lately, and the results are surprisingly good.

Crispy Fried Pork Belly Recipes

Nothing beats the satisfying crunch of perfectly fried pork belly. These recipes show you different ways to achieve that crispy skin and tender meat that Filipinos love so much. The key is always the same: boil until tender, dry completely, then fry until golden.

Super Crispy Lechon Kawali Recipe

Lechon Kawali

This is the classic Filipino crispy fried pork belly. The name comes from the kawali (wok) that we traditionally use to fry it. I boil the pork with bay leaves and peppercorns first, which infuses flavor into the meat. Then I fry it until the skin puffs up and turns into crackling. Serve it with lechon sauce or spiced vinegar for the best experience.

Lechon Kawali Recipe
Super Crispy Lechon Kawali Recipe Panlasang Pinoy

Super Crispy Lechon Kawali

This version takes the crispiness to another level using the double fry method. Frying the pork twice gives you skin that is so crispy, it actually crackles when you tap it with a fork. The secret is letting the pork cool down completely between the first and second fry. This extra step makes all the difference.

Super Crispy Lechon Kawali Recipe
Recipe for Filipino Lechon Kawali Deep Fried Pork Belly

Filipino Lechon Kawali

This is my special version that I make during Christmas and other celebrations. I marinate the boiled pork in liquid seasoning before frying, which gives it extra flavor. The result is so good that you do not even need dipping sauce, though I still serve it with toyomansi on the side.

Filipino Lechon Kawali
Crispy Lechon Belly Recipe Panlasang Pinoy

Crispy Lechon Belly

Bellychon is made in the oven instead of deep fried. The pork belly is seasoned with star anise and other aromatics, then roasted until crispy. This method uses less oil but still gives you that crunchy skin everyone loves.

Crispy Lechon Belly Recipe

Crispy Pork Belly Chicharon

This is pork belly taken to the extreme in terms of crispiness. I boil the pork until very tender, air dry it, then fry until it is crispy all the way through, almost like chicharron. It is incredibly addictive as a snack or pulutan with ice cold beer.

Crispy Pork Belly Chicharon Recipe
How to Get Crispy Pork Belly Chips

Crispy Pork Belly Chips

These are thin slices of pork belly cooked in the air fryer until they are crispy like chips. I season them with Knorr Liquid Seasoning before air frying. They make a great snack or topping for dishes like arroz caldo or lugaw.

Get the recipe:

Crispy Pork Belly Chips Recipe
Fried pork belly liempo

Fried Pork Belly Liempo

This recipe uses a flour and cornstarch coating for extra crunch. The pork is boiled first, then dredged and fried until golden. I serve it with a chili garlic dipping sauce that my family loves. The coating gives it a different texture from regular lechon kawali.

Fried Pork Belly Liempo Recipe

Bagnet

Bagnet is the famous crispy pork belly from Ilocos. It is similar to lechon kawali but traditionally uses no seasoning at all. The pork is simply boiled and fried, letting the natural pork flavor shine through. It is best served with bagoong (fermented fish paste) and pairs perfectly with pinakbet.

Bagnet Recipe
Crispy Bagnet

Crispy Bagnet

This is my version of Ilocano bagnet with extra crispy skin. I use the double fry method to make sure the skin is perfectly crunchy. The inside stays tender and juicy while the outside becomes golden and crispy. I also rub some salt on the pork before frying for added flavor.

Crispy Bagnet Recipe

How to Cook Pork Bagnet

This is a detailed guide on making authentic bagnet at home. I explain the traditional method and share tips on getting the best results. If you want to learn the proper technique from start to finish, this post walks you through it step by step.

How to Cook Pork Bagnet

Pro Tips for Crispy Fried Pork Belly

  • Boil the pork until the skin is very tender. If the skin is still tough, it will not get crispy no matter how long you fry it.
  • Dry the pork completely before frying. I pat it dry with paper towels and sometimes let it sit uncovered in the fridge for a few hours or overnight.
  • Fry in medium heat (around 350F), not high heat. High heat will burn the outside before the inside is cooked through.
  • Use a splatter screen or partially cover the pot when frying. The moisture in the pork will cause the oil to splatter.
  • Let the fried pork rest on a wire rack, not paper towels. Paper towels can make the bottom soggy from trapped steam.
  • For extra crispy skin, try the double fry method. Fry once, let it cool completely, then fry again.

Oven Roasted Pork Belly Recipes

Oven roasting is my go to method when I want crispy pork belly without the mess of deep frying. The slow roasting makes the meat incredibly tender, and the high heat at the end crisps up the skin beautifully. These recipes are perfect for special occasions when you want something impressive.

Roasted Pork Belly (Lechon Liempo)

This is my foolproof oven roasted pork belly recipe. I stuff the belly with lemongrass, scallions, and onions, then roll it up and roast. The aromatics infuse the meat with flavor, and brushing the skin with milk helps it turn golden brown. This is the recipe I make for New Year celebrations.

Roasted Pork Belly Recipe

Oven Roasted Pork Belly

This version uses Chinese five spice powder and Shaoxing wine for a slightly different flavor profile. The pork is marinated overnight, then roasted until crispy. I like to serve it with Filipino lechonย sauce or sinamak

Oven Roasted Pork Belly Recipe

Crispy Oven Broiled Liempo Recipe

This is a lighter version that uses the broiler instead of deep frying. The pork is steamed first to make it tender, then broiled until crispy. It has less oil than lechon kawali but still satisfies that craving for crispy pork.

Crispy Oven Broiled Liempo Recipe
Crispy Air Fried Liempo Pinakbet with Ube Recipe

Crispy Air Fried Liempo Pinakbet with Ube

This creative dish combines crispy air fried liempo with pinakbet vegetables and ube. The pork is marinated with sinigang mix for a tangy flavor, then air fried until crispy. It is a complete meal in one plate and a fun twist on two classic Filipino dishes.

Crispy Air Fried Liempo Pinakbet with Ube Recipe

Pro Tips for Oven Roasted Pork Belly

  • Score the skin lightly or poke holes in it to help the fat render and the skin crisp up. Just do not cut too deep into the meat.
  • Start with low heat (around 325F to 350F) to cook the meat through, then blast it with high heat (450F or higher) at the end for crispy skin.
  • Brushing the skin with milk during roasting helps it brown evenly and adds a subtle sweetness.
  • Place the pork on a wire rack over a baking pan so air circulates around it and the bottom does not get soggy.
  • Let the pork rest for 10 to 15 minutes before slicing so the juices redistribute throughout the meat.

Grilled Pork Belly Recipes

Grilled pork belly has a smoky, charred flavor that you cannot get from any other cooking method. The marinade caramelizes on the grill and creates those irresistible grill marks. These recipes are perfect for backyard barbecues, outdoor gatherings, or anytime you want that grilled flavor.

Grilled Pork Belly

This is my basic grilled pork belly recipe with a simple but flavorful marinade. The pork marinates for at least an hour in soy sauce, garlic, and spices, then goes on the grill. I baste it with the remaining marinade while grilling for extra flavor. Serve it with sinangag and a fried egg for a complete meal.

Grilled Pork Belly Recipe

Inihaw na Liempo

This is the traditional Filipino grilled pork belly that you find at barbecue stands all over the Philippines. The marinade has soy sauce, calamansi (or lemon), garlic, and black pepper. I serve it withย atchara on the side.

Inihaw na Liempo Recipe
Liempo Recipe

Easy Liempo Inihaw

This is a simpler version for those busy weeknights when you still want grilled pork belly. The marinade comes together quickly, and the pork only needs to marinate for about 30 minutes. Quick, easy, and still delicious.

Easy Liempo Inihaw Recipe

How to Grill Liempo in the Oven

No outdoor grill? No problem. This recipe shows you how to get that grilled flavor using your oven. I use the broiler to mimic the high heat of a grill, and the results are surprisingly close to the real thing. Great for apartment living or rainy days.

How to Grill Liempo in the Oven

Pro Tips for Grilled Pork Belly

  • Slice the pork belly into pieces about half an inch thick for faster cooking and more surface area for the marinade to flavor.
  • Marinate for at least 1 hour, but overnight is even better. The longer it marinates, the more flavorful the meat.
  • Oil the grill grates before cooking to prevent sticking. Use a paper towel dipped in oil and tongs.
  • Grill over medium heat and flip frequently to prevent burning. The sugars in the marinade can burn quickly over high heat.
  • Baste with marinade (mixed with a little oil) while grilling to keep the meat moist and build up layers of flavor.
  • Let the grilled pork rest for a few minutes before serving so the juices settle.

Braised Pork Belly Recipes

Braised pork belly is comfort food at its finest. The long, slow cooking turns the meat incredibly tender and allows it to soak up all the flavors of the sauce. These are the dishes I make when I want something hearty and satisfying, especially on cold or rainy days.

Filipino Adobo Pork Recipe

Pork Adobo

This is the iconic Filipino dish that needs no introduction. Pork belly simmers in a mixture of soy sauce, vinegar, garlic, and bay leaves until tender. The sauce is savory, slightly tangy, and absolutely delicious over rice. This recipe is how I have been making adobo for years, and it never disappoints.

Pork Adobo Recipe

Basic Pork Adobo

This is my stripped down version using just the core ingredients. No fancy additions, just the essential flavors that make adobo so good. I like to infuse the oil with garlic and bay leaves at the start, which makes the whole dish more aromatic. If you want to learn the fundamentals of adobo, start here.

Basic Pork Adobo Recipe
Coke Pork Adobo Recipe

Coke Pork Adobo

Adding cola to adobo might sound unusual, but it works beautifully. The cola adds sweetness and helps tenderize the meat, giving the adobo a flavor similar to humba. This is a fun twist on the classic that my family really enjoys.

Coke Pork Adobo Recipe
Nagmamantikang-Pork-Adobo-Recipe

Nagmamantikang Pork Adobo

This is a dry version of adobo where the sauce is reduced until the pork is coated in a glossy, flavorful glaze. The pineapple juice in the marinade adds a subtle sweetness and helps tenderize the meat. The result is pork that is rich, slightly sweet, and incredibly tender. The name means “oily adobo” in Filipino.

Nagmamantikang Pork Adobo Recipe
Pork Adobo with Potato

Pork Adobo with Potato

Adding potatoes to adobo stretches the dish and makes it even more satisfying. The potatoes absorb the adobo sauce and become just as flavorful as the meat. This is a great way to make a little pork belly feed more people, and kids love it.

Pork Adobo with Potato Recipe
Pork Adobo with Tofu

Pork Adobo with Tofu

I developed this recipe when I wanted to eat a little less meat but still enjoy adobo. The fried tofu soaks up the sauce and adds a nice texture contrast to the tender pork. It is a good compromise when you want something lighter but still satisfying.

Pork Adobo with Tofu Recipe
Extremely Spicy Pork Adobo Recipe

Extremely Spicy Pork Adobo na Tuyo

This is for those who love heat. I use ghost peppers to make this adobo extremely spicy. The sauce is cooked down until almost dry, leaving the pork coated in a spicy, flavorful glaze. Have a glass of milk ready. This makes excellent pulutan (beer food).

Extremely Spicy Pork Adobo na Tuyo
Pork Humba Recipe Panlasang Pinoy

Humba

Humba is the Visayan version of braised pork belly. It is sweeter than adobo, with brown sugar, pineapple juice, and banana blossoms in the mix. The salted black beans (tausi) give it a unique savory depth that sets it apart from regular adobo. This is one of my favorite comfort foods.

Humba Recipe
humba bisaya version recipe

Humba Bisaya Version

This version uses cola instead of pineapple juice for the sweetness, which is how they make it in some parts of the Visayas. The cola caramelizes as it cooks and gives the pork a beautiful dark color. A regional twist on a regional dish.

Humba Bisaya Recipe
braised pork belly

Braised Pork Belly with Potato and Peppers

This is a soy and oyster sauce braised pork belly with potatoes and bell peppers. The braising liquid becomes a rich, savory sauce that goes perfectly with rice. I love how the potatoes become soft and absorb all that flavor. A hearty one pot meal.

Braised Pork Belly with Potato and Peppers Recipe

Pro Tips for Braised Pork Belly

  • Cut the pork belly into chunks about 1.5 to 2 inches for the best texture. Too small and they can fall apart; too large and they take forever to cook.
  • Sear the pork before braising to develop flavor and render some of the fat. This extra step makes a noticeable difference.
  • Cook low and slow. Rushing the braising will give you tough meat. Patience is key.
  • Do not stir the adobo right after adding the vinegar. Let it boil for a minute first so the sourness mellows and the harsh acidic smell cooks off.
  • Braised dishes often taste even better the next day after the flavors have had time to meld. Make extra for leftovers.

Other Delicious Pork Belly Dishes

These recipes do not fit neatly into one category, but they are all wonderful ways to enjoy pork belly. Some combine different cooking methods, while others pair pork belly with vegetables and other ingredients for complete meals.

pork belly with oyster sauce

Pork Belly with Boiled Eggs in Oyster Sauce

This dish simmers pork belly in a savory oyster sauce until tender, then adds boiled eggs at the end. The eggs soak up the sauce and become beautifully flavored. It reminds me of the braised pork dishes you find at Chinese restaurants. Great for meal prep since it reheats well.

Pork Belly with Boiled Eggs in Oyster Sauce Recipe
pepper pork belly recipe

Pepper Pork Belly

This is a quick stir fry of pork belly with colorful bell peppers. The pork is cooked in soy sauce and oyster sauce until tender, then the peppers are added for crunch and color. It comes together in about 30 minutes, making it perfect for busy weeknights.

Pepper Pork Belly Recipe

Sinigang na Liempo sa Sampaloc

This is the classic sour soup made with pork belly and tamarind. The sourness of the broth cuts through the richness of the pork belly perfectly. I add lots of vegetables like kangkong, string beans, radish, and eggplant. One of the most comforting Filipino soups.

Sinigang na Liempo sa Sampaloc Recipe
Killer Crispy Sinigang

Killer Crispy Sinigang

This creative dish combines two Filipino favorites: crispy liempo and sinigang. The pork belly is marinated with sinigang mix, air dried, then fried until crispy. It is served with sinigang soup and vegetables on the side. Best of both worlds in one meal.

Killer Crispy Sinigang Recipe
Paksiw na Lechon Kawali Recipe

Paksiw na Lechon Kawali

This is what I make when I have leftover lechon kawali. The crispy pork is simmered in vinegar and lechon sauce until tender and flavorful. It is a great way to transform leftovers into something new. The sauce becomes rich and slightly sweet.

Paksiw na Lechon Kawali Recipe

Pinakbet with Lechon Kawali

Pinakbet is a vegetable dish, but adding crispy lechon kawali takes it to another level. The crispy pork adds richness and texture that complements the vegetables perfectly. This is one of my favorite ways to eat pinakbet. The combination of vegetables and crispy pork is so satisfying.

Pinakbet with Lechon Kawali Recipe
easy crispy kare kare

Crispy Kare Kare

This is kare kare made with crispy pork belly instead of the usual oxtail. The pork is fried until crispy, then served with the rich peanut sauce and vegetables. The contrast between the crispy pork and creamy sauce is amazing. Serve it with bagoong on the side.

Crispy Kare Kare Recipe

Expert Tips for Cooking Pork Belly

After cooking pork belly for over 30 years, I have learned a few things that make a big difference in the final result. Here are my best tips that will help you get great results no matter which recipe you choose:

For the Crispiest Skin

  • Make sure the skin is completely dry before cooking. Moisture is the enemy of crispy skin. Pat it dry with paper towels and let it air dry in the fridge.
  • Do not score too deep. If you cut into the meat, the juices will bubble up during cooking and prevent the skin from crisping. Keep cuts shallow, just through the skin.
  • Salt the skin generously. Salt draws out moisture and helps the skin crisp up. For oven roasted pork belly, I salt the skin and leave it uncovered in the fridge overnight.
  • For deep frying, make sure the oil is hot enough (around 350F) before adding the pork. Cold oil will result in soggy skin.

For Tender Meat

  • Do not rush the cooking. Pork belly needs time for the fat and connective tissue to break down.
  • When boiling pork belly for lechon kawali, cook it until a fork slides in easily with no resistance.
  • For braised dishes like adobo and humba, low and slow is the way to go. Simmer gently, do not boil vigorously.
  • Cutting the pork into even sized pieces ensures they cook at the same rate.

For Better Flavor

  • Season the meat, not just the skin. Rub salt and pepper on all sides of the pork.
  • Marinating overnight allows the flavors to penetrate deeper into the meat.
  • Use the rendered pork fat for cooking other things. It adds so much flavor to vegetables and fried rice.
  • For braised dishes, sear the pork first to develop a flavorful crust before adding the liquid.

For Food Safety

  • Pork belly should reach an internal temperature of at least 145F (63C) according to USDA guidelines.
  • When reheating, make sure it is heated through completely, especially for braised dishes.
  • Do not leave cooked pork belly at room temperature for more than 2 hours.

What to Serve with Pork Belly

Pork belly is rich and flavorful, so I like to serve it with things that balance out that richness. Here are my favorite pairings:

Rice

Bacon Garlic Fried Rice-

Rice is essential with pork belly. Here are some options:

  • Plain steamed rice – The classic choice
  • Sinangag (Garlic Fried Rice) – Crispy garlic adds another layer of flavor
  • Java Rice – The turmeric and aromatics complement pork belly well

Dipping Sauces

lechon sauce recipe

The right dipping sauce can elevate your pork belly:

  • Lechon Sauce – Sweet and savory, perfect for crispy pork belly
  • Spiced Vinegar – Tangy and spicy, cuts through the richness
  • Toyomansi – Simple soy sauce with calamansi, great for grilled pork

Pickled Sides

Ensaladang Talong

Pickled dishes cut through the richness of pork belly:

  • Pickled Papaya – Sweet and tangy, a classic pairing
  • Ensaladang Talong (Eggplant Salad) – Smoky and refreshing

Soups

Classic Chicken Tinola

A bowl of soup on the side helps balance a rich pork belly meal:

  • Sinigang – The sourness cleanses the palate
  • Nilaga – Simple and comforting
  • Pork Tinola – Green papaya and ginger broth

How to Store It

Fridge

Let the pork belly cool to room temperature (but not more than 2 hours), then store in an airtight container in the refrigerator. It will keep for 3 to 4 days. For braised dishes like adobo, store the pork in its sauce to keep it moist.

Freezer

Pork belly freezes well for up to 3 months. Here is how I do it:

  1. Let it cool completely
  2. Wrap tightly in plastic wrap
  3. Put it in a freezer bag and remove as much air as possible
  4. Label with the date
  5. Thaw overnight in the refrigerator before reheating

How to Reheat Pork Belly

Reheating Crispy Pork Belly

The air fryer is the best way to reheat crispy pork belly and restore its crunch:

  • Set your air fryer to 375F
  • Heat for 5 to 8 minutes until the skin is crispy again
  • No need to add oil

You can also use the oven:

  • Preheat to 400F
  • Place pork on a wire rack over a baking sheet
  • Heat for 10 to 15 minutes until crispy

Reheating Braised Pork Belly

  • Reheat in a pan over low heat with the sauce
  • Add a few tablespoons of water.
  • Cover and heat until warmed through
  • You can also microwave covered, stirring halfway through

Frequently Asked Questions

What is the difference between lechon kawali and bagnet?

Both are crispy fried pork belly, but there are some differences. Lechon kawali is usually seasoned before frying with salt, pepper, and aromatics in the boiling liquid. Traditional bagnet from Ilocos uses no seasoning at all. The pork is simply boiled and fried, letting the natural pork flavor shine through. Bagnet is also typically fried longer for extra crispiness and is traditionally served with bagoong.

Can I make crispy pork belly without deep frying?

Yes, you can use the oven or air fryer. For oven roasting, cook the pork belly at low temperature (325F to 350F) until tender, then blast it with high heat (450F or higher) to crisp up the skin. Air frying also works well for smaller pieces. Check out my Crispy Pork Belly Chips recipe for an air fryer method. The results are not exactly the same as deep frying, but still delicious.

How do I prevent the skin from being rubbery?

Rubbery skin usually means one of these issues:

  • The skin did not get dry enough before cooking. Make sure to pat it completely dry.
  • The heat was not high enough at the end. You need high heat to crisp the skin.
  • The pork was not boiled long enough. The skin needs to be tender before frying.

For best results, dry the skin in the fridge overnight and make sure your oil is at the right temperature (around 350F) before frying.

What cut of pork can I use instead of pork belly?

For braised recipes like adobo and humba, pork shoulder or pork butt can work. They are leaner but still have enough fat to stay moist during long cooking. For crispy recipes like lechon kawali, pork belly is really the best choice because of the skin and fat content that makes the crackling possible.

How long should I marinate pork belly?

It depends on the recipe:

  • For grilled pork belly (inihaw na liempo): At least 1 hour, but overnight is even better
  • For braised dishes: You can skip marinating since the pork cooks in the sauce and absorbs flavor that way
  • For oven roasted pork belly: Overnight marinating gives the best flavor

Why is my fried pork belly tough?

The pork was probably not boiled long enough before frying. The meat needs to be tender before it goes into the oil. If it is tough after frying, there is no way to fix it. Next time, boil longer until a fork slides in easily with no resistance. For a 2 pound piece of pork belly, this usually takes 45 minutes to 1 hour.

Can I use pork belly without skin?

Yes, skinless pork belly works fine for braised dishes. For crispy recipes, you will not get the crackling, but the meat will still be delicious. The fat in pork belly keeps it moist and flavorful even without the skin.

I hope this collection helps you find your new favorite pork belly recipe. Each one has been tested and enjoyed by my family over the years, and I know you will love them too. If you have questions about any of these recipes or want to share how yours turned out, leave a comment below and I will do my best to help.

Happy cooking!

Classic Bicol Express Recipes

7 Classic Bicol Express Recipes You Can Make At Home

These Bicol Express Recipes best represent the rich and lively flavors of Filipino cooking. It is creamy, spicy, and always comforting. The mix of coconut milk, shrimp paste, and chili makes every bite full of flavor. The sauce is smooth and slightly sweet from the coconut, while the chili adds the right amount of heat.

Classic Bicol Express Recipes

The beauty of Bicol Express is in its simplicity. With just a few common ingredients, you can create a dish that tastes like it came from home. Coconut milk brings creaminess, shrimp paste gives that savory depth, and chili ties everything together. Once the sauce starts to simmer, the aroma fills the kitchen and instantly makes you hungry.

This dish is also known for being flexible. You can use pork, chicken, beef, fish, or seafood. You can make it extra spicy or keep it mild. Some versions have thick sauce, while others stay a bit lighter. No matter how you prepare it, the result is always creamy, flavorful, and satisfying.

Bicol Express is the kind of food that fits any table. It is perfect with rice, but it can also be served as pulutan when sharing food with friends. Each version tells a story of how Filipinos enjoy comfort food that excites the appetite and brings people together.

Classic Bicol Express Recipes That You Must Try

Bicol Express Ingredients

Classic Pork Bicol Express

The classic version that made this dish famous. Pork belly is simmered in coconut milk with shrimp paste, garlic, onion, and chili until the meat becomes tender and the sauce rich and creamy. Every bite delivers the perfect balance of spice and flavor.

GET THE RECIPE
Seafood Bicol Express Recipe Panlasang Pinoy

Seafood Bicol Express

A light and flavorful variation that uses shrimp, squid, and mussels. The seafood absorbs the creamy coconut sauce beautifully. The shrimp paste adds savoriness, and the chili keeps the flavor lively. This version is great for anyone who enjoys seafood but still wants that rich and spicy taste.

GET THE RECIPE
Tahong Bicol Express

Tahong Bicol Express

This version gives Bicol Express a refreshing seafood touch. Fresh mussels cook in coconut milk with shrimp paste, garlic, ginger, and chili until the sauce turns thick and flavorful. The mussels bring their natural sweetness, which blends nicely with the spicy and creamy sauce. It tastes great with steamed rice and also makes an excellent pulutan for get-togethers.

GET THE RECIPE
chicken gizzard bicol express

Chicken Gizzard Bicol Express

A flavorful twist to the classic dish by using tender chicken gizzards simmered in creamy coconut milk with shrimp paste and chili. The gizzards soak up the rich, spicy sauce while adding a pleasant chewiness that makes every bite satisfying.

GET THE RECIPE
Fish bicol express in a pan

Bangus Bicol Express

Milkfish brings a tender and mild flavor to this dish. The bangus pieces soak up the coconut milk and chili, creating a soft texture with bold taste. It is lighter than pork but still has the same satisfying richness.

GET THE RECIPE

Beef Bicol Express

Beef makes this version hearty and bold. Slow cooking in coconut milk softens the meat and thickens the sauce into a creamy layer of flavor. The shrimp paste and chili give it a deep and slightly smoky taste that goes perfectly with plain rice.

GET THE RECIPE
chicken bicol express recipe

Chicken Bicol Express

A lighter and quicker version of the classic dish. Boneless chicken pieces simmer in coconut milk with shrimp paste and chili until the sauce becomes thick and flavorful. It has the same creamy and spicy taste that makes Bicol Express special but feels less heavy, making it perfect for everyday meals.

GET THE RECIPE

How to Enjoy Bicol Express

Each version of Bicol Express goes best with hot steamed rice. The creaminess and spice blend nicely with rice, creating a comforting meal that fills you up.

Thicker versions also make great pulutan. The creamy and spicy sauce pairs perfectly with cold drinks and friendly conversation. It is one of those dishes that taste even better when shared.

Each version, from pork to seafood, has its own personality. The creamy sauce ties them all together, creating something that feels familiar and new at the same time. Cooking it at home fills the kitchen with the aroma of garlic, chili, and coconut milk, a smell that always makes you look forward to eating.

Pancit

Pancit

A freshly cooked plate of Pancit always feels like home to me. The aroma of garlic sizzling in oil, the noodles soaking up that savory sauce, and the sound of laughter as everyone gathers around the table bring back so many memories.

Pancit Mami Soup

What is Pancit

Pancit is a Filipino noodle dish with deep roots in Chinese influence. The word comes from pian i sit, which means โ€œsomething cooked fast.โ€ Through the years, Filipinos embraced and transformed it into something truly our own. From rice noodles to egg noodles, stir fried versions to soupy ones, pancit has become one of the most loved dishes in Filipino cooking.

It is more than just noodles. It is comfort food that carries the warmth of home. Each region has its own take on it, some with seafood, others with meat, and many with vegetables straight from the garden. Every version tells a different story, and yet they all share the same familiar heart.

The Heart of Pancit

Cooking pancit is simple, but there is a special rhythm to it. It usually starts with garlic and onion sizzling in oil, followed by slices of pork, chicken, or shrimp. Then the vegetables go in, cabbage, carrots, maybe some snow peas for crunch. Finally, the noodles soak up the sauce until every strand is packed with flavor. A quick squeeze of calamansi at the end ties everything together beautifully.

Pancit Bato

What I love about pancit is how forgiving it is. You can make it with whatever you have at home, and it will still come out delicious. It does not have strict rules, only your favorite ingredients and a bit of love.

Why Filipinos Love Pancit

In Filipino gatherings, pancit is a must have dish. You will always find it at birthdays because the long noodles symbolize long life. But even on ordinary days, it is a dish that brings comfort after a long day at work or something to share with friends when they visit.

Pancit reminds us of togetherness. It is one of those dishes that always makes people stop and sit down to eat, talk, and laugh. Whether you are in Manila or abroad, cooking pancit always feels like bringing a piece of the Philippines to your kitchen.

11 Pancit Recipes to Try

If you want to explore different versions of this Filipino favorite, here are 11 pancit recipes that show just how special our noodle dishes can be. Each one has its own personality, some are saucy and rich while others are light and simple.

Fried Noodles with Chicken and Shrimp Recipe

Crispy Fried Noodles

This version features deep fried noodles that are crisped first then topped with sautรฉed garlic, chicken slices, shrimp, and vegetables for a delightful contrast of textures. It is perfect for gatherings because the crunchy noodle base stays crisp before soaking in the sauce. The recipe shows how simple noodles, when handled right, can turn into a memorable dish.

GET THE RECIPE
Sotanghon Guisado

Sotanghon Guisado

This dish uses vermicelli glass noodles that are soaked and then sautรฉed with garlic, onions, meat, and vegetables for a light and flavorful result. It is a comforting noodle dish that feels homey enough for weekdays yet special enough for celebrations. The noodles absorb the savory broth beautifully, making every bite delicate and satisfying.

GET THE RECIPE
Bam-i

Bam I

This Cebuano style noodle dish combines two types of noodles and a mix of meats to create a hearty and rustic meal. It captures the regional creativity of Cebu, where local cooks blend Chinese and Filipino influences seamlessly. The combination of textures and flavors makes it a true comfort dish.

GET THE RECIPE
pancit bihon guisado recipe

Pancit Guisado

A classic rice noodle version featuring bihon stir fried with chicken, shrimp, and vegetables in a savory soy based sauce. It is one of the most familiar and comforting types of pancit you will find across Filipino homes. This simple yet flavorful dish proves that pancit does not need fancy ingredients to taste amazing.

GET THE RECIPE
Pancit Canton Recipe

Pancit Canton

This recipe uses flour stick noodles combined with pork, shrimp, Chinese sausage, and soy oyster seasoning for that rich, meaty taste everyone loves. It is one of the most popular pancit varieties, known for its bold flavors and satisfying bite. The mix of vegetables and proteins gives this version a wonderful balance of color and texture.

GET THE RECIPE
Pancit Palabok Recipe

Pancit Palabok

This dish features noodles coated in a golden shrimp sauce and topped with crushed chicharon, hard boiled eggs, and smoked fish flakes. It is colorful, festive, and often served during special occasions and family gatherings. The combination of textures and flavors makes it one of the most iconic Filipino noodle dishes.

GET THE RECIPE
chicken pancit habhab recipe panlasang pinoy

Pancit Habhab

Originating from Lucban, this dish uses miki Lucban noodles served on banana leaves and eaten without utensils for a fun and rustic experience. It combines pork, liver, shrimp, and vegetables for a flavorful and smoky taste. Pancit Habhab is proof that good food does not need to be fancy to be unforgettable.

GET THE RECIPE
How to cook pancit bato from Bicol

Pancit Bato

From Bicolโ€™s town of Bato, this local favorite uses toasted noodles stir fried with pork, shrimp, chicken broth, and vegetables. It has a bold, savory flavor that reflects the regionโ€™s love for hearty, home cooked food. Including it in your pancit lineup shows how diverse Filipino noodles can be from one province to another.

GET THE RECIPE
Pancit Malabon Recipe Panlasang Pinoy

Pancit Malabon

A rich seafood laden noodle dish from Malabon featuring thick rice noodles in an orange colored sauce made with shrimp broth and crab fat. It is generously topped with shrimp, squid, pork rinds, and smoked fish flakes for extra flavor. This vibrant and saucy dish always stands out in celebrations and fiestas.

GET THE RECIPE
Pancit Chami with Lumpia

Pancit Chami

This version from Quezon province features fresh noodles cooked with pork, chicken, liver, and a sweet savory sauce made from soy sauce, oyster sauce, and sugar. It is thick, flavorful, and slightly saucy, offering something different from the usual pancit dishes. It is a great way to experience another regional style of Filipino noodles.

GET THE RECIPE

Pancit Luglug

This Pampanga favorite is similar to palabok but uses thicker rice noodles and a rich shrimp and pork sauce. It is flavorful, creamy, and always topped with egg, shrimp, and crushed chicharon for that perfect mix of texture. This dish beautifully represents the Kapampangan love for bold and hearty flavors.

GET THE RECIPE

These recipes show just how diverse Filipino noodles can be. Each one has its own character, but they all celebrate the same idea, food that brings people closer.

Tips in Cooking Pancit

  • Prepare all ingredients before you start cooking. Pancit cooks fast once you begin.
  • Use high heat so the noodles absorb flavor without turning soggy.
  • Sautรฉ the garlic and onion until fragrant before adding meat and vegetables.
  • Adjust seasonings toward the end to get the perfect balance of saltiness and umami.
  • Do not forget to finish with calamansi or lemon juice for that bright, fresh flavor.

How Pancit Brings People Together

Every Filipino family has their own pancit memories. It could be a birthday meal with long noodles for long life, or a quick merienda shared after a long day. Pancit has a way of turning simple moments into something meaningful.

I still find comfort in cooking pancit. The smell alone brings me back to my childhood in the Philippines, the laughter, the stories, and the joy of eating together. That is what makes it timeless.

Pancit is a reflection of who we are. It is simple, humble, and full of warmth, the kind of food that reminds you of family, friends, and home.

Try these 11 pancit recipes and discover which one becomes your favorite. Each dish has its own charm, but they all share that familiar taste of comfort and togetherness.

Juicy bbq chicken

BBQ Chicken with Java Rice

It’s hard to go wrong when you put chicken and rice together. But, what could make it even better? BBQ! This BBQ Chicken with a savory glaze tastes as good as it looks. The side of Java Rice is also a real visual delight.

chicken bbq

BBQ Chicken with Java Rice is an easy recipe where marinated grilled chicken meets flavorful rice. I prepared the chicken using a marinade that combines sweet and umami flavors. It includes banana ketchup, lemon-lime soda, and soy sauce. Additionally, the Java Rice complements the chicken with its rich taste and aroma. It is made by cooking rice with turmeric powder, which gives it a vibrant yellow color. Together, the smoky chicken and fragrant rice create a satisfying and colorful meal!

I wanted to highlight the bold flavors of the chicken. For this reason, The Java Rice I used here is a basic recipe. I used butter to make it richer and infused it with garlic oil. Java Rice can also be served with other dishes such as fried pork chops. I have a great recipe for you to try: Pork Chop with Java Rice.

How to Cook BBQ Chicken with Java Rice

  1. Making Crispy Garlic Toppings And Garlic Oil – Place 1/4 cup of cooking oil and a head of crushed garlic in a saucepan. Heat it on the stovetop while stirring to ensure the garlic cooks evenly. When the garlic turns golden brown, remove it from the heat. Separate the toasted garlic from the oil.
  2. Deboning the chicken thigh – Locate the bone by creating an incision on the inner part of the chicken thigh. Pull off the bones and cut the connecting tissues to separate it from the meat.
  3. Preparing The Chicken Marinade And Marinating – In a bowl, combine 1/2 cup banana ketchup, 1/2 cup soy sauce, 1 cup lemon-lime soda, the juice of one lemon, 5 cloves of crushed garlic, 1/4 teaspoon ground black pepper, and 1/2 teaspoon salt. Pour the mixture into a large freezer bag with 4 cleaned chicken leg quarters. Shake gently to coat the chicken completely, remove excess air, and seal. Refrigerate for at least 3 hours to let the flavors penetrate deeply.
  4. Cooking Vibrant And Aromatic Java Rice – In your rice cooker, combine 2 cups of rice, 3 cups of water, 1 tablespoon of butter, 1 teaspoon turmeric powder, and 1 teaspoon chicken powder. Add 2 tablespoons of garlic oil for extra flavor. Cook until the rice is done – turmeric adds a vibrant yellow hue.
  5. Grilling The Chicken To Smoky Perfection – Take the marinated chicken out of the bag. Transfer the marinade to a saucepan and boil it for 1 minute. Let it cool down and stir in the remaining garlic oil. Grill the chicken for 12 to 15 minutes, flipping and basting regularly. Check that the internal temperature reaches 165ยฐF for doneness.
  6. Plating And Final Touches – Serve the grilled chicken alongside the Java Rice. Sprinkle the toasted garlic on the rice and add a side of papaya atchara for a fresh, tangy balance. Enjoy your BBQ Chicken with Java Rice!
Juicy bbq chicken

A Dish to Share with the Family

Do you love having your friends and family over? Whether youโ€™re entertaining on a weeknight or having a casual gathering, consider serving Java Rice with BBQ. Itโ€™s a popular choice at many pop-up food stalls, and for good reason! Itโ€™s an excellent option for sharing a hearty and affordable meal with loved ones. Pair it with grilled chicken or pork for a hearty meal your guests will enjoy.

What to Serve with BBQ Chicken with Java Rice

Do you want to elevate the flavor of the BBQ chicken? You can drizzle some chicken or chili oil on the meat, or even on a spoonful of rice. You can also prepare a dip made with soy sauce, chili, and lime or calamansi.

Java rice

Alternatively, serve it with fresh greens like pickled radish, garden salad, cucumber slices, or a tomato and onion salad.

If you are a fan of desserts and sweets after a hearty meal, try having some Filipino fruit salad. You can also enjoy the dish with Cranberry Apple Juice or a refreshing glass of cold Melon Juice.

chicken bbq recipe
chicken bbq
Print Pin

BBQ Chicken with Java Rice

Marinated chicken that is grilled and served with Java rice
Course Main Course
Cuisine Fiipino, Indonesian
Keyword Filipino chicken recipes, java rice, pinoy bbq
Prep Time 20 minutes minutes
Cook Time 15 minutes minutes
Marinating the chicken 3 hours hours
Total Time 3 hours hours 35 minutes minutes
Servings 4 people
Calories 3608kcal
Author Vanjo Merano

Ingredients

  • 4 chicken leg quarters cleaned
  • 1 head garlic crushed
  • 1/4 cup cooking oil

Marinade ingredients:

  • 1/2 cup banana ketchup
  • 1/2 cup soy sauce
  • 1 cup lemon lime soda
  • 1 lemon
  • 5 cloves garlic crushed
  • 1/4 teaspoon ground black pepper
  • 1/2 teaspoon salt

Java rice ingredients:

  • 2 cups rice
  • 3 cups water
  • 1 tablespoon butter
  • 1 teaspoon turmeric powder
  • 1 teaspoon chicken powder

Instructions

  • Make the toasted garlic by combining 1/4 cup of cooking oil and 1 head crushed garlic in a saucepan. Turn on the heat on your stovetop and slowly cook while stirring until the garlic turns golden brown. (see notes below)
    1/4 cup cooking oil, 1 head garlic
  • Separate the toasted garlic from the garlic oil.
  • Make the marinade by combining all the marinade ingredients. Stir to mix.
    1/2 cup banana ketchup, 1/2 cup soy sauce, 1 cup lemon lime soda, 1 lemon, 5 cloves garlic, 1/4 teaspoon ground black pepper, 1/2 teaspoon salt
  • Put the chicken leg quarters inside a large freezer bag and then pour-in the marinade.
    4 chicken leg quarters
  • Shake the bag gently to coat the chicken with marinade then remove the air inside the bag. Seal the bag then refrigerate. Marinate for at least 3 hours.
  • Meanwhile, make the java rice by combining all the java rice ingredients plus 2 tablespoons of garlic oil in a rice cooker. Cook until the rice is done.
    2 cups rice, 3 cups water, 1 tablespoon butter, 1 teaspoon turmeric powder, 1 teaspoon chicken powder
  • Remove the chicken from the bag and transfer the remaining marinade to a saucepan.
  • Cover the saucepan and boil the remaining marinade for 1 minute. Let it cool down and then add the remaining garlic oil. Stir.
  • Heat-up your grill and start grilling the chicken for 12 to minutes or until the chicken is completely cooked (165F internal temp). Baste the chicken every time you turn it over. Remove from the grill and arrange the grilled chicken and java rice on a serving plate. Top the rice with toasted garlic. Serve with papaya atchara.
  • Share and enjoy!

Notes

Garlic Oil – Slow cooking involves using a lower heat setting to gently cook the garlic in the oil. By doing this, the garlic releases its natural flavors gradually without burning. Cooking too quickly at high heat can cause the garlic to brown unevenly or turn bitter, which would affect the taste of the dish. The infused garlic oil you get from this process is important for enhancing the flavor of the Java Rice.

Nutrition

Calories: 3608kcal | Carbohydrates: 388g | Protein: 138g | Fat: 167g | Saturated Fat: 38g | Polyunsaturated Fat: 37g | Monounsaturated Fat: 79g | Trans Fat: 1g | Cholesterol: 597mg | Sodium: 9831mg | Potassium: 2584mg | Fiber: 11g | Sugar: 56g | Vitamin A: 1447IU | Vitamin C: 76mg | Calcium: 337mg | Iron: 12mg

Watch How to Cook BBQ Chicken with Java Rice

@panlasangpinoyog

Inihaw na manok #panlasangpinoy

โ™ฌ original sound – Panlasang Pinoy Original – Panlasang Pinoy Original
Chicken thigh bbq
what is patola

What is patola (loofah)?

Aside from the Filipino slang term derived from it, how well do you know the nutritious ingredient that is patola? You might have heard this word a lot lately because it has been used somewhat interchangeably with the Filipino word โ€œpatolโ€ to describe those willing to respond to internet trolls. But for the cooks out there, this holds a more special meaning as a favorite among soup recipes and more. This article is for the people curious about what this food brings to the table in terms of taste, health benefits and more! Get to know our tasty patola with me.

patola

More about patola

Patola in English is actually the sponge gourd or the silk squash. Funnily enough, this is actually a fruit. But if you are familiar with the numerous Filipino dishes that make use of the ingredient, it is likely that you have always thought it was a vegetable. Just like the cucumber, our patola is technically a fruit, specifically an unripe one of a plant with the scientific name Luffa acutangular and Luffa aegyptiaca.
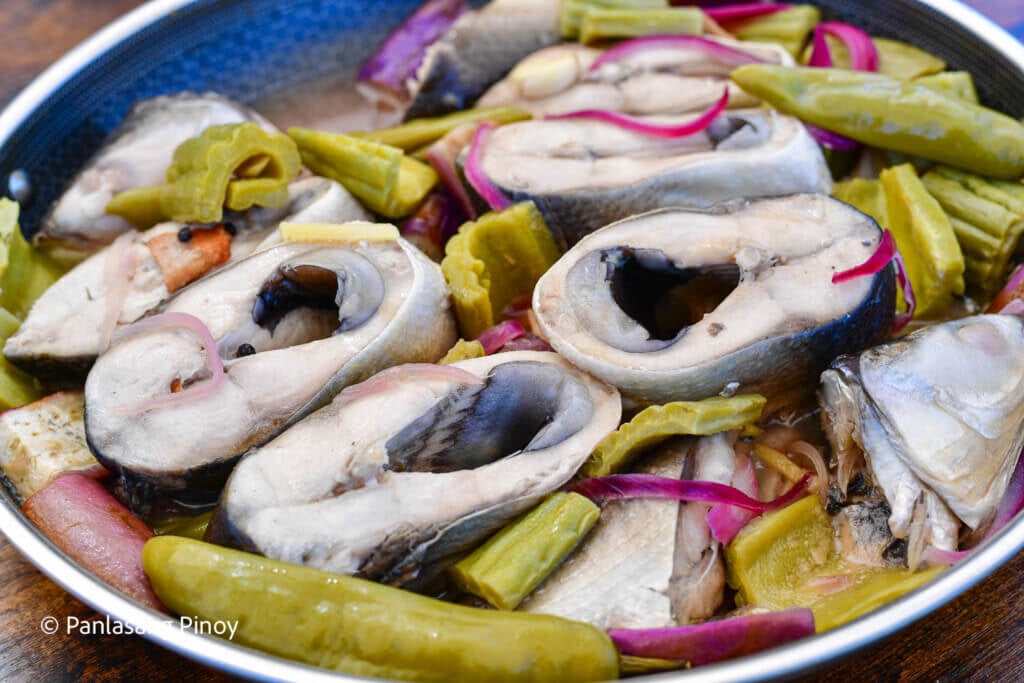
We will dive further into this plant later on, and how we can grow some in our own backyard. For now, take a look at the advantages for your body that are waiting when you cook up some delightful patola recipes!

Patola benefits to your health

Studies show that sponge gourd is rich in beta-carotene. This component is great for keeping you protected from eye diseases, as well as strengthening your immune system. Patola also has blood-cleansing qualities, which helps in maintaining your skin. Your liver health can also get a boost from this ingredient.

As for other vitamins and minerals, you can expect to get the likes of zinc, iron, vitamin C, magnesium and more just from this ingredient alone. Vitamin C is another component that is perfect for improving your immunity. There is also a great deal of dietary fiber in this, and that can really help lower the chances of constipation, while keeping your bowel system in order.
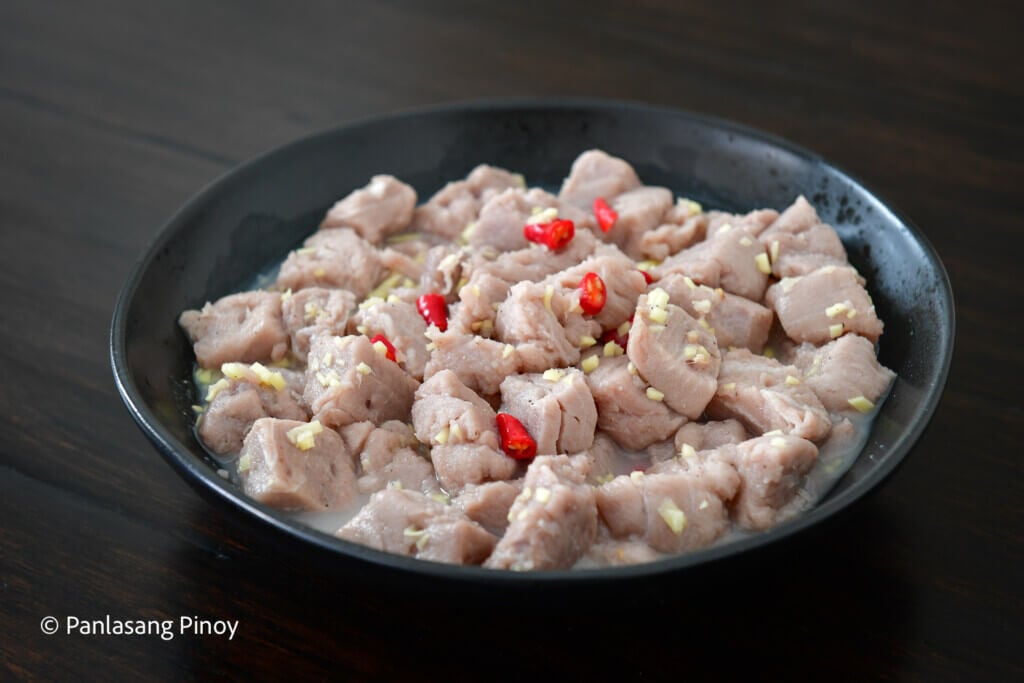
Our patola is also great for balancing your blood sugar levels, which is helpful for those who have type 2 diabetes. We also cannot forget about the anti-inflammatory qualities this fruit has. Now I would say you are quite familiar with how much you will benefit from enough servings of patola. How about learning to plant your own?

How to plant patola

Direct-seeded
what is patola

The first way you could take a look at when it comes to planting your patola is direct seeding. This means putting your seeds directly in the garden. I would suggest that before you plant your seeds though, try soaking them overnight with clean water to help in germination. Then use a moist cloth to wrap the seeds with, and store this in a cool and dark area until the seed coat has broken.

Now when you plant the seeds, put around one to two of them at a distance of 1 meter. Then place a thin layer of soil on top. During the wet season, I would suggest planting the seeds in raised beds to keep them protected from rotting because of floods.

Transplanted

As for this method, transplanting is best if you want to make the most of your seeds, making sure that the seedling survives. This way is essentially preparing your seeds before planting them in your garden. And if you truly want the best results for patola, this is the way to go. Start by getting your soil media ready. You may use the ready-mixed kind. But you also have the option of making it with one part organic or compost fertilizer, one part garden soil, and one part carbonized rice hull.

Get your seedling trays, and fill each with the soil media. Afterwards, water the potting media. Sow a pre-germinated seed like we did in the direct-seeded method for every hole. Make sure this is around 1 to 2 centimeters deep at least. Then cover the seeds with fine soil. Put your trays under a temporary shade, and donโ€™t forget to water them regularly.
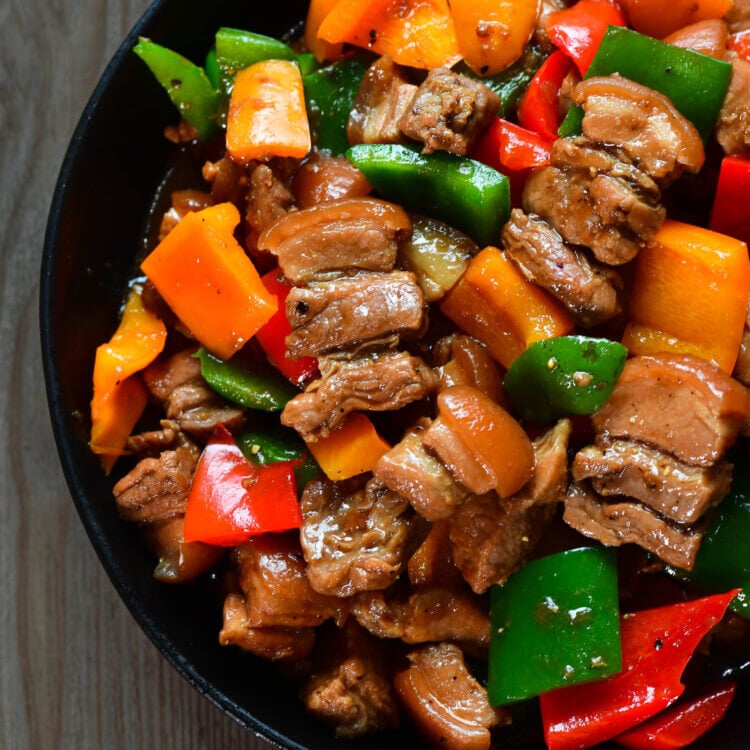
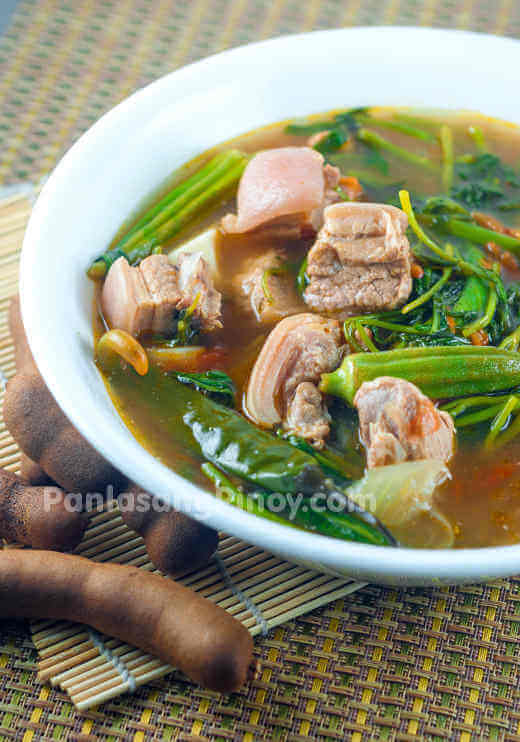
We will need to harden these seedling a week before transplanting by slowly lessening our watering, and getting them more sunlight exposure. When true leaves have developed, or around 10 to 15 days after emergence, you will know these are ready to be transplanted. Put one seedling per hill with 1 meter of distance between them. 

Had fun testing out if you have a green thumb? Tell me about your experience planting patola by leaving a comment in the comments section below!

Which patola recipe should I try out?

Shall we move on to the cooking part then? As I have told you, this is a perfect ingredient for when you want something that will give you a healthy boost. But it is also really great taste and texture-wise. And that is why there are a bunch of recipes to choose from if you are hoping to integrate more sponge gourd into your diet. Come and let mel show you some recipes that bring out the best in our patola!

Misua with Patola And Meatballs

Comfortingly warm, meaty, and packed with just the right amount of flavor, Misua with Patola And Meatballs is easily one of the most optimal ways to have your sponge gourd. This is essentially a meatball soup with thin flour noodles that, in my opinion, can be a lot like a hug in a dish! That is because it has healthy components like patola to energize you, alongside a chicken broth soup that is not too flavorful so as to overpower the rest of the yummy ingredients. You will need to set aside just a bit more than an hour to get this done. 

As for our patola, I would recommend going for the younger kind as these are often more tender when cooked. And a fun fact about this recipeโ€” it is somewhat multi-purpose! This utilizes my pork burger patty recipe for the meatballs, and so if you end up with any extras, you can always try to make Salisbury Steak out of them!

Misua with Patola And Shrimp

Are you more of a seafood kind of diner? Nothing really beats having some perfectly cooked and seasoned shrimp with a rich, hot broth. And that is what you get with this Misua with Patola And Shrimp recipe! If you cannot imagine the taste, it is a lot like our Almondigas. But it also has a great boost of savor from our tomato sauce. And instead of meatballs, we make use of the semi-sweet and tender shrimp as the meat.

I also love this recipe because of how budget-friendly it is. Plus we utilize a bunch of ingredients that are already pretty common. And so you are likely to have them at home. Some fish sauce, toasted garlic, salt and pepper can do the trick in seasoning this yummy dish.

Sardines With Misua and Patola

Speaking of affordable dishes, I find working with sardines as a quick and budget-friendly way to eat something that is both flavorful and satisfying. This Sardines With Misua and Patola dish gives our usual misua dish a bit of a twist in terms of both flavor and texture. Like our previous recipe, it has the richness of tomato sauce from the canned sardines. 

And it is very easy to make because we only need about 25 minutes for the entire cooking process! The convenience of this dish definitely makes it perfect for those days wherein you are not feeling like whipping up anything complicated as a meal, but want something that is both filling and nutritious.

Bulanglang na Gulay
patola

If you want the full vegetable experience when it comes to your food, Bulanglang na Gulay is one of my favorite recommendations! This Batangas-based recipe I have is both tasty and satisfying. It contains the likes of unripe papaya, Indian eggplant and spinach to make you feel full. You will also not have to worry about salt or fat content because we can just add a bit of salt. And as for seasoning, we will mostly just use that with pepper and a fish cube. 

You can actually enjoy this with various kinds of dishes on the side. This can be enjoyed with classics like fried fish, but you can also have just this with rice. That is because our Bulanglang already has enough flavor. And it has a great variety of ingredients you will not get tired of.

But if you find yourself struggling to get ahold of this fruit, no worries! Here are some of my go-to substitutes.

loofah

Alternative Ingredients for Patola

Zucchini – I find this to be a great alternative to our patola. That is because it has qualities that are very similar to our patola. These are both greens that have a very mild flavor. But both can bring a lot to the table in terms of health benefits. For one, zucchini has high antioxidant content. And because of the two componentsโ€™ similarities, you will definitely find misua soups that also utilize zucchini.

Chayote – also known as chayote squash or sayote, is yet another fruit that a lot of people mistake for a vegetable. Both our patola and the chayote have a very light flavor, and are part of the gourd family. One of the main differences lies in the appearance of these components. While chayote has wrinkled skin, patola has segments and ridges, and can resemble a big cucumber.

Is patola one of your favorite ingredients to work with too? Tell me all about the food you like to cook up with patola in the comments below!

what is loofah
  • Page 1
  • Page 2
  • Page 3
  • Interim pages omitted …
  • Page 27
  • Next

sidebar

Welcome!

As a huge fan of Filipino food, it is my goal to teach people how to cook it using the simplest way possible. Prepare your taste buds for an ultimate showdown of delectable Filipino dishes! Read more…

Facebook
Instagram
Pinterest
YouTube

Reader Favorites

Chicken Adobo in a Bowl

Filipino Chicken Adobo Recipe

Leche Flan Recipe

kare kare beef tripe

Kare-Kare Recipe (Beef Tripe)

Pork Sinigang

Sinigang

Receive new recipes by email!


Seasonal

Beef Morcon Recipe

Arroz Valenciana

lechon belly roll recipe

Lechon Belly Roll

Christmas Macaroni Salad

How to Make Macaroni Salad for the Holidays

As Seen In:

good housekeeping
parents
serious eats
livestrong
kitchn
sheknows
Facebook
Instagram
Pinterest
YouTube
About
Meet Vanjo
New? Start Here
Browse Recipes
Explore
Ingredient 101
Filipino Food
Cooking Schools
Privacy Policy
Disclaimers
Contact
© 2026 Panlasang Pinoy
Site Credits
Designed by Melissa Rose Design Developed by Once Coupled
Back to Top
Back to Top